Rebuild Software RAID (Windows/Dedicated Server with UEFI)
In this article, you will learn how to restore the software RAID on your Dedicated Server Windows. This guide is only valid for Dedicated Server using UEFI as the interface between hardware and operating system.
If you are using a Dedicated Server that uses BIOS as the interface between the hardware and the operating system, you will find information on how to rebuild the software RAID of your server in the following article:
Rebuilding Software RAID (Windows/Dedicated Server with BIOS)
Note
This article assumes good knowledge of server administration with Microsoft Windows Server.
If you have any questions regarding the replacement of a defective hard disk or require support, please contact IONOS customer service.
It is necessary to restore the RAID if one of the hard disks has been replaced due to a defect. There are two scenarios here:
Hard disk 1 has been replaced.
Hard disk 2 has been replaced.
If an error occurs on hard disk 1 (data carrier 0), you must boot the server from hard disk 2 (data carrier 1) and then recreate the mirroring in order to return the boot volume in a fault-tolerant state.
In the following instructions, we assume as an example that hard disk 1 has been replaced. This guide explains how to:
boot from the second hard disk
check whether your dedicated server uses UEFI or BIOS
assign the drive letter S to hard disk 1
import the BCD memory
identify the data carrier on which the mirroring must be broken and then break it
remove obsolete entries from the BCD memory
Convert the new disk to GPT format
assign a drive letter to the recovery partition
customize the Windows recovery environment service
Update the boot manager
Update the primary disk priority for the Windows boot sequence
Check the status of the synchronization
Boot the server from the Cloned Boot Entry
Caution
The configuration changes described in this article have far-reaching effects on the operating system. Due to the numerous individually possible operating system configurations, only exemplary instructions can be provided. Therefore, check the commands given in this article and adapt them before entering them. In addition, carry out a backup before rebuilding the software RAID. Otherwise there is a risk of data loss!
Further information on UEFI
Further information on UEFI can be found in the following article:
Preparation: Booting from a second hard disk
- Log in to your IONOS account log in.
Click Menu > Server & Cloud in the title bar .
Optional: Select the desired Server & Cloud contract.
Activate the desired server in the Infrastructure > Server area.
Click on the arrow pointing down next to Actions.
Click on Restart.
Make sure that the Current operating system option is activated.
Click on Yes.
Next to Actions, click on the arrow pointing downwards.
Click on Start VNC console.
The VNC console opens.Wait until the following message is displayed.

Press and hold the F11 key until the boot menu is displayed.
Note
Depending on the hardware used, a different button may need to be used.
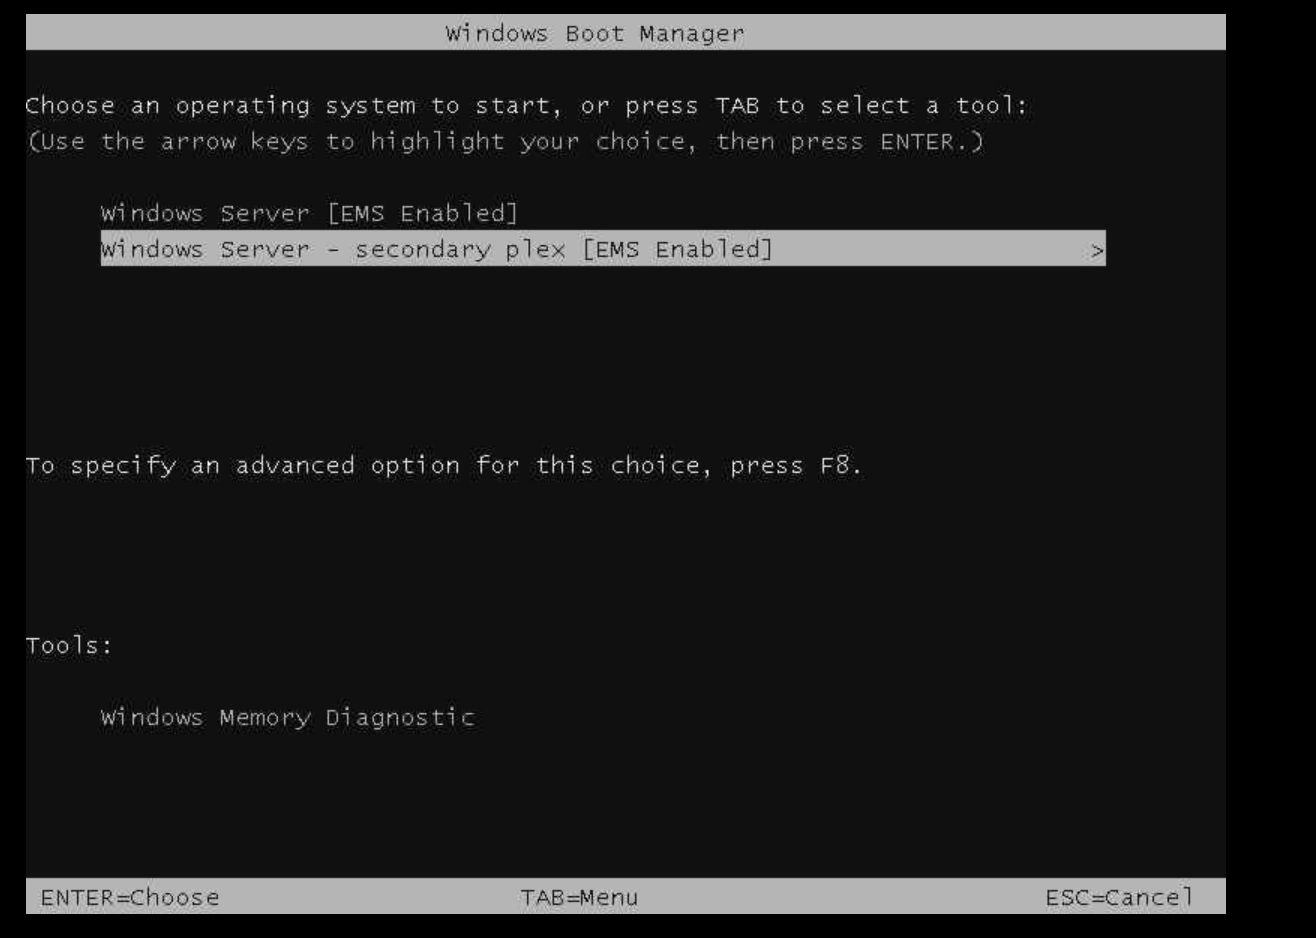
Select Windows Boot Manager Cloned from the boot menu.
Select the option Windows Server - secondary plex [EMS Enabled] and press Enter.
The server is booted from the second hard disk. Once the boot process is complete, you can establish a remote desktop connection to your server. To do this, log in as an administrator.
Check whether a dedicated server uses UEFI or BIOS
To check whether your server uses BIOS or UEFI as the interface between hardware and operating system, proceed as follows:
Establish a remote desktop connection to the server.
Log in to the desired server as an administrator.
Enter the command cmd in the search bar located in the taskbar.
Right-click on Command Prompt.
Click on Run as administrator.
Enter the command msinfo32 and press the Enter key.
The System information window opens.Scroll down to the BIOS mode line. If this line contains UEFI, your server uses UEFI as the interface between the hardware and the operating system.
Assign drive letter S to hard disk 1
Enter the word Powershell in the search bar at the bottom of the taskbar.
Right-click on Powershell and click on Run as administrator.
Enter the command diskpart in Powershell.
PS C:\Users\Administrator> diskpart
Microsoft DiskPart version 10.0.17763.1911
Copyright (C) Microsoft Corporation.
On computer: E83A0ABTo display an overview of the disks, enter the following command:
DISKPART> list disk
The following information is then displayed, for example:
DISKPART> list disk
Disk ### Status Size Free DynGPT
Disk 0 Online 1863 GB 0 B **
Disk 1 Online 1863 GB 0 B
Disk M0 Missing 0 B 0 B *In this example, disk 1 is the new data carrier. You can recognize this by the missing star symbol in the Dyn column. M0, on the other hand, is the defective and already replaced disk.
To select disk 1, enter the following command:
DISKPART> select disk 1
To display an overview of the partitions, enter the following command:
DISKPART> list partition
The following partitions are then displayed, for example:
Partition ### Type Size Offset
------------- ---------------- ------- -------
Partition 1 System 260 MB 1024 KB
Partition 2 Dynamic Reserved 1024 KB 261 MB
Partition 3 Reserved 15 MB 262 MB
Partition 4 Recovery 650 MB 277 MB
Partition 5 Dynamic Data 195 GB 927 MB
Partition 6 Dynamic Data 1666 GB 196 GBMake a note of the partitions and their type and size.
To select partition 1, enter the following command:
DISKPART> select partition 1
To assign the drive letter s to the selected partition, enter the following command:
DISKPART> assign letter=s
Exit diskpart by entering the following command:
DISKPART> exit
Import BCD memory
Import the BCD memory located on the EFI partition on data carrier 1. This defines the BCD memory on data carrier 1 as the active system memory and can be changed. To do this, proceed as follows:
Enter the command cmd in the search bar located at the bottom of the taskbar.
Right-click on Command Prompt.
Click on Run as administrator.
To import the BCD storage, enter the following command:
C:\Users\Administrator>bcdedit /import S:\EFI\Microsoft\Boot\BCD /clean
Identify data carriers and break mirroring
To restore the mirroring of hard disk 1, the first step is to break the existing mirroring. To do this, you must first determine on which data carrier the required command must be executed.
Caution
Use the diskpart clean command to destroy the partition table on the selected data carrier. Executing this command will irretrievably delete the data on the data carrier. Therefore, before executing this command, check which data carrier is the correct one.
Enter the word Powershell in the search bar at the bottom of the taskbar.
Right-click on Powershell and click on Run as administrator.
Enter the command diskpart in Powershell.
PS C:\Users\Administrator> diskpart
Microsoft DiskPart version 10.0.17763.1911
Copyright (C) Microsoft Corporation.
On computer: E83A0ABTo list all available volumes, enter the following command:
DISKPART> list volume
Select the volume C:.
DISKPART> select volume c:
To display detailed information on the selected volume, enter the following command:
DISKPART> detail volume
Determine the identifier for the missing volume and make a note of it.
To break the mirroring for volume C: and remove the missing disk from the mirroring, you must adapt the command break disk=mIDENTIFIER nokeep and then enter it. Replace the placeholder with the identifier of the missing disk. In the example below, this has the identifier m0.
DISKPART> break disk=mIDENTIFIER nokeep
Example:
DISKPART> break disk=m0 nokeep
Make sure that the mirroring no longer exists and that the volume is executed as a simple volume. To do this, enter the following command:
DISKPART> list volume
Select the volume D:.
DISKPART> select volume d:
To display detailed information on volume d:, enter the following command:
DISKPART> detail volume
To break the mirroring for volume D: and remove the missing disk from the mirroring, enter the command break disk=mIDENTIFIER nokeep and replace the placeholder with the identifier of the missing disk. In the example below, this has the identifier m0.
DISKPART> break disk=mIDENTIFIER nokeep
Example:
DISKPART> break disk=m0 nokeep
Make sure that the mirroring no longer exists and that the volume is executed as a simple volume. To do this, enter the following command:
DISKPART> list volume
To display an overview of the disks, enter the following command:
DISKPART> list disk
Select the missing disk.
DISKPART> select disk IDENTIFIER
Example:
DISKPART> select disk m0
Delete the missing disk.
DISKPART> delete disk
Call up the overview of the hard disks and check whether the missing disk has been deleted:
DISKPART> list disk
To exit Diskpart, enter the following command:
DISKPART> exit
Remove obsolete entries from the BCD memory
Remove all obsolete entries from the BCD memory. Also rename the entries to accurately reflect the current state of the system. To do this, proceed as follows:
Enter the command cmd in the search bar located at the bottom of the taskbar.
Right-click on Command Prompt.
Click on Run as administrator.
To determine the GUID of the entry in NVRAM that has the description Windows Boot Manager and a device parameter with an unknown or missing device parameter, enter the following command:
C:\Users\Administrator>bcdedit /enum all /v
Once you have determined the GUID for this entry, use the command device partition bcdedit /set {GUID} =s: to point the entry to disk 1. Replace the placeholder {GUID} before the entry.
C:\Users\Administrator>bcdedit /set {GUID} device partition=s:
Example:
C:\Users\Administrator>bcdedit /set {9dea862c-5cdd-4e70-acc1-f32b344d4795} device partition=s:
Use the output of the bcdedit /enum all /v command to determine the GUID of the Windows Boot Manager Cloned entry in NVRAM.
C:\Users\Administrator>bcdedit /enum all /v
After you have determined the above GUID for this entry, use the command bcdedit /delete {GUID} command to delete the old entry for data carrier 1 from NVRAM. Replace the placeholder {GUID} before the entry.
C:\Users\Administrator>bcdedit /delete {GUID}
Example:
C:\Users\Administrator>bcdedit /delete {48202074-7321-11ee-9af9-d05099ff2689}
In the output for the bcdedit /enum all /v command, search for an entry named Windows Resume Application that has a device parameter with an unknown or missing device parameter. Enter the following command:
C:\Users\Administrator>bcdedit /enum all /v
Delete this entry using the command bcdedit /delete {GUID} . To do this, adjust the placeholder and then enter the customized command:
C:\Users\Administrator>bcdedit /delete {GUID}
Example:
C:\Users\Administrator>bcdedit /delete {4820206e-7321-11ee-9af9-d05099ff2689}
Use the output of the command bcdedit /enum all /v to determine the entry with the description Windows Resume Application - Secondary Plex.
To rename the entry so that it is now the Windows Resume Application entry for the primary mirror plex, replace the placeholder in the command below and then enter the customized command:
C:\Users\Administrator>bcdedit /set {GUID} description "Windows Resume Application"
Example:
bcdedit /set {48202072-7321-11ee-9af9-d05099ff2689} description "Windows Resume Application"
Enter the following command:
C:\Users\Administrator>bcdedit /enum all /v
In the output, search for an entry with the description Windows Server that has a device parameter with an unknown or missing device parameter.
Delete this entry. Adapt the placeholder of the command below and then enter the adapted command:
C:\Users\Administrator>bcdedit /delete {GUID}
Example:
C:\Users\Administrator>bcdedit /delete {4820206f-7321-11ee-9af9-d05099ff2689}
Enter the following command:
C:\Users\Administrator>bcdedit /enum all /v
In the output, search for an entry with the description "Windows Server - Secondary Plex".
Rename this entry. To do this, adapt the placeholder of the command below and then enter the adapted command:
C:\Users\Administrator>bcdedit /set {GUID} description "Windows Server"
Example:
C:\Users\Administrator>bcdedit /set {48202073-7321-11ee-9af9-d05099ff2689} description "Windows Server"
Enter the following command:
C:\Users\Administrator>bcdedit /enum all /v
Search for the BCD entry with the description "Windows Memory Diagnostic".
To point the entry to the memory tester, which is located on disk 1, you must adapt the placeholder of the command below and then enter it:
C:\Users\Administrator>bcdedit /set {GUID} device partition=s:
Example:
C:\Users\Administrator>bcdedit /set {b2721d73-1db4-4c62-bf78-c548a880142d} device partition=s:
To display the GUID of the Windows Recovery Environment and the corresponding GUID under "Device options", enter the following command:
C:\Users\Administrator>bcdedit /enum all /v
To configure the RAM disk device for the Windows recovery environment, adjust the placeholder of the command below and then enter the adjusted command:
C:\Users\Administrator>bcdedit /set {GUID} ramdisksdidevice partition=\Device\HarddiskVolume3
Example:
C:\Users\Administrator>bcdedit /set {48202071-7321-11ee-9af9-d05099ff2689} ramdisksdidevice partition=\Device\HarddiskVolume3
Enter the following command:
C:\Users\Administrator>bcdedit /enum all /v
The second GUID is the GUID of the Windows restore. This is displayed under Device options.
In the complete list of existing boot configuration entries in the BCD store (Boot Configuration Data), search for the entries in the BCD store that are relevant for the Windows recovery environment.
Configure the Windows recovery environment to access a specific RAM disk device and the associated Windows recovery image file (Winre.wim). To do this, adjust the placeholder of the command below and then enter the customized command. The first placeholder is the GUID for the Windows recovery environment. The second GUID is the GUID that is displayed as a specific entry under Device options in Windows Recovery.
C:\Users\Administrator>bcdedit /set {GUID} device ramdisk=[\Device\HarddiskVolume3]\Recovery\WindowsRE\Winre.wim,{GUID}
Example:
C:\Users\Administrator>bcdedit /set {48202070-7321-11ee-9af9-d05099ff2689} device ramdisk=[\Device\HarddiskVolume3]\Recovery\WindowsRE\Winre.wim,{48202071-7321-11ee-9af9-d05099ff2689}
Configure the RAM disk device for the operating system so that it accesses the specific Windows recovery image file. To do this, adjust the placeholder of the command below and then enter the customized command:
C:\Users\Administrator>bcdedit /set {GUID} osdevice ramdisk=[\Device\HarddiskVolume3]\Recovery\WindowsRE\Winre.wim,{GUID}
Example:
C:\Users\Administrator>bcdedit /set {48202070-7321-11ee-9af9-d05099ff2689} osdevice ramdisk=[\Device\HarddiskVolume3]\Recovery\WindowsRE\Winre.wim,{48202071-7321-11ee-9af9-d05099ff2689}
To ensure that the changes made are correct, enter the following command:
C:\Users\Administrator>bcdedit /enum all /v
Check the NVRAM and BCD entries.
Restart the server.
If available, select Windows Server in the Windows Boot Manager. Otherwise, the operating system should boot automatically from disk 1.
Converting data carriers to GPT format
To convert the data carrier to GPT format, proceed as follows:
Log in to the desired server as an administrator.
To open Powershell, enter the word Powershell in the search bar in the taskbar.
Right-click on Powershell and click on Run as administrator.
Enter the command diskpart in Powershell.
PS C:\Users\Administrator> diskpart
Microsoft DiskPart version 10.0.17763.1911
Copyright (C) Microsoft Corporation.
On computer: E83A0ABTo display an overview of the disks, enter the following command:
DISKPART> list disk
Use the following command to select disk 0:
DISKPART> select disk 0
To convert disk 0 to GPT format, enter the following command:
DISKPART> convert GPT
To display an overview of the partitions, enter the following command:
DISKPART> list partition
Make a note of the partitions and their type and size.
To delete partition 1 on disk 0, which is created automatically, enter the following commands:
DISKPART> Select partition 1
DISKPART> delete partition overrideRecord the partition layout for disk 1 to duplicate the layout on disk 0. To do this, enter the following commands:
DISKPART> select disk 1
DISKPART> list partitionUse the following command to select disk 0:
DISKPART> select disk 0
To create an EFI system partition with a size of 260 MB on the selected disk, enter the following command:
DISKPART> create partition efi size=260
Use the command below to format the EFI system partition you have just created with the FAT32 file system and assign it the label "System":
DISKPART> format quick fs=fat32 label="System"
To create an MSR partition (Microsoft Reserved Partition) with a size of 16 MB on the selected data carrier, enter the following command:
DISKPART> fcreate partition msr size=16
Use the following command to create a primary partition with a size of 650 MB on the selected data carrier.
DISKPART> create partition primary size=650
Format the primary partition you have just created with the NTFS file system and assign the label "Recovery tools". To do this, enter the following command:
DISKPART> format quick fs=ntfs label="Recovery tools"
To label the created partition as a Windows recovery partition, you must assign it a special GUID. To do this, enter the following command:
DISKPART> set id="de94bba4-06d1-4d40-a16a-bfd50179d6ac"
To assign attributes to the GUID partition table that define certain characteristics for partitioning, enter the following command:
DISKPART> gpt attributes=0x8000000000000001
To display an updated list of all partitions on the selected disk, enter the following command:
DISKPART> list partition
Convert disk 0 to a dynamic disk. To do this, enter the following commands:
DISKPART> select disk 0
DISKPART> convert dynamicTo convert disk 1 to a dynamic disk, enter the following commands:
DISKPART> select disk 1
DISKPART> convert dynamicTo add the dynamic disk (disk 0) to volume C, enter the following commands:
DISKPART> select volume c
DISKPART> add disk=0To add the dynamic disk (disk 0) to volume D, enter the following commands:
DISKPART> select volume d
DISKPART> add disk=0Restart the server.
If available, select Windows Server in the Windows Boot Manager. Otherwise, the operating system should automatically boot from disk 1.
Assign a drive letter to the recovery partition
To open Powershell, enter the word Powershell in the search bar located in the taskbar.
Right-click on Powershell and click on Run as administrator.
Enter the command diskpart in Powershell.
PS C:\Users\Administrator> diskpart
Microsoft DiskPart version 10.0.17763.1911
Copyright (C) Microsoft Corporation.
On computer: E83A0ABTo select disk 0, enter the following command:
DISKPART> select disk 0
To display an overview of the partitions, enter the following command:
DISKPART> list partition
Select the partition with the name Recovery. To do this, adapt the placeholder of the command below and then enter the adapted command:
DISKPART> select partition PARTITION NUMBER
Example:
select partition 4
Assign the drive letter r to the partition.
DISKPART> assign letter=r
To select disk 1, enter the following command:
DISKPART> select disk 1
Call up the overview of partitions with the following command:
DISKPART> list partition
Select the partition with the name Recovery. To do this, adapt the placeholder of the command below and then enter the adapted command:
DISKPART> select partition PARTITION NUMBER
Example:
select partition 4
Assign the drive letter q to the partition.
DISKPART> assign letter=q
To exit Diskpart, enter the following command:
DISKPART> exit
Customize Windows Recovery Environment Service
Enter the command cmd in the search bar at the bottom of the taskbar.
Right-click on Command Prompt.
Click on Run as administrator.
Copy the contents of the primary recovery partition from disk 0 to the primary recovery partition on disk 1 (secondary disk) by entering the following command:
C:\Users\Administrator>robocopy q:\ r:\ * /e /copyall /dcopy:t /xd "System Volume Information"
Query the status of the Windows Recovery Environment Service. To do this, enter the following command:
C:\Users\Administrator>reagentc /info
To deactivate the Windows Recovery Environment Service, enter the following command:
C:\Users\Administrator>reagentc /disable
Specify the storage location for the Windows Recovery Environment image. To do this, enter the following command:
C:\Users\Administrator>reagentc /setreimage /path q:\Recovery\WindowsRE /target C:\Windows
To re-enable the Windows Recovery Environment service, enter the following command:
C:\Users\Administrator>reagentc /enable
To query the status of the Windows Recovery Environment Service, enter the following command:
C:\Users\Administrator>reagentc /info
Enter the diskpart command.
PS C:\Users\Administrator> diskpart
Microsoft DiskPart version 10.0.17763.1911
Copyright (C) Microsoft Corporation.
On computer: E83A0ABTo select disk 0, enter the following command:
DISKPART> select disk 0
To display an overview of the partitions, enter the following command:
DISKPART> list partition
Select the partition with the name System. Example:
select partition 1
Assign the drive letter p to the partition.
DISKPART> assign letter=p
To select disk 1, enter the following command:
DISKPART> select disk 1
To display an overview of the partitions, enter the following command:
DISKPART> list partition
Select the partition with the name System. Example:
DISKPART> select partition 1
Assign the drive letter s to the partition.
DISKPART> assign letter=s
To exit the Diskpart program, enter the following command:
DISKPART> exit
Update boot manager
To copy a new entry for the Windows Boot Manager, enter the following command in the command prompt
PS C:\Users\Administrator>bcdedit /copy {bootmgr} /d "Windows Boot Manager Cloned"
Note the GUID for the new entry that is then displayed.
Change the assignment of the device partition. To do this, replace the placeholder in the following command with the GUID that you have noted and then enter the modified command in the command prompt:
PS C:\Users\Administrator>bcdedit /set {GUID} device partition=p:
Example:
PS C:\Users\Administrator>bcdedit /set {9dd220be-7e2d-11ee-a730-d05099ff2689} device partition=p:
To check the changes, enter the following command:
PS C:\Users\Administrator>bcdedit /enum all /v
Export the BCD memory with the following command:
PS C:\Users\Administrator>bcdedit /export S:\EFI\Microsoft\Boot\BCD2
To copy the EFI partition located on the S: drive to the P: drive, enter the following command:
PS C:\Users\Administrator>robocopy s:\ p:\ /e /r:0
To rename the copied BCD memory BCD2 to BCD, enter the following command:
PS C:\Users\Administrator>rename P:\EFI\Microsoft\Boot\BCD2 BCD
Delete the BCD memory BCD2 in the directory S:\EFI\Microsoft\Boot with the following command:
PS C:\Users\Administrator>del S:\EFI\Microsoft\Boot\BCD2
Update primary disk priority for the Windows startup sequence
Open the Powershell as administrator.
Start diskpart. Enter the following command:
DISKPART>diskpart
Select the volume with the letter p. Enter the following command:
DISKPART>select volume p
Remove the selected volume with the following command:
DISKPART>remove
To select the volume with the letter s, enter the following command:
DISKPART>select volume s
Remove the selected volume with the following command:
DISKPART>remove
Select the volume with the letter q. To do this, enter the following command:
DISKPART>select volume q
Remove the selected volume with the following command:
DISKPART>remove
To select the volume with the letter r, enter the following command:
DISKPART>select volume r
Remove the selected volume with the following command:
DISKPART>remove
With these changes, Disk 1 is the primary volume. Disk 0 is the secondary volume.
Check synchronization status
The hard disks are now synchronized. Wait for the next restart or test. To check the synchronization status, proceed as follows:
Right-click on the Windows button.
Click on Run.
Enter the command diskmgmt.msc and click OK.
Disk Management opens.Check the status of the synchronization. When synchronization is complete, both hard disks have the status Healthy.
Boot the server from the Cloned Boot Entry
When synchronization is complete and the hard disks have the status Healthy, restart the server.
Wait until the following message is displayed:
Press and hold the F11 key until the boot menu is displayed.
Select the option Windows Boot Manager Cloned and press Enter.
Select the option Windows Server - secondary plex [EMS Enabled] and press Enter.