Setting up a private network for migrated Cloud Servers (Windows)
Please use the “Print” function at the bottom of the page to create a PDF.
For migrated Cloud Servers
This article explains how to configure the network settings in Microsoft Windows Server 2016, Microsoft Windows Server 2019, and Microsoft Windows Server 2022 in order to use a migrated Cloud Server within a private network.
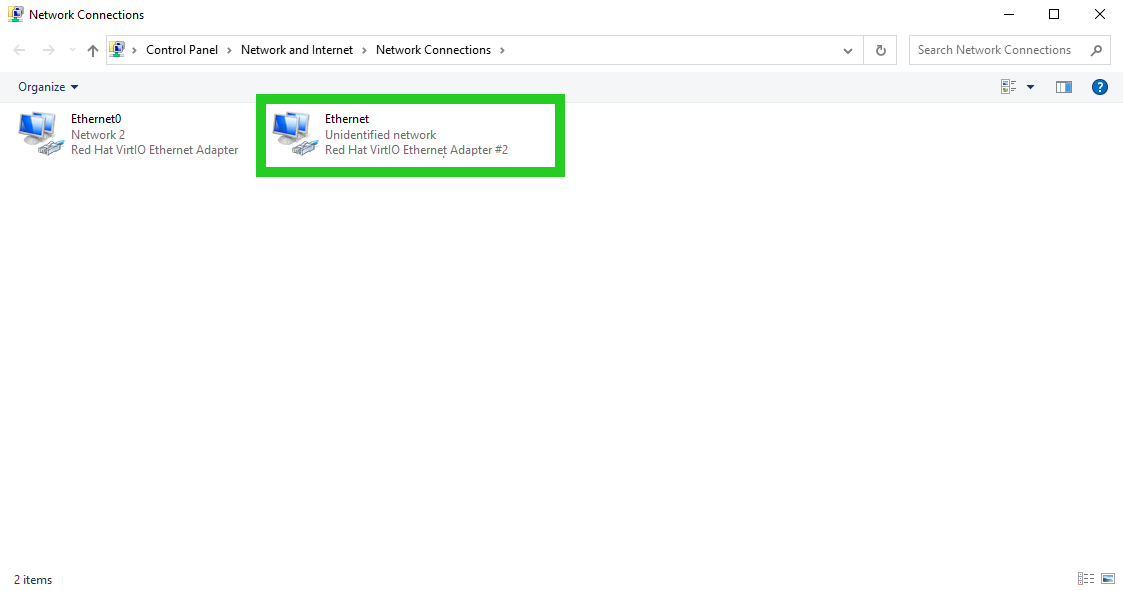
To be able to use a server in a private network, you must first assign the server to the desired private network in the Cloud Panel. As soon as the server has been assigned to the desired private network, an additional virtual network adapter with the information "Unindentified network" is automatically displayed in the network connections. You must configure this network adapter on the server. To do this, proceed as follows:
Requirements
- You have created a private network.
- You have assigned the desired server to the private network in the Cloud Panel.
- You have logged in to the server.
- You have noted the IPv4 and IPv6 addresses of the server.
- Open the Control Panel.
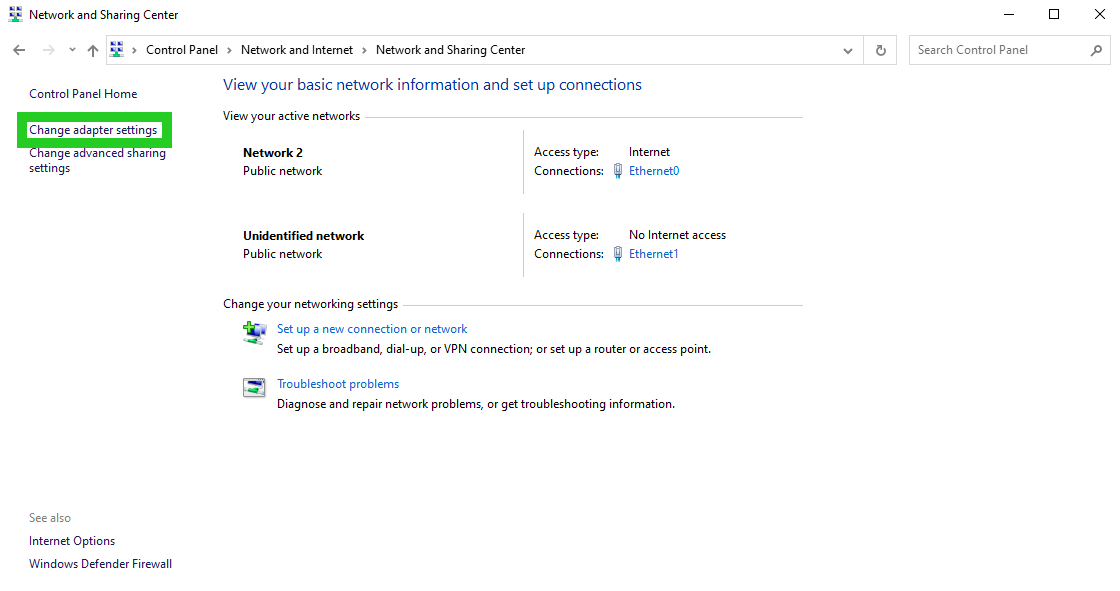
- Click on Network and Internet > Network and Sharing Center.
- Click on Change adapter settings.

- Right-click on the additional virtual network adapter labeled Ethernet, which has the information Unidentified network below it.

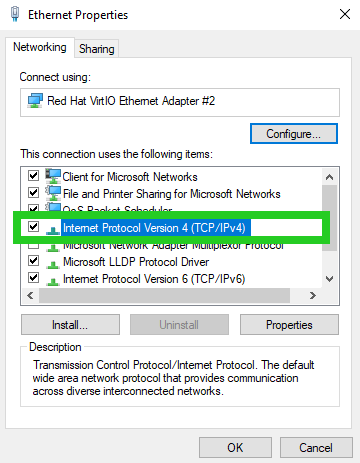
- Click on Properties.
- Double-click on Internet Protocol Version 4 (TCP / IPv4).

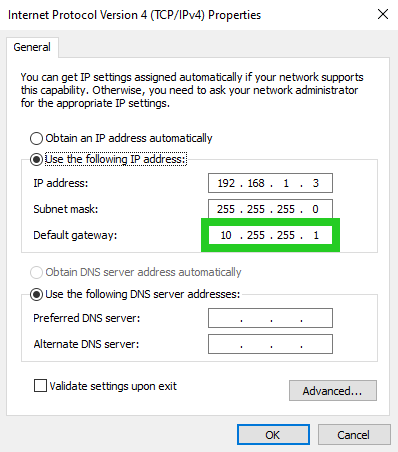
- Enter the desired IP address from the private IP address range in the IP Address: field. In the following example, the server is using the IP address 192.168.1.3.
- Enter 255.255.255.0 in the Subnet mask field.
- Enter the IP address 10.255.255.1 in the Default gateway field.

- Click on OK. The following warning is then displayed: Warning - The default gateway is not on the network segment (subnet) that is defined by the IP address and subnet mask. Do you want to save this configuration?
- Click on Yes.
The server can now be reached under the selected IP in the private network.