Please use the “Print” function at the bottom of the page to create a PDF.
For Mail Business
This article explains to you how to use additional third party email accounts or regular POP/IMAP email addresses within Webmail.
- Log in to your Webmail.
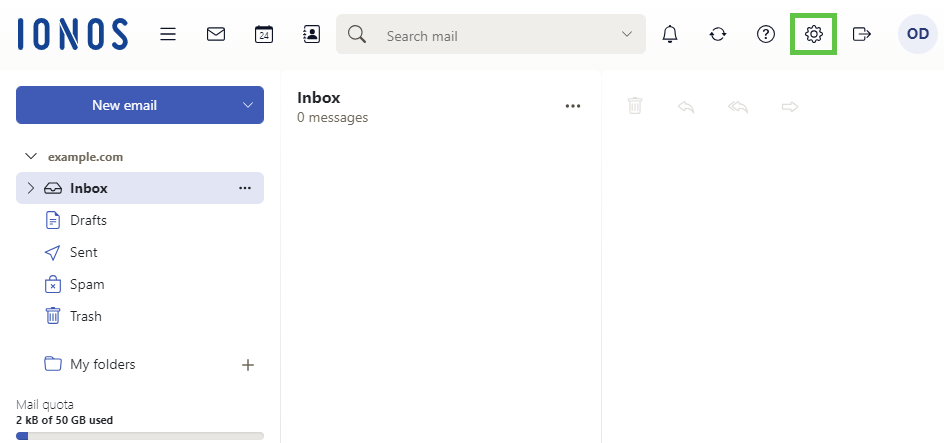
- In the main navigation bar, click on the gear icon in the top-right corner.

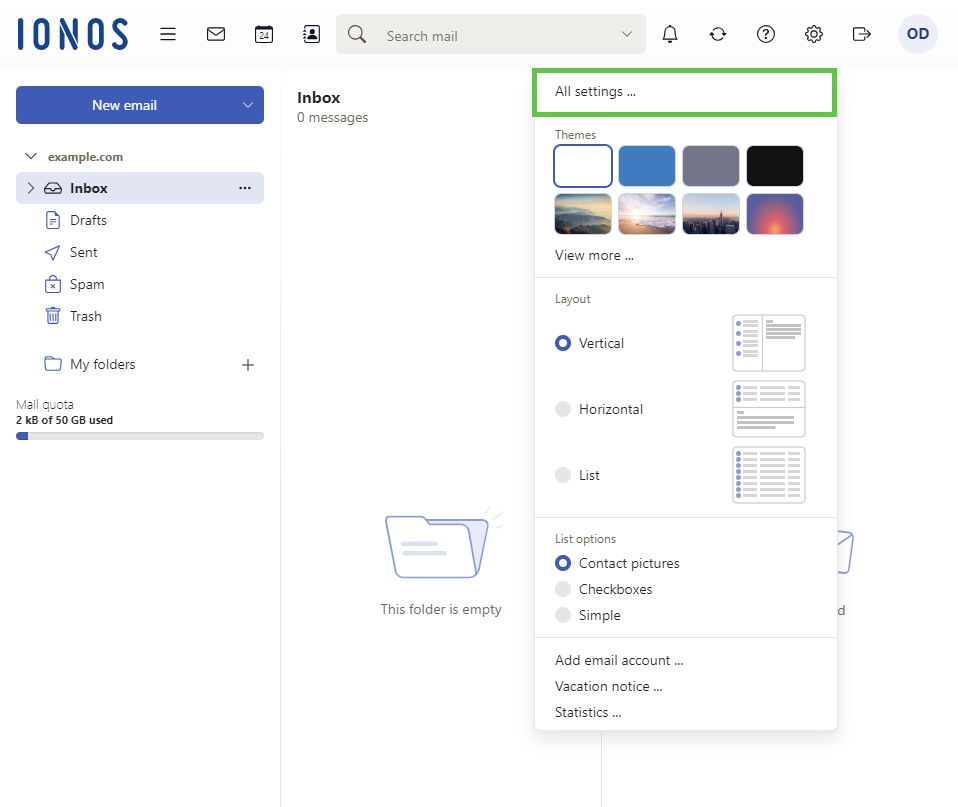
- Click on All settings …

- Click on Accounts in the navigation bar on the left.
- Click on Add email account. A new window opens.
- Enter the email address of the desired mail account.
- Click on Add.
Note
The automatic setup works with many email accounts such as Gmail, Yahoo or iCloud. If the automatic configuration fails, click on Configure manually. Then enter the required data manually and click on Save. You will receive the required data from your respective email provider.
Manual setup
The following steps describe how to manually set up an email account. This is necessary, if your account cannot be set up automatically or if you want to enter the server settings yourself.
Enter the applicable account and server settings:
| Account Settings | |
|---|---|
| Account name | The name of the email account to be displayed in Mail Business. |
| Your name | This is the name others will see when receiving your mail from this account. |
| E-mail address | The email address you want to add. |
| Use Unified Mail for this account | Check this box only if you want this account's mail to be included in the inbox of your Mail Business account. Otherwise this account will use a separate inbox. |
| Incoming Server | |
|---|---|
| Server type | Specify whether the email account you want to add should use the POP or IMAP protocol. |
| Server name | Enter the incoming email server address for the account, e.g. imap.domain.ca |
| Connection security | Enable this setting if the transmission is to take place via a secure (encrypted) connection. Some email providers require this type of connection. |
| Server port | The default port is already set. If retrieving emails does not work with the default setting, please ask your email provider for the correct port. |
| Username | The user name of the email account. This is typically the full email address or the part preceding the '@' symbol. Contact your email provider for the correct username for your email account. |
| Password | The password for the email account. |
| Outgoing server (SMTP) | |
|---|---|
| Server name | Enter the outgoing email server address for the account, e.g. smtp.domain.ca |
| Connection security | Select 'StartTLS' or 'SSL/TLS' to enable encrypted connections. Some email providers require this connection type. |
| Server port | The default port is already set. If sending emails does not work with this setting, please ask your email provider for the correct port. |
| Authentication | Use 'As incoming mail server' to use same username and password for sending as receiving. Otherwise, select 'Use separate username and password' or 'None.' |
| User name | Only required where Use separate username and password is selected under Authentication. |
| Password | Only required where Use separate username and password is selected under Authentication. |
Click Save to add the account.
This successfully completes the integration of the email account into your Mail Business mailbox. You can now add more accounts using these instructions.