Progressive JPEGs: An introduction
JPEG is the most frequently used image format on the internet. Around 71.4 percent of all websites contain photos and graphics in this format. But JPEG is actually just an umbrella term for an image compression standard. PJPEG, also known as Progressive JPEG, is one of three popular compression modes of this standard. Progressive JPEGs compress photos and graphics in a particular way, with the effect that they load differently than “normal” or baseline JPEGs.
- Store, share, and edit data easily
- Backed up and highly secure
- Sync with all devices
The Basics: JPEG and image compression
JPEG refers to a format developed in 1992 for compressing images. It’s an umbrella term for various modes of image compression. The acronym JPEG stands for “Joint Photographic Expert Group”, referring to the group that developed the standard. JPEGs are the most frequently used image format on the internet and are chosen for photos and complex graphics with high color depth. Based on the export settings of the particular image editor being used, there are major differences in JPEG compression.
The process of compressing reduces files in size. This saves disk space and shortens transfer and loading times. A shorter transfer time means that an image loads faster on a website. However, in most cases reducing the file size has consequences for the content, because it requires cutting down on content, in one way or another. In the case of photos and graphics, it’s important to make sure that the image quality isn’t reduced too much. This results in files that load quickly but don’t look very good.
PJPEG
One method of image compression that falls under the JPEG standard is the progressive JPEG or PJPEG. PJPEGs are also made using a compression algorithm, but appear differently when they are being loaded in the browser. PJPEGs work in all modern browsers, including Chrome, Firefox, and versions 9 and higher of Internet Explorer. Older versions of Internet Explorer have significant problems displaying progressive JPEGs. However, since Internet Explorer 8 has a distribution of only 0.4% worldwide, this is not relevant for most web projects. Browsers that do not support the progressive JPEG format will load the photos like normal JPEGs. So what exactly is the difference between the two formats?
JPEG vs PJPEG
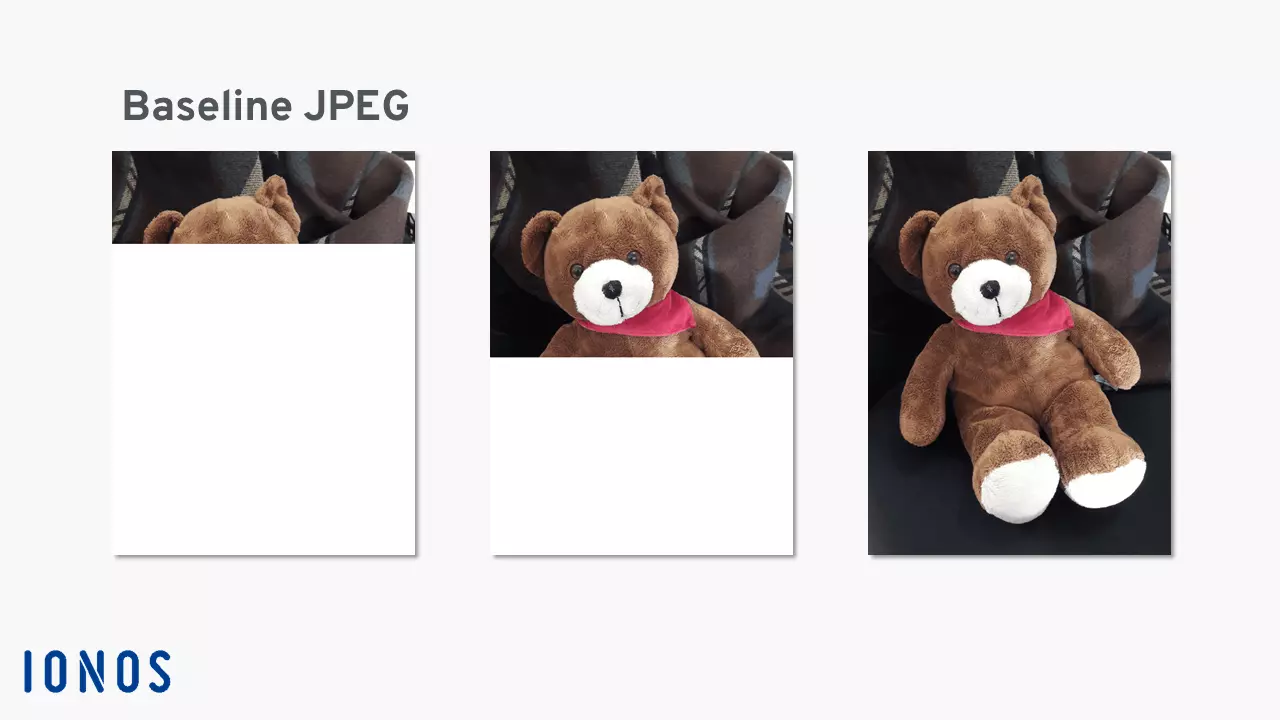
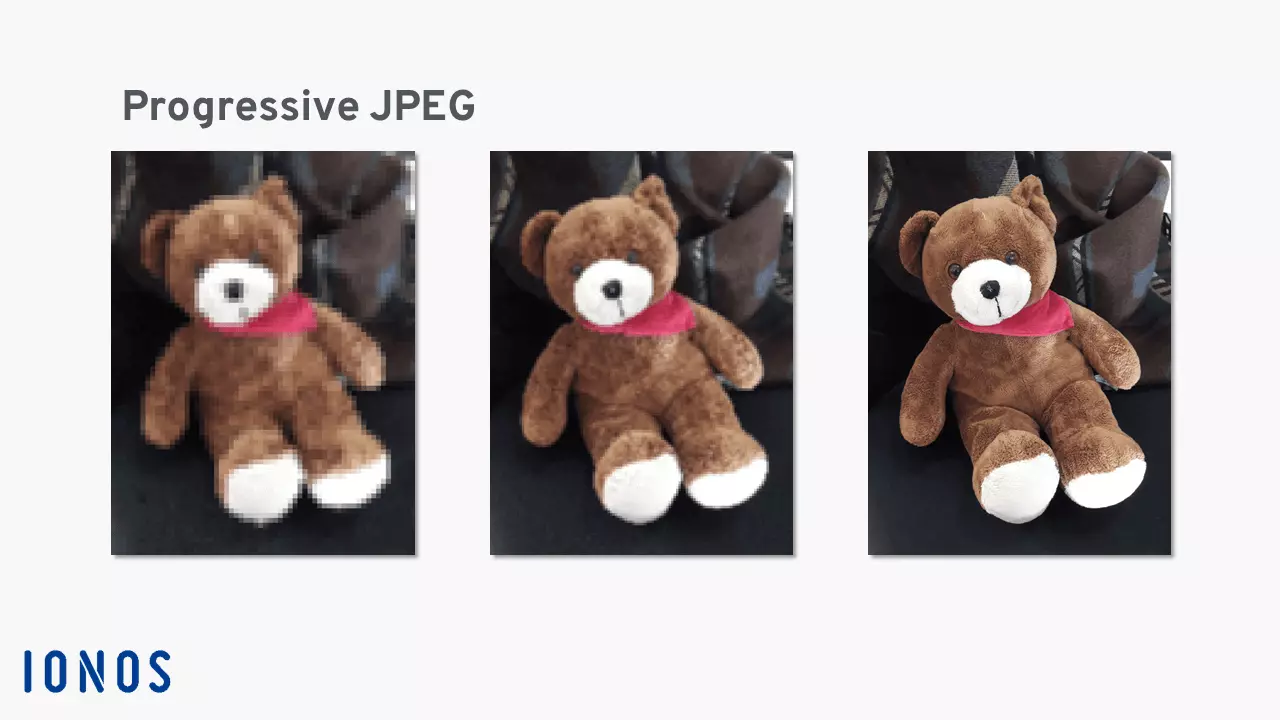
The biggest difference between JPEGs and PJPEGs is the way images are loaded. Images saved as baseline JPEGs (that is, “normal” JPEGs) are loaded line by line from top to bottom. In the case of progressive JPEGs, however, the entire image is shown immediately and loaded pixel by pixel. So a pixelated, blurry image gradually sharpens. While baseline JPEGs are loaded from top to bottom, PJPEGs can be said to load from back to front.
This has a positive effect on user experience since PJPEGs appear to load faster due to the lack of extra whitespace on the page. The following images illustrate how JPEGs and PJPEGs are loaded. In the case of baseline JPEGs, the pixels appear line by line, from top to bottom:
On the other hand, PJPEGs are loaded from back to front. The image gets clearer and clearer as it loads, and the number of pixels increases incrementally.
Pros and cons of PJPEGs
Many users prefer the entire photo to appear immediately, even if it’s blurry. But PJPEGs also have some disadvantages.
| Advantages | Disadvantages |
|---|---|
| The compression ratio can be customized in programs like Photoshop | Internet Explorer versions 8 and below have significant problems displaying PJPEGs |
| Small file size | Transparent backgrounds, e.g. for GIFs, are not supported |
| Relatively high image quality with a high rate of image compression | Faster loading times are barely noticeable in modern browsers |
| Positive effect on user experience, and subjectively faster loading time due to minimal whitespace | Negative effect on user experience, because users can’t tell when an image has finished loading |
- Store, share, and edit data easily
- Backed up and highly secure
- Sync with all devices
Creating PJPEGs
Most graphics editing programs automatically save photos and graphics as baseline JPEGs. But it’s usually quite easy to save files as PJEGs. There are many different ways to create a progressive JPEG. In programs like IrfanView and Adobe Photoshop, you can export files in that format. Specifically, an image can be saved as a PJPEG in Photoshop as follows:
- In the “File” menu, select “Export” and choose the option “Save for web (Legacy)”
- On the upper right, choose JPEG as the file format, and check “Progressive”
- Set the image quality as needed
- Click “Save” on the bottom left
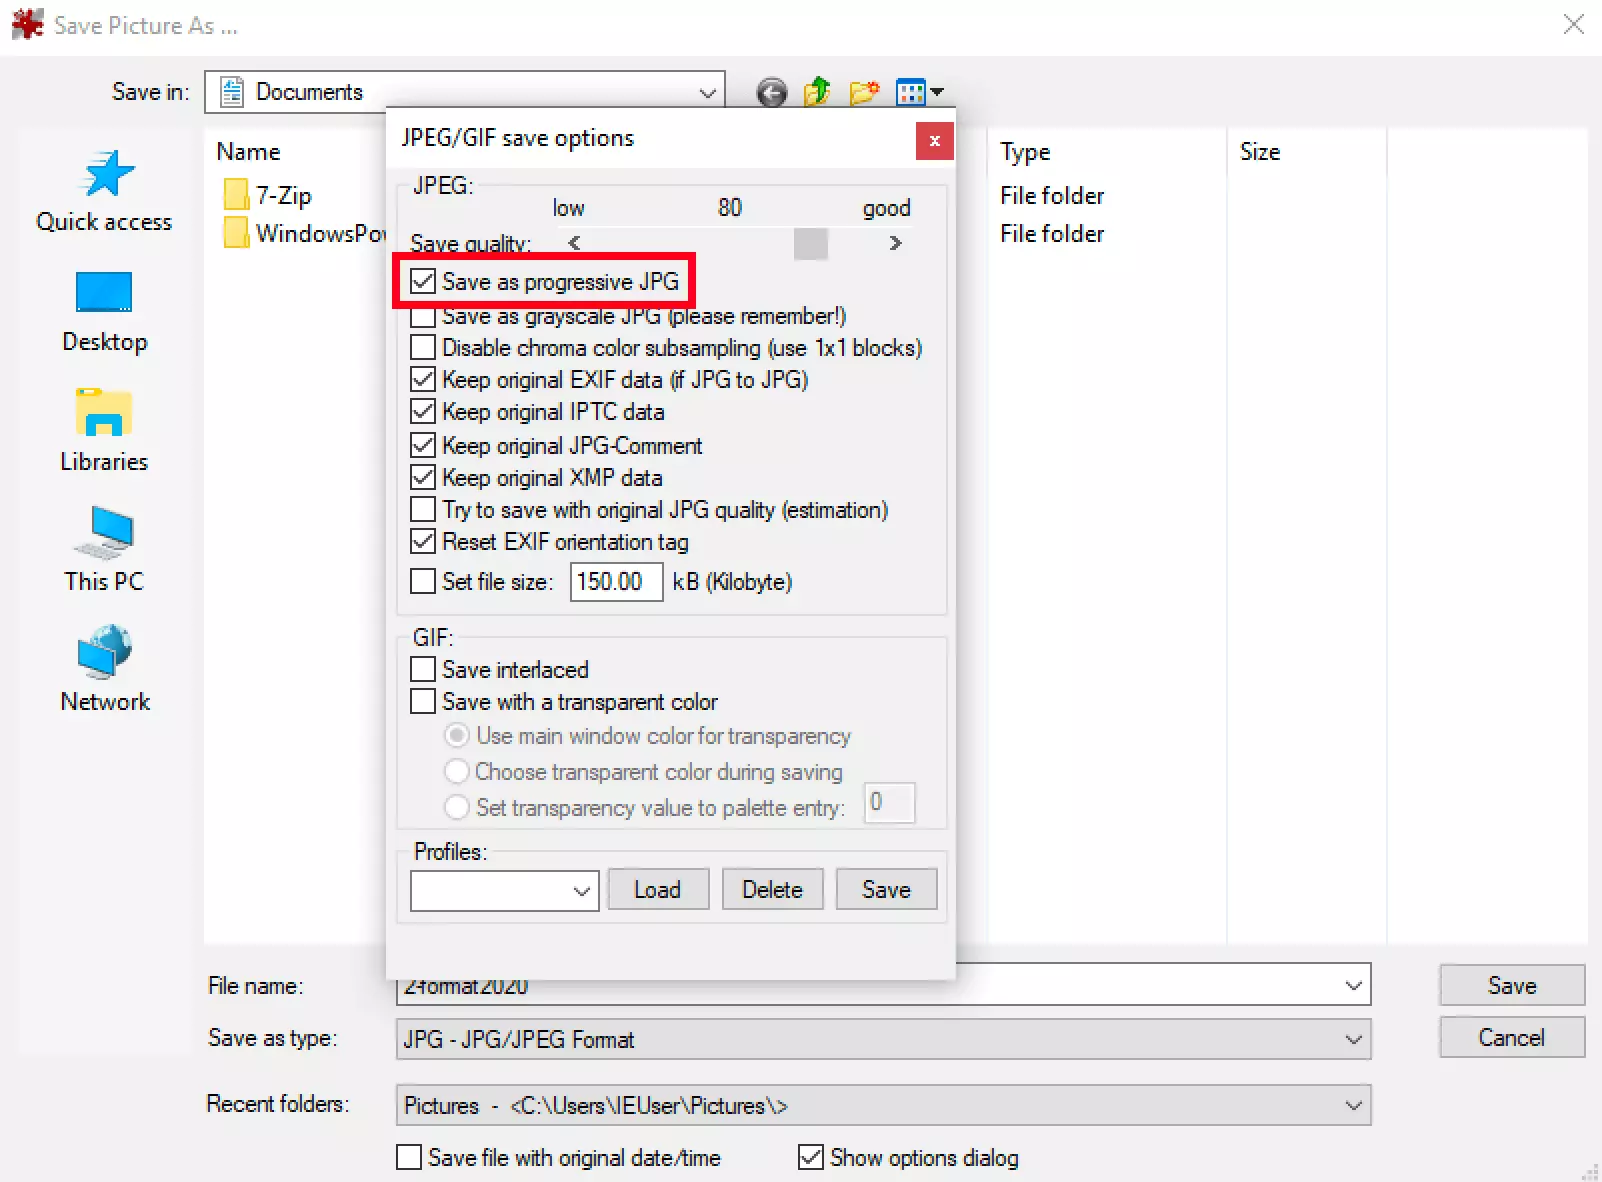
You can also create progressive JPEGs using the free program IrfanView. The program is an alternative to Photoshop, but unfortunately is not available for iOS. You can save a photo as a PJPEG in IrfanView as follows:
- In the “File” menu, click “Save” or simply click the “Save” icon
- In the dialog window “JPEG/GIF save options”, tick the box for “Save as progressive JPEG”
- Click “Save”
Now the file is ready to be uploaded to your website. If the user’s browser supports the format, your photo or graphic will be loaded as a progressive JPEG.


