How to set up a Mount and Blade 2 Bannerlord custom server
Mount and Blade 2: Bannerlord is an addictive game that has gained popularity among gamers all over the world. It makes sense to set up your own dedicated server if you’re a hardcore fan of the game. A Bannerlord dedicated server will optimize your gaming experience and ensure that the game runs smoothly. Other benefits include improved performance, reliability, and security. We’ll tell you everything you need to know about setting up a dedicated server for Mount and Blade 2: Bannerlord.
Advantages of a Bannerlord dedicated server
You can host your own Mount and Blade 2 server on your home PC or on an external server. An external server offers greater advantages when compared to your home PC. A server on your home PC is only accessible to fellow players when the device is turned on. On the other hand, an external rented server runs around the clock and is always accessible.
The internet connection is an important factor to consider. Rented servers offer a higher bandwidth and a more stable connection than most home networks. The server’s connection quality can be easily affected by other devices on your home network. Accessibility and speed are not concerns when it comes to an external server.
Mount and Blade 2 Bannerlord server system requirements
The manufacturer recommends the following minimum requirements to run your Bannerlord dedicated server:
- Processor: at least 2 cores with 2-3 GHz
- Working memory: at least 4 GB
- Storage space: at least 60 GB
These specifications are more suitable for beginners who want to play in small groups. You can opt for a server with more power depending on how many users you want to play with and which configurations you choose.
The cloud server is recommended for beginners who are not sure what server capacities they will need. It offers a lot of flexibility and can be easily scaled up if required.
Suitable IONOS servers to host your Bannerlord dedicated server
IONOS has several server models to choose from, so you can choose the server that fits your individual requirements.
- Cloud server: Cloud servers offer maximum flexibility. You can scale the virtual server as needed. This option is flexible in case your player community grows over time. You will only be billed for the server performance used at the end of the month.
- vServer: vServers are also virtual servers. Do you have a fixed group of users using the server and know exactly what performance you need? A vServer with the exact configurations you need would be the best option.
- Dedicated server: A Dedicated Server provides the highest performance. You rent all the hardware for a fixed monthly price. A dedicated server is suitable if you play a lot and need a server with strong performance.
If you’re a regular player and you’re thinking about hosting a TeamSpeak server or a Mumble server in addition to the actual game, you will need more capacity. A dedicated server has enough space and it can be used for multiple servers.
Step-by-step guide for setting up a Bannerlord dedicated server
You can begin the setup after selecting your server and getting your access data. We will show you step by step how to set up your Mount and Blade 2 server. We use a IONOS Cloud Server and Windows 2022 in our example.
Step 1: Establish connection to the server
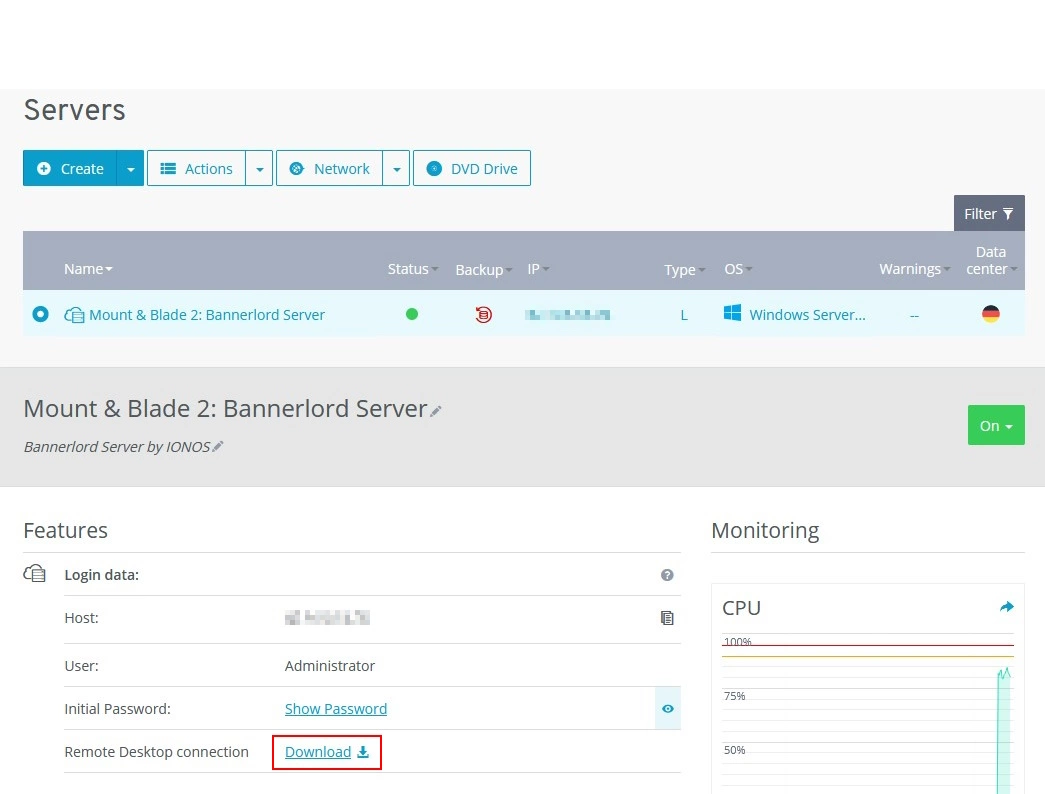
You need to establish a Remote Desktop connection to access your server. Log in to your IONOS customer account and go to “Server and Cloud”. You will find your server there.
Click “Download” and launch the file to connect to the server. Your login data will be needed the first time you connect to the server. You may also need to unblock the firewall.
Step 2: Forward ports
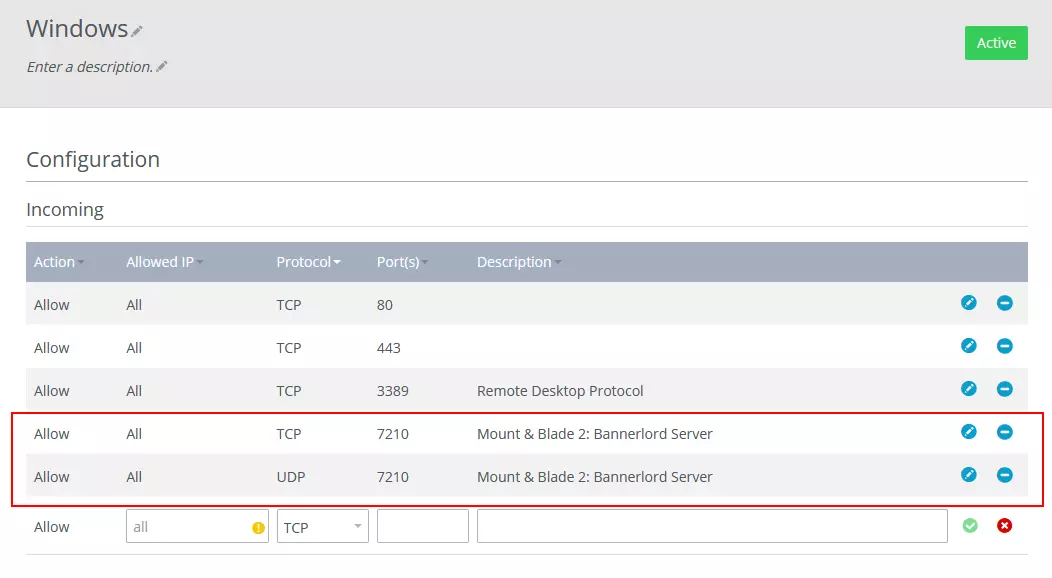
You will need to forward ports to access your server later. You can do this in your IONOS customer account. Click on “Network” in the main menu and set up port forwarding in “Firewall Policies”. Enable ports UDP 7210 and TCP 7210 for your Bannerlord dedicated server.
Step 3: Install Mount and Blade 2 Bannerlord dedicated server
You must install Steam, Mount and Blade 2: Bannerlord and the Mount and the Blade 2: Bannerlord Dedicated Server on your server before you can proceed with the setup. The dedicated server is in the Steam library under “Tools”.
Downloading the configuration files is the final step. These can be found in the Developer’s Forum. Unzip the files and save them to your desktop.
Step 4: Generate a Bannerlord token
You must generate an individual token to set up a dedicated server for Bannerlord. Start the game and open the console by pressing [Alt] + [^] when you are in the main menu. Then enter the command:
customserver.gettokenYou should not share the token with third parties as it is linked to your Steam account.
Step 5: Copying the configuration files
Go to your desktop and paste the configuration files into the correct folders on the server. First, copy the tdm_config.txt file to your clipboard.
Open Steam and right-click on “Mount & Blade II: Dedicated Server”. This file is in the overview on the left. Select “Properties” > “Local Files” > “Browse”.
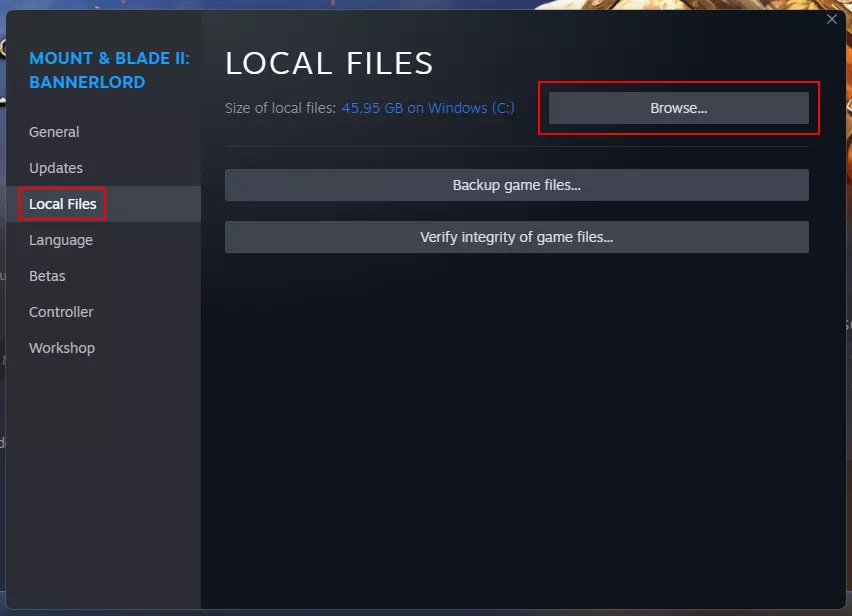
The folder containing the server files will open. Follow the path Modules\Native and paste the tdm_config.txt file from the clipboard.
Open the tdm_config.txt to name your server. You will use this name to find your Bannerlord dedicated server when playing. You only need to change the first line of the file. Delete “FirstServer” and enter a name of your choice. Save the changes and close the file.
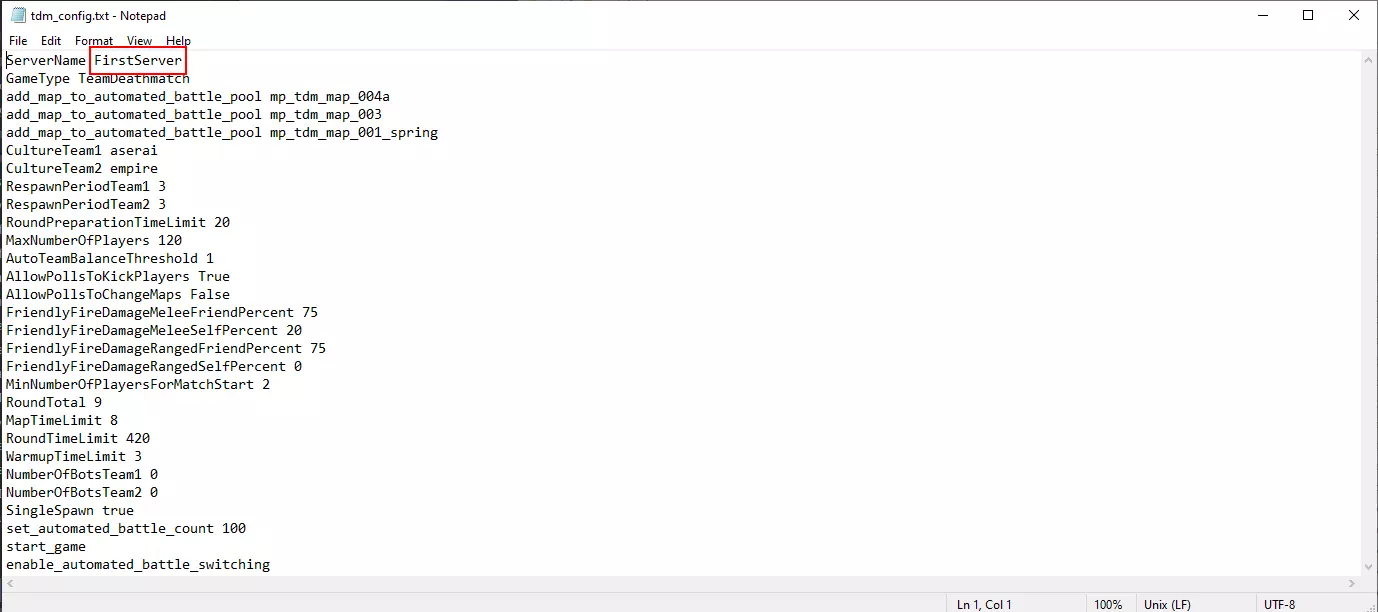
Next, move the startup file, which is also one of the downloaded files, to the correct folder. Copy it, go back to the Mount & Blade II Dedicated Server folder, and paste the file under bin\Win64_Shipping_Server.
It is a good idea to create a shortcut to the desktop as the server is also started using the start file. Create the shortcut by right-clicking on the start file and then “Send to” > “Desktop”.
Go back to the “Modules” folder and open the “Native” subfolder. Create a new folder called “MultiplayerForcedAvatars” there.
Step 6: Update the Dedicated Customer Server Helper
It is important to update the Dedicated Customer Server Helper before starting the Mount and Blade 2 server. Start Bannerlord to find out the current version of the game. You can see the current version on the start screen in the lower left corner. Make a note of it and close the game again.
Go to the “Modules” folder again and open the “DedicatedCustomerServerHelper” subfolder. The SubModule.xml file is there. You can edit it by right-clicking and clicking “Edit”. Change the “Version value” and the “DependentVersion” to the current version of the game and save the changes.
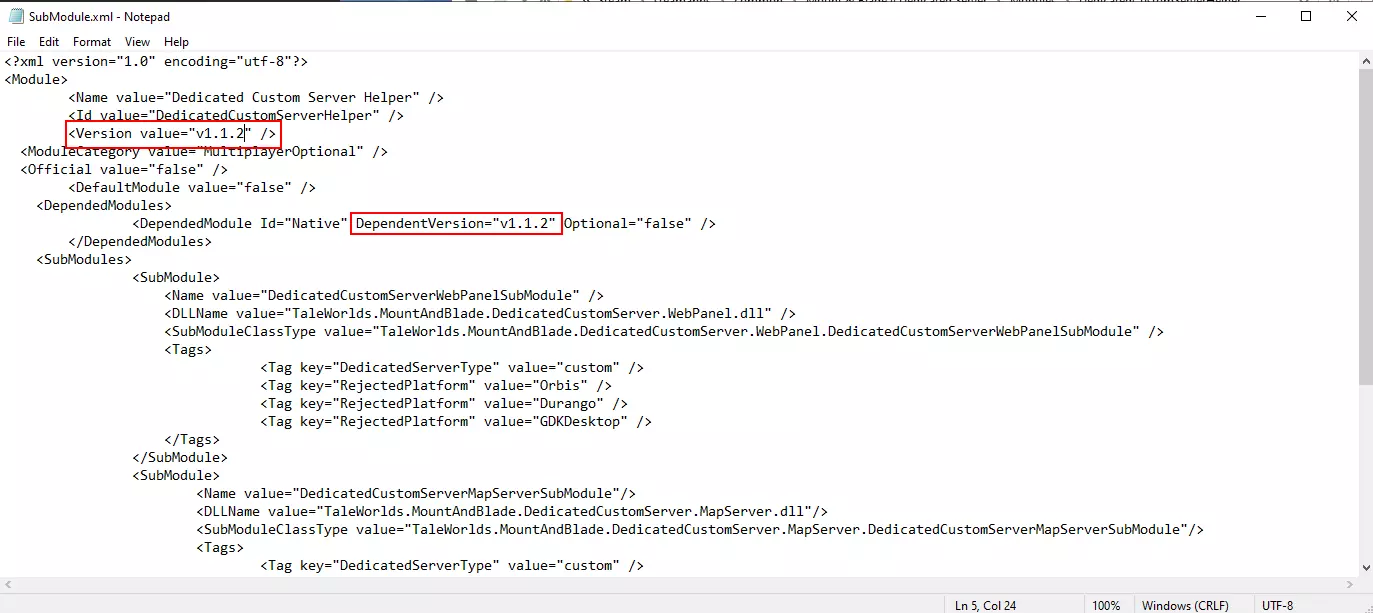
Step 7: Starting the Bannerlord server
Your Mount and Blade 2 server is ready. Double-click on the linked start file on the desktop to start the server. The green dialog box indicates that the server is live.
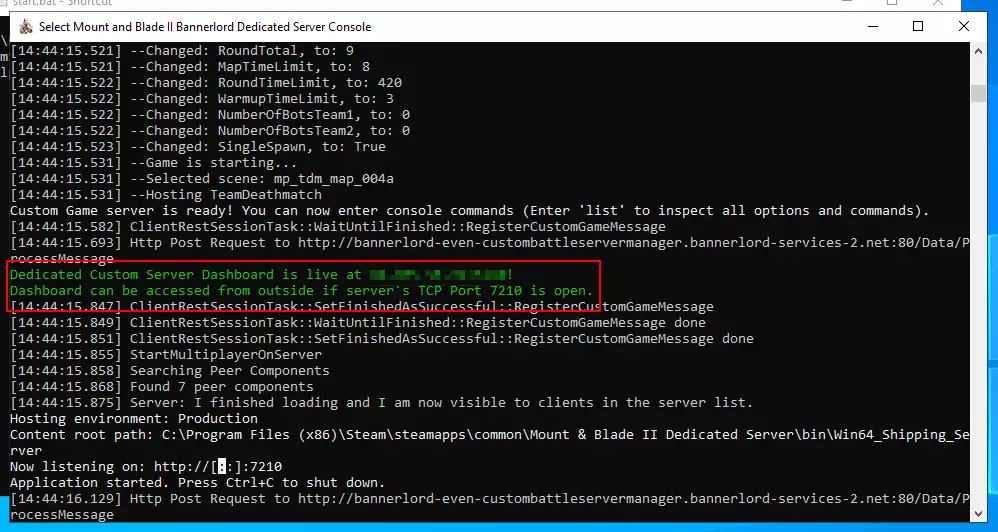
Step 8: Connect to the server
Connecting to a Mount and Blade 2 server is very simple. Start the game in multiplayer mode on your PC. You will find a list of all the dedicated servers under “Play” and “Custom Server List” in the menu. Use the search bar at the bottom right to search for the name of your server. Join the server and start your battle!
