How to set up your own Foundry server
With a dedicated Foundry server, you can easily set up and host multiplayer gaming. In this tutorial, we’ll explain the requirements and give you a step-by-step guide to setting up your own robot factory, including options for Foundry server hosting.
What are the requirements for a Foundry server?
There are a number of reasons for setting up a dedicated Foundry server with a professional provider. For one, you’ll have better bandwidth, which ensures a more fluid gaming experience. And you won’t have to constantly leave your computer on to keep the server online.
The best way to meet the requirements for a dedicated Foundry server is to rent external hardware from a provider. You’ll get access to professional components with tailored performance and enjoy the benefits of a server without significant investment in high-end hardware.
The hardware that you rent for your gaming server can be used for more than just Foundry. For example, you can also use it to run a CS2 server or an Enshrouded server.
The technical requirements for a dedicated Foundry server will primarily depend on the number of players. More resources are used when many players are active at the same time than for a smaller group of players. There’s no limit on the number of players for Foundry, but the developers recommend 2-4 players.
In any case, you’ll need to fulfill these minimum requirements:
- CPU/computing power: minimum 3.2 GHz (2 cores)
- RAM/memory: minimum 4 GB recommended
- Hard drive storage: 20 GB
- Internet connection: minimum 10 Mbps
Foundry server software is designed for Windows, so you’ll also need to plan in enough computing power for that. For example, if you have a Windows Server 2022, you’ll also need a 1.4 GHz 64-bit processor, 2 GB RAM and 32 GB hard drive storage (512 MB and 32 GB without GUI).
In our article “Windows vs. Linux” we share everything you need to know about the pros and cons of the two operating systems.
What are IONOS’s options for a Foundry server?
External Foundry server hosting is offered by several different providers, including IONOS. With IONOS, there are three different types of servers on offer, each of which can be used as a dedicated Foundry server:
- vServer (VPS): IONOS offers vServers or VPS, which are based on a fixed server platform and provide virtualized resources. Different plans are available for a fixed monthly rate.
- Cloud Server: IONOS’s cloud servers use virtualized resources without a fixed server platform. This kind of server is billed by the minute and can be scaled anytime.
- Dedicated Server: IONOS’s dedicated servers work without virtualization and offer access to dedicated physical server hardware. You’re only charged for active use and will be billed by the minute.
All of these servers have a broadband connection with up to 1 Gbit/s.
Try out your VPS for 30 days. If you're not satisfied, you get your money back.
How to choose a IONOS plan for your FOUNDRY server
Below we describe 3 possible setups for your personal Foundry server – differing based on the number of players and frequency of use – and the IONOS plan that best fits them.
| FOUNDRY server setup | Best IONOS server (Windows) |
|---|---|
| 2–3 people; Server constantly online | VPS Windows M |
| 4–6 people; Server constantly online | VPS Windows L |
| 7+ people; Server constantly online | AR6-32 HDD |
Try out your VPS for 30 days. If you're not satisfied, you get your money back.
How to set up a FOUNDRY server for Windows
Once you have the hardware for your server, you can start installing and setting it up. In the tutorial below, we explain the process step by step. In our example, we install the Foundry server on a IONOS server using the SteamCMD command line client on Windows Server 2022.
Step 1: Establish a remote connection to the server
You can access the server hardware you rented anytime using Remote Access. You’ll find the log in info for remote connection in your IONOS account:
- Log in to your account.
- Choose “Server & Cloud” from the menu.
- Select the hardware you rented for your Foundry server.
- Note the IP address of your server and your access info (“User” and “Initial Password”) listed under “Access Data”.
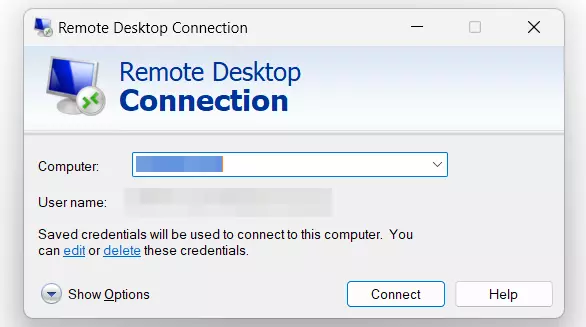
- Start the Windows Remote Desktop Connection tool and enter the information from above to establish the connection. Accept the server certificate as trustworthy.
In the IONOS Help Center, you can learn how to connect to Windows Servers using Remote Desktop Connection.
Step 2: Install SteamCMD
Next you’ll need to install SteamCMD, so that you can easily find server applications like your Foundry server on the command line client of the gaming platform. Follow these steps:
- Download SteamCMD for Windows.
- Extract the file in any directory, e.g.
C:\SteamCMD. - Start
steamcmd.exeto install the client.
Step 3: Download the Foundry server app
After installing the command line client on your server, you can open it anytime by double-clicking steamcmd.exe. When the client is ready to start you’ll see the command prompt Steam>.
Start by establishing a connection to the public Steam servers. For use with a Foundry server, an anonymous login will suffice:
login anonymousThen set up a directory for your server. You can choose the name and location of the folder yourself. To set up a target directory like C:\foundry-server, use the following command:
force_install_dir C:\foundry-serverFinally, use the SteamCMD command app_update to download the server application. To do so, you’ll only need the Steam-ID of the Foundry server, which is “2915550”.
You’ll also need the command app_update 2915550 to update your Foundry server when a new version is available:
app_update 2915550 validateStep 4: Configure the FOUNDRY server
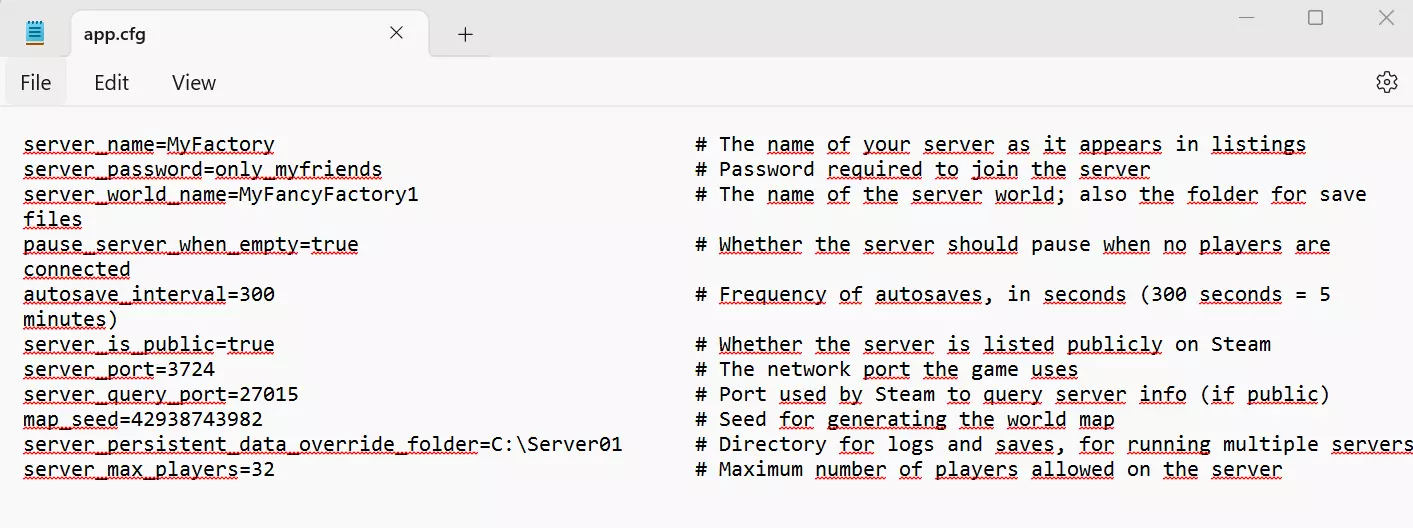
Use the command exit to exit SteamCMD after you’ve finished installing the server application. The window for the command prompt will then be closed. Now locate your server directory, where you will find all the important files for your Foundry server, including the FoundryDedicatedServerLauncher script as a batch file. Open that document with any editor (e.g. Notepad) to configure your server.
In the configuration file, you can choose various settings that will have a decisive effect on your gameplay and how findable the server is. Some possible configurations include:
server_name: Specify which name your server will be presented under.server_password: Specify a password that players need in order to connect to your game world.server_world_name: Specify where the server’s world data and other files will be stored.server_portandserver_query_port: Make sure these ports are forwarded correctly in your router when accessing the server via internet.map_seed: This determines the procedural generation of your game world and affects the layout of the environment.server_max_players: Controls the maximum number of simultaneous players. Choose a number based on the capacity and bandwidth of your server.
Once you’ve found the right configuration for your Foundry server, save the script and close it.
Step 5: Open ports
To ensure your server is available online, you’ll need to open the game port and the query port for communications. Players won’t be able to connect to the server and game data won’t be processed until you’ve completed this step. TCP ports 3724 and 27015 provided as standard for the Foundry server application. If necessary, the game port can be changed in the configuration file.
With your IONOS account you can open your server’s ports as follows:
- Log in to your IONOS account on the login page.
- Open the menu “Server & Cloud” and choose your server.
- In the left side menu, click on “Network” and “Firewall Policies”.
- Under “Incoming”, create 2 new rules for TCP ports 3724 and 27015. Restart your server.

Step 6: Start the Foundry server
After you’ve opened the ports you can start your server by executing the start script FoundryDedicatedServerLauncher.bat. The application will automatically start in a command prompt window.
Step 7: Connect to the Foundry server
Follow these steps to connect to other players in your game world:
- Start Foundry in your Steam account and click on “Play”.
- Click on “Multiplayer” and select “IP Direct Connect”.
- Enter the data from your dedicated server.
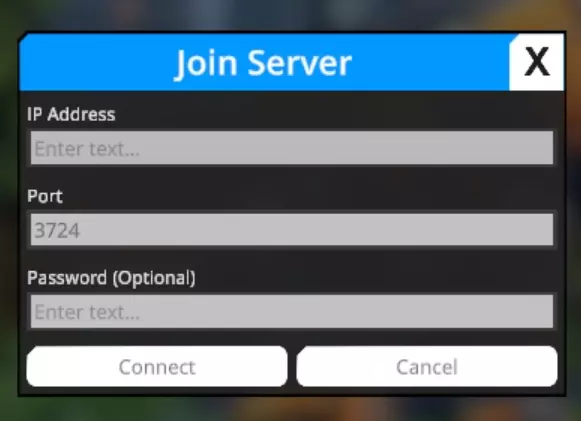
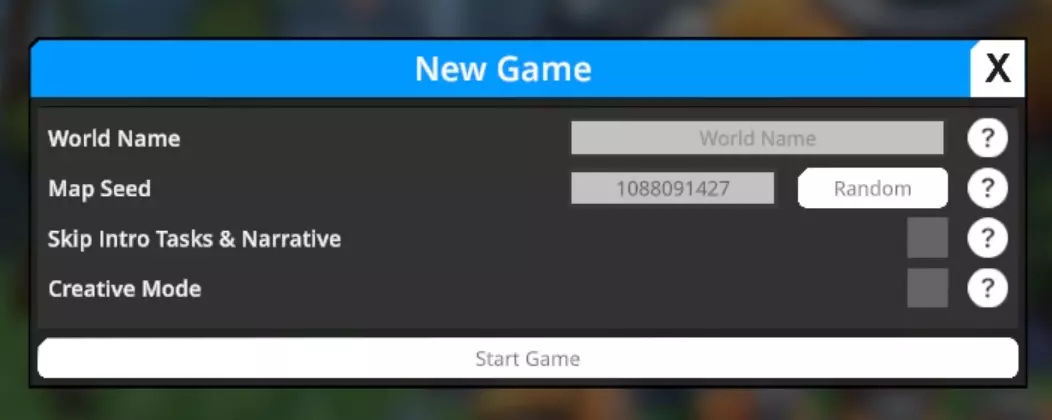
- After you’ve connected to the host server you can start the game. Before you start playing, you can enter your server settings (e.g. public/private) and game settings (e.g. name, map seed).
Once you and the other players are connected to the server, you’re ready to start your Foundry adventure!
If you’re looking for an alternative to a classic IP address, check out our practical .gg domain.

