How to set up an American Truck Simulator dedicated server
An American Truck Simulator server guarantees the best long-term multiplayer sessions. You can download the software for dedicated ATS servers using the SteamCMD command-line client. You do not need to have an additional license for this. Keep on reading to find out how to carry out the installation and setup.
How does an ATS dedicated server differ from Convoy sessions on a PC?
An American Truck Simulator server offers a multiplayer mode with the Convoy feature, which you can start directly on your own PC at home. However, if you shut down your device or quit the game, the multiplayer game will end abruptly for everyone. In addition, the session’s performance depends heavily on your PC’s performance and the internet connection.
ATS Dedicated Server software, on the other hand, ensures an optimal gaming experience. You can run the application continuously on externally rented server hardware and do not have to buy another license or DLCs (downloadable content) for the simulator. Recreational truckers can join the server at any time, accept new orders and finish routes. Hosting with a professional provider means that you can rely on powerful hardware and a fast broadband connection.
Try out your VPS for 30 days. If you're not satisfied, you get your money back.
What are the requirements for an American Truck Simulator dedicated server?
Your hardware should have sufficient computing power for your ATS server to run smoothly. The performance requirements will depend on various factors such as the modifications or the number of players active. The following are the minimum requirements:
- Processor (CPU): Dual core from 2.4 GHz
- Memory (RAM): 2-3 GB RAM
- Hard disk space: 10 GB
The operating system will also have its own requirements. You can choose between the Windows server operating systems from Microsoft and the classic Linux server distributions such as Ubuntu or Debian. If you are working with Windows Server 2022, you’ll need the following resources:
- 1.4 GHz processor (64-bit)
- 512 MB (without graphical user interface) or 2 GB RAM (with graphical user interface)
- 32 GB (without graphical user interface) or 36 GB (with graphical user interface) hard disk space
If you want to use the server for different purposes, for example, to create a TeamSpeak-Server or Euro Truck Simulator 2 server, it’s best to have a more powerful hardware setup from the get-go.
American Truck Simulator servers from IONOS
You can rent powerful hardware for your ATS server from IONOS. There are three different server models to choose from with a guaranteed broadband connection up to 400 Mbit/s. The servers are available in different price-performance classes. The servers have the following features:
- vServer (VPS): IONOS’ vServers or VPS (Virtual Private Server) use virtualized computing resources in a fixed host system. You choose a specific service plan and pay fixed monthly costs.
- Cloud Server: IONOS’ cloud servers also take advantage of hardware virtualization. However, the resources in this model come from several different host systems. The computing power can be scaled flexibly at any time, and you pay by the minute for the performance used.
- Dedicated Server: Dedicated Servers from IONOS give you access to fixed, enterprise hardware with high single-core computing power. The hardware is reserved exclusively for you, and services are billed by the minute.
Rent a dedicated server from IONOS today and lay a powerful and secure foundation for all of your hosting projects.
ATS servers and corresponding IONOS Cloud Server plans
To give you a better overview of the server models, we have outlined three scenarios for an American Truck Simulator dedicated server in the table below along with the best server solutions from IONOS for each of these scenarios.
| American Truck Simulator dedicated server scenario | IONOS Cloud Server plan |
|---|---|
| 1-4 people; server permanently online | VPS M RAM |
| 5-8 people; server permanently online | VPS L RAM |
| 8 persons; many mods or other use of the server planned; server permanently online | AR6-32 SSD |
Choose a cloud server from IONOS today to create and host your own American Truck Simulator server. Add more performance capabilities as the amount of players increase or cancel your subscription when you no longer need the server.
How to create an American Truck Simulator dedicated server (A step-by-step tutorial)
Once you have decided on a hosting variant, you can start installing and setting up your ATS server. We’ll outline the steps for IONOS customers (Cloud Server, vServer or Dedicated Server) using the Windows Server 2022 as the operating system.
Step 1: Establish remote connection to the hosting environment
The first step is to establish a remote connection to the rented server hardware. The Windows Server can be accessed using the Remote Desktop Protocol, which is supported by default. The setup is conveniently done through the IONOS Customer Center:
- Log in to the IONOS Cloud Panel with your customer credentials.
- Click on Server & Cloud in the product overview.
- Select your server package.
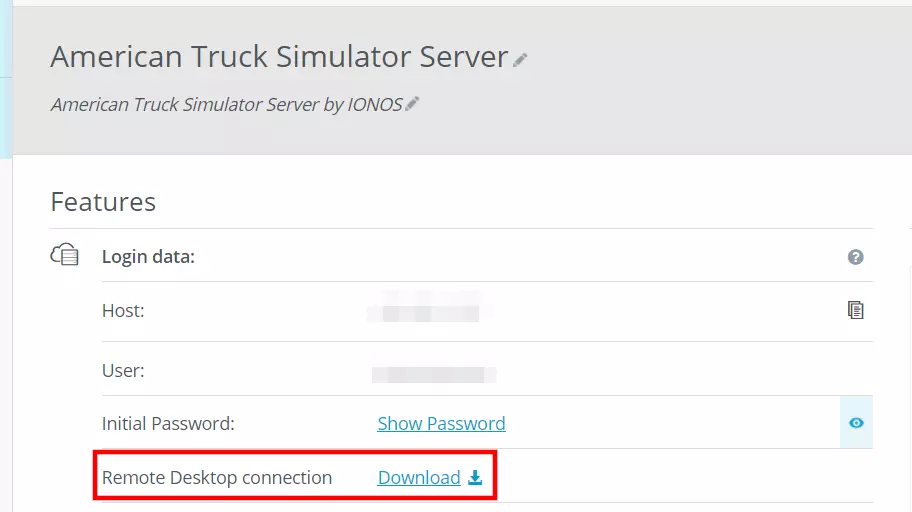
- Scroll to the credentials overview and click on the download link next to Remote Desktop Connection.
- Run the downloaded rdp file by double-clicking on it.
- Confirm the server’s security certificate and log in with the server information (user and initial password).
Step 2: Install SteamCMD
Once connected to the hosting environment, you can install SteamCMD. This tool is a command-line version of the Steam Client. This allows you to connect to the public Steam servers and download applications at any time. Proceed as follows to carry out an installation on the server:
- Download the SteamCMD installation package.
- Unzip the ZIP package to a folder, e.g., C:\steamcmd.
- Run the steamcmd.exe file to install the client.
You can find detailed information about setting up the Steam command-line client in our article “SteamCMD: How to install the command line client”.
Step 3: Install American Truck Simulator dedicated server
You can now download and install the official ATS server software American Truck Simulator dedicated server using SteamCMD. Open the client and log in anonymously to the public Steam servers by running the following command:
login anonymousCreate a folder for the ATS server program files:
force_install_dir C:\american-truck-simulator-serverThe dedicated server application will be available after using the Steam app ID (2239530) and the app_update command:
app_update 2239530 validate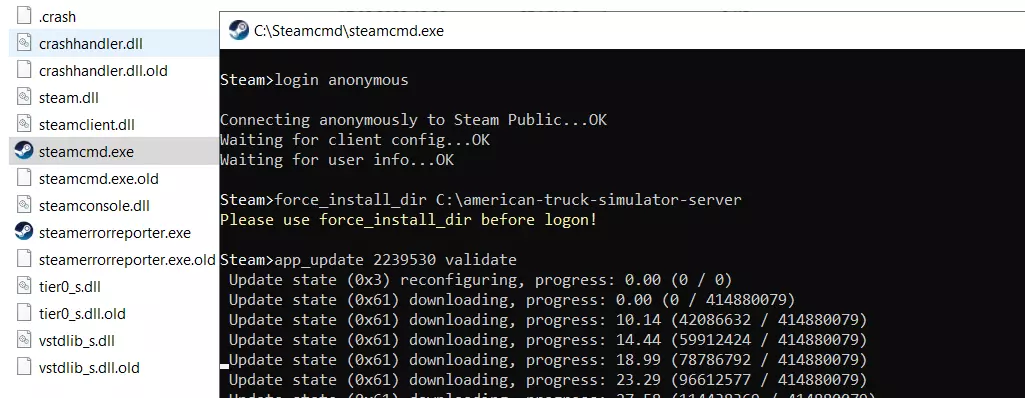
Log out of the Steam servers with the quit command once the installation is complete.
Step 4: Copy configuration files to the server
You will need access to the following three configuration files to get your American Truck Simulator server up and running:
- server_config.sii: This is the main configuration file. It contains important server settings, such as the name of the lobby, the maximum number of players, and the authentication token.
- server_packages.sii: This file defines important details about the map, the DLCs and mods.
- server_packages.dat: This file has specific, internal data for the respective map.
The server_config.sii file is automatically generated with the default configuration as soon as the ATS Dedicated Server application runs for the first time. Simply run the amtrucks_server.exe, which you can find in the subfolder .\bin\win_x64 in the server folder.
Since the other two configuration files are still missing, the server start cannot be carried out. However, the server_config.sii is now under the path .\Documents\American Truck Simulator in the user folder, which you can adjust with an editor.
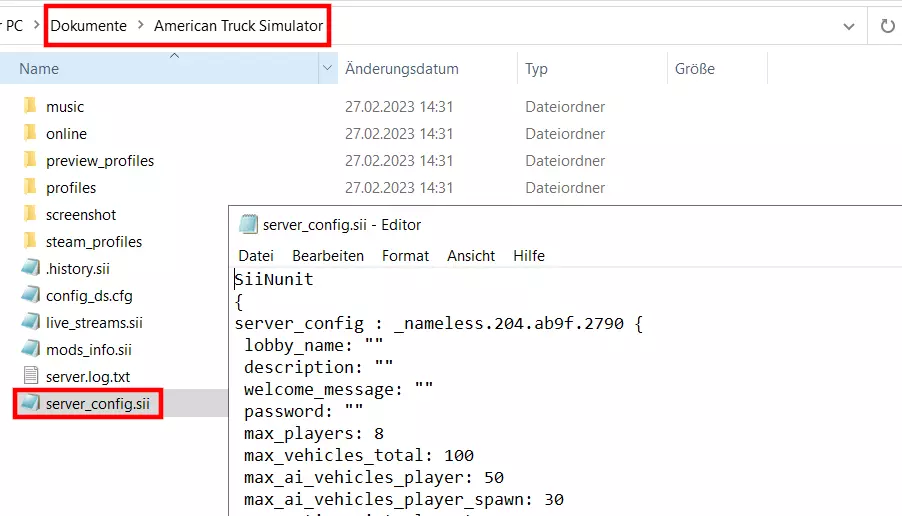
The other two configuration files with the information on the game world, DLCs and mods need to be created after this. Simply create a new session in American Truck Simulator or select a saved game. Since the game must be installed for this, it is recommended that you export the configuration files using your personal computer:
- Open the C:\Users\username\Documents\American Truck Simulator folder (replace username with your username).
- Open the config.cfg file with any editor to activate the ATS console.
- Find the line uset g_developer and set the value to “1”.
- Find the line uset g_console and set the value to “1”.
- Save the document and start a game session in American Truck Simulator.
- Open the previous Console with the tilde key (~), which you will find to the left of “1”.
- Run the command
export_server_packages. - The configuration files server_packages.sii and server_packages.dat will now be in the C:\Users\username\Documents\American Truck Simulator.
- Copy the files to your server in the .\Documents\American Truck Simulator, where the server_config.sii configuration file is located.

Step 5: Create authentication token
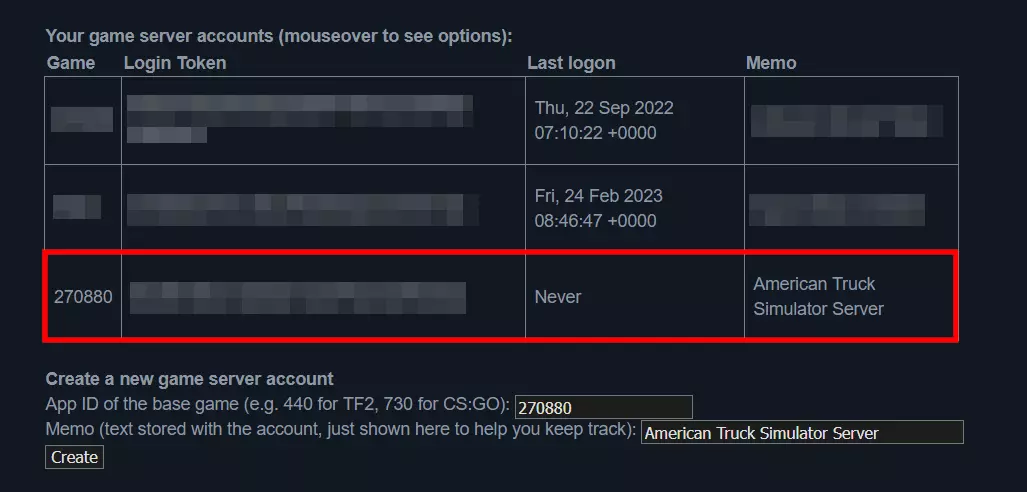
Your American Truck Simulator server must be associated with an authentication token to make it available on the listing of official multiplayer servers. The token can be created in the Steam Game Server Account Management tool as follows:
- Log in to the account management page with the Steam account used to purchase American Truck Simulator.
- Scroll to Create new game server account.
- Enter the American Truck Simulator ID (270880) in the field App ID of the base game.
- You can also enter a short description in the Memo field to simplify assigning the token in Account Management later.
- Click on Create to generate the token.
- You will see the token in Your game server accounts afterwards. Copy and paste it using (Ctrl + C) and (Ctrl + V).
- Open server_config.sii on your server and find the line server_logon_token. Paste the copied authentication token between the quotation marks and save the configuration file.
Step 6: Open ports
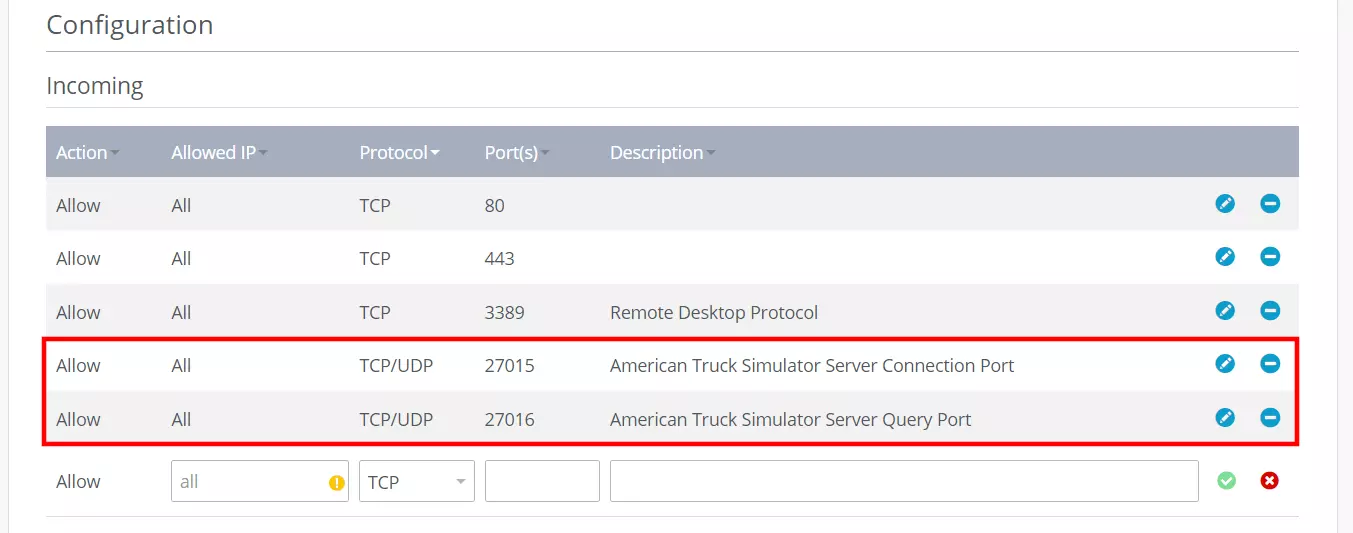
You must also enable TCP/UDP ports 27015 and 27016 in the Firewall Settings to make your American Truck Simulator server accessible online. Your server will be displayed in the overview of available multiplayer servers once these ports are open.
As an IONOS customer, it is easy to open the ports for your server in the Customer Center:
- Log in to the IONOS Cloud Panel.
- Open the product category Server & Cloud.
- Select the hosting environment where you have installed and configured the ATS server.
- Click on Network and Firewall Policies.
- Create the rules for TCP/UDP port 27015 and TCP/UDP port 27016 under Incoming.
Step 7: Start ATS server
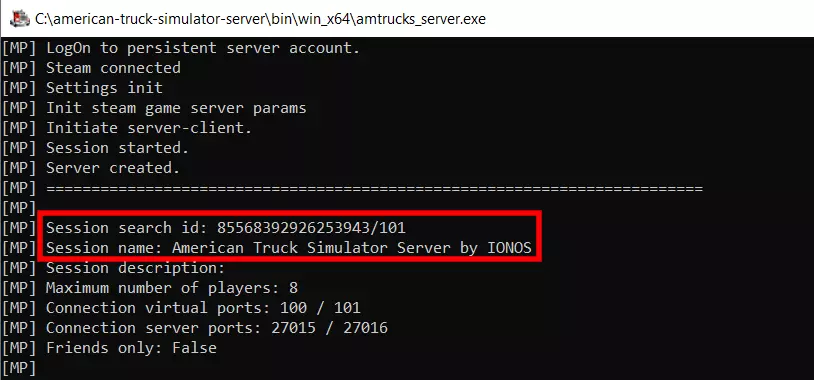
Start your American Truck Simulator server by running amtrucks_server.exe in the .\bin\win_x64 folder. The application will run automatically in a command prompt window.
To shut down your ATS-Server, you can use the shortcut [Strg] + [C].
Step 8: Connect to the American Truck Simulator server
You and your fellow players can now connect to your ATS server at any time. You can find it using the lobby name you chose in the server_config.sii or using the server’s session ID. The command prompt will present these options to you after starting the server.
Connect to your server as follows once your lobby name or session ID is ready:
- Launch American Truck Simulator.
- Select a driver profile and start a game.
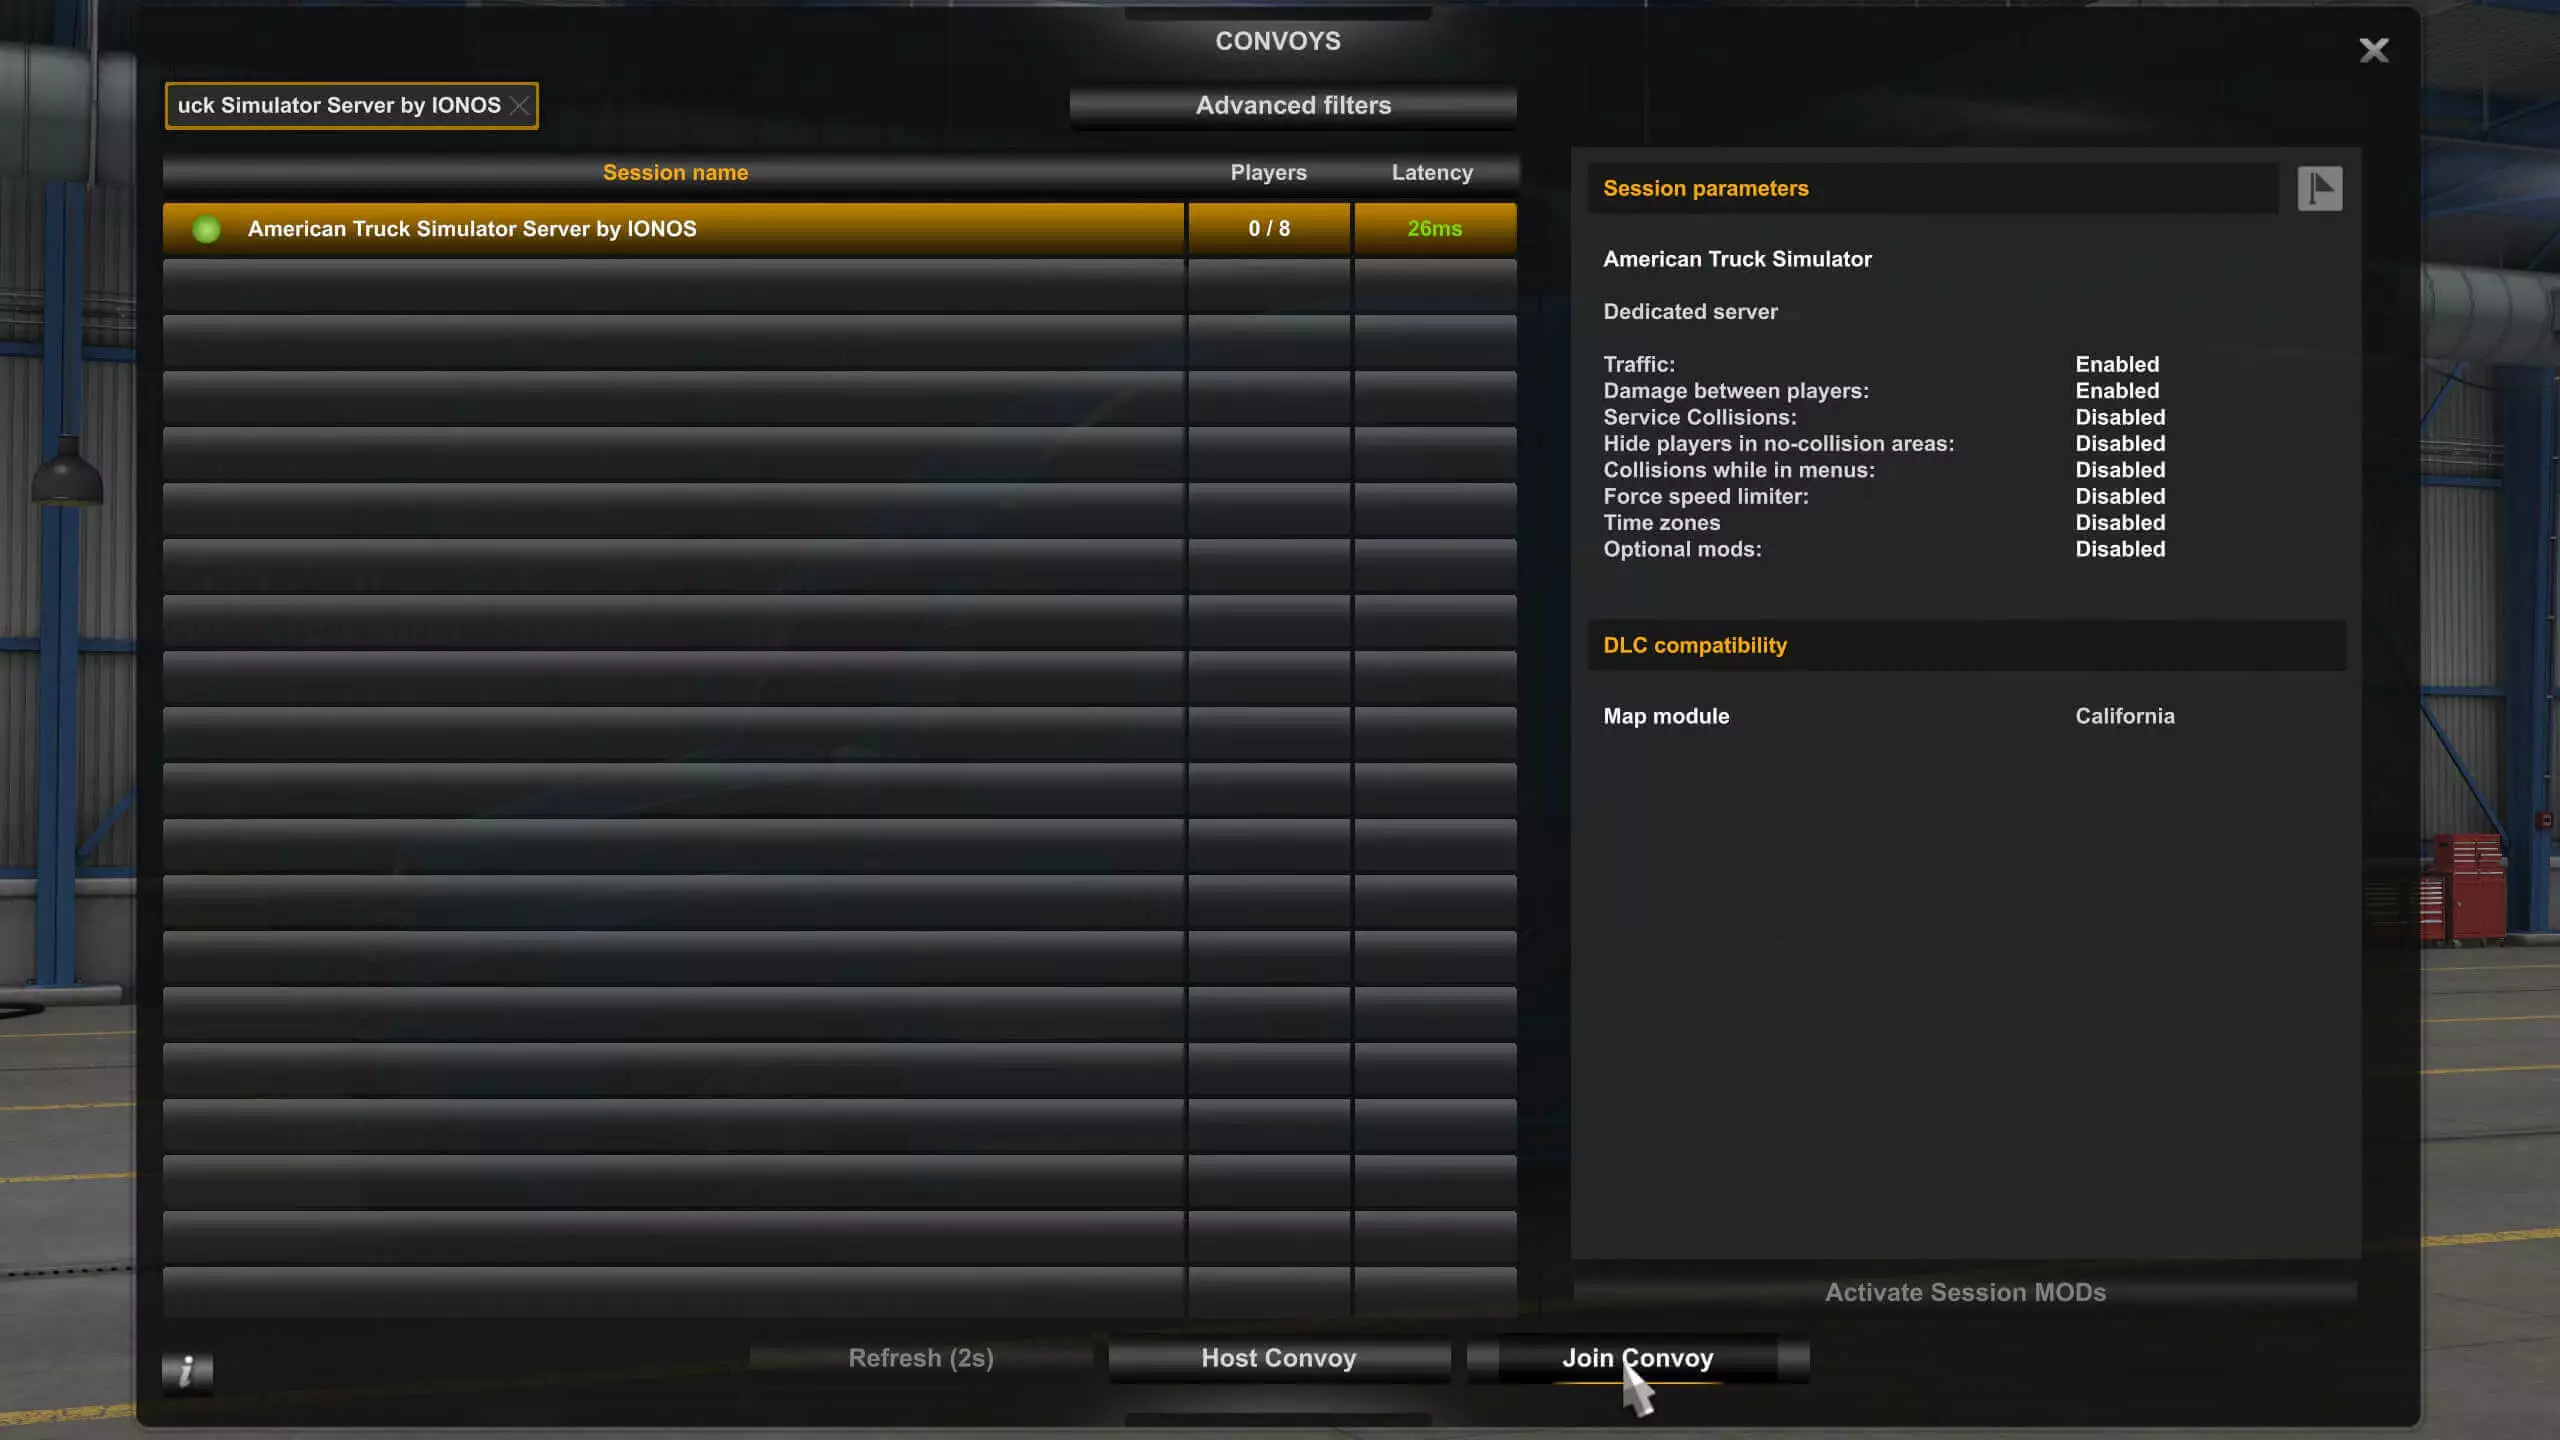
- Press [Esc] to open the menu and select Convoys.
- Use the search function to search for your server.
- Select an entry in the listing and click Join convoy.
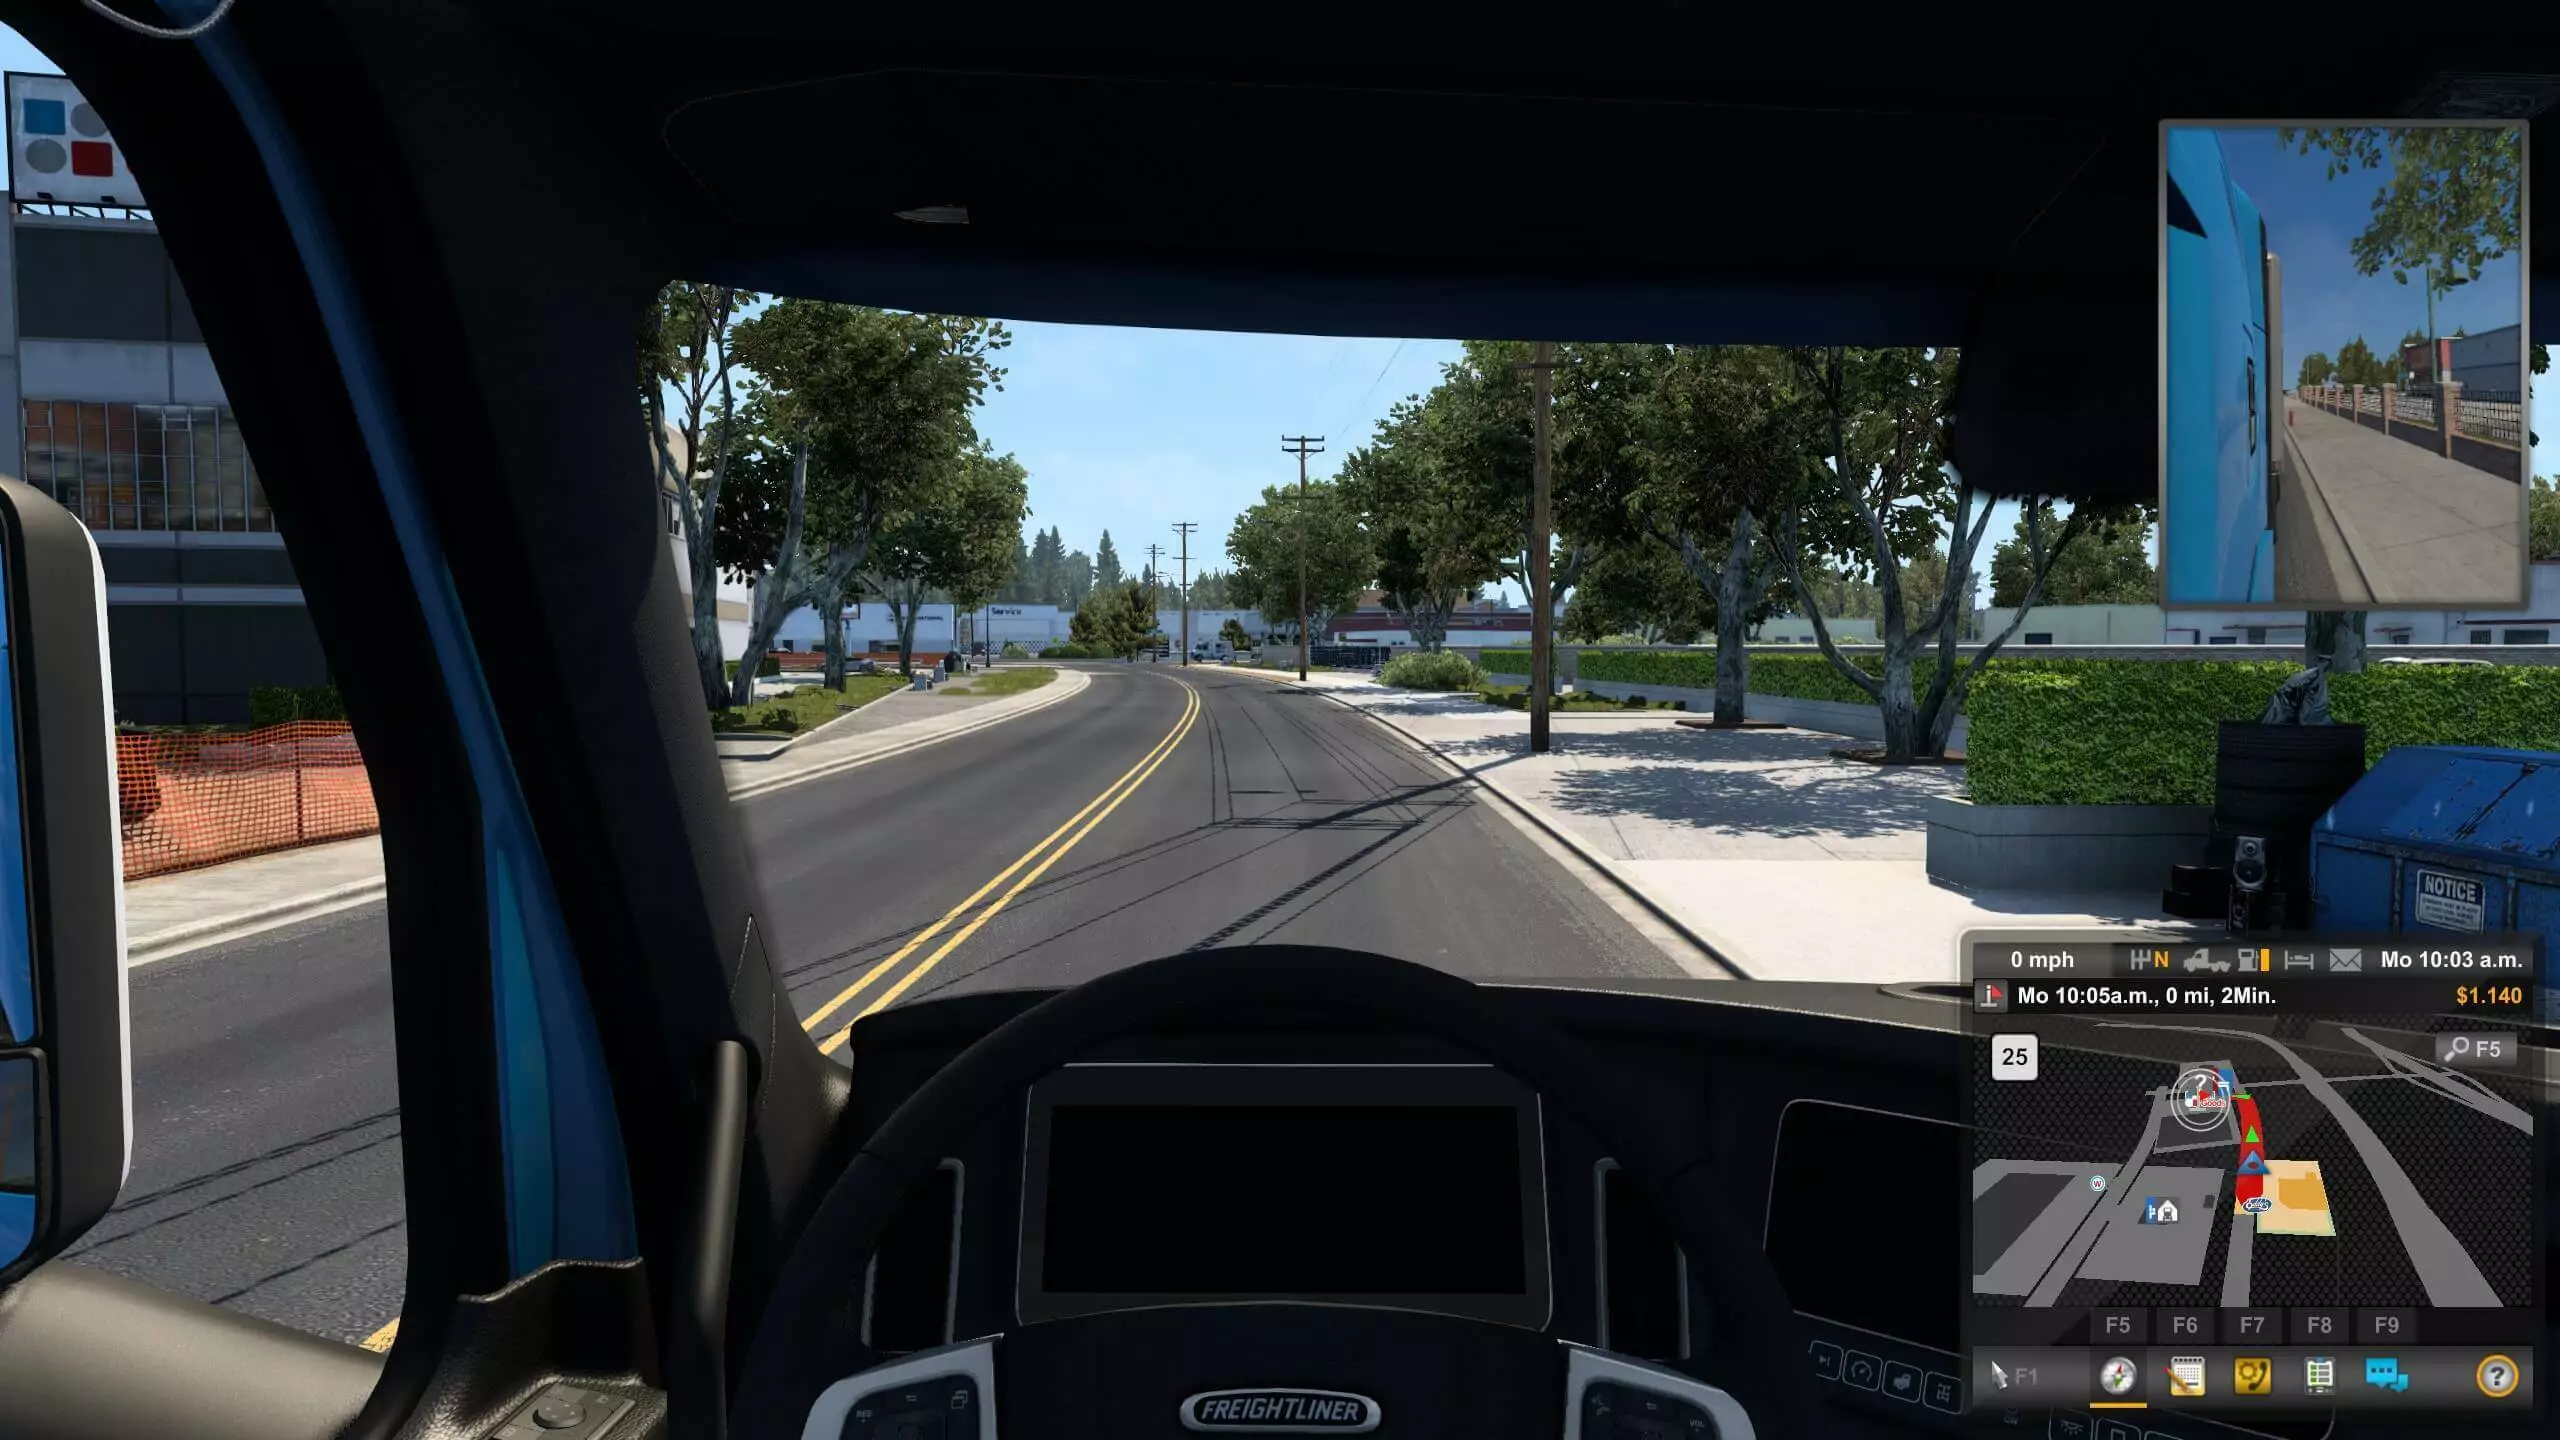
Once you have established a connection, you can accept orders and rule the streets of America with your trucker troop.
Make a statement with your own .gg domain and let the games begin. Register your own .gg domain now with IONOS.

