Windows 11: virtual desktops – definition and tutorial
By using virtual desktops, you can restore order in busy Windows environments. In Windows 11, you can use virtual desktops via the “Active applications” icon in the taskbar or by pressing the corresponding key combination.
- Simple registration
- Premium TLDs at great prices
- 24/7 personal consultant included
- Free privacy protection for eligible domains
What is the Windows “Virtual Desktop” feature?
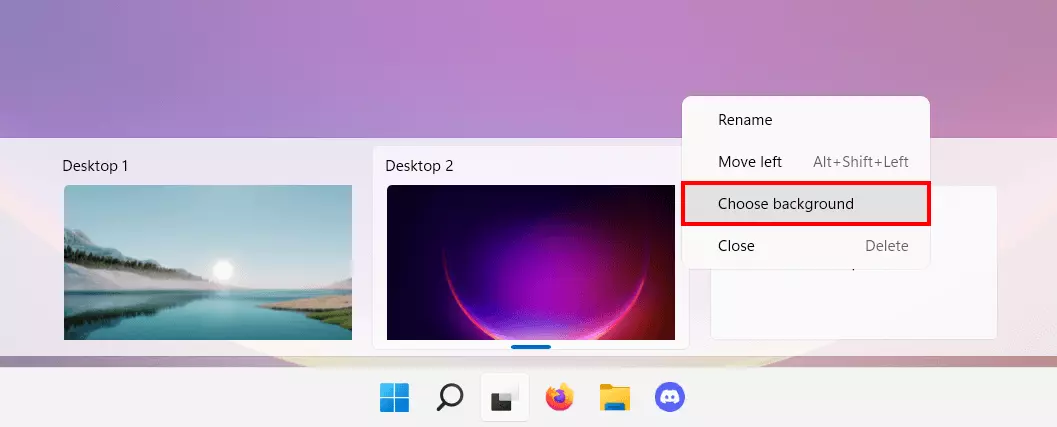
The “Virtual Desktop” feature in Windows 11 provides the option to simulate additional desktops on your current device. Each new virtual desktop behaves just like the user interface. You can create shortcuts to quick-launch programs or applications, watch a movie, or play games. Individual names can be assigned to desktops and you can even add a custom wallpaper. The tool is available by default from Windows 10 onwards. Prior Windows versions require additional software to use virtual desktops.
Only the desktop currently selected will be displayed. So, you need to switch back and forth between the main desktop and the Windows 11 virtual desktops you have set up.
Windows 11 virtual desktops are particularly interesting for power users who tend to manage multiple tasks at the same time. For example, you can use it to work on one virtual desktop, while a presentation or virtual meeting is in progress on yet another. Another advantage is that several different desktops simplify the structuring of shortcuts.
Not happy with the performance of your device? Read our Digital Guide to find out how to make Windows 11 faster, for example, by optimizing Windows 11 autostart.
How to set up a Windows 11 virtual desktop
The following guide provides step-by-step instructions to add and set up virtual desktops in Windows 11 and explains how to switch between them.
Step 1: Call up Manager for Active Applications and Virtual Desktops
Windows 11 comes with a built-in and active virtual desktop management tool by default. This makes it easy to manage active applications from the respective active interface. There are two ways to active it:
- Click “Active applications” in the taskbar.
- Use the key combination [Windows] + [Shift].
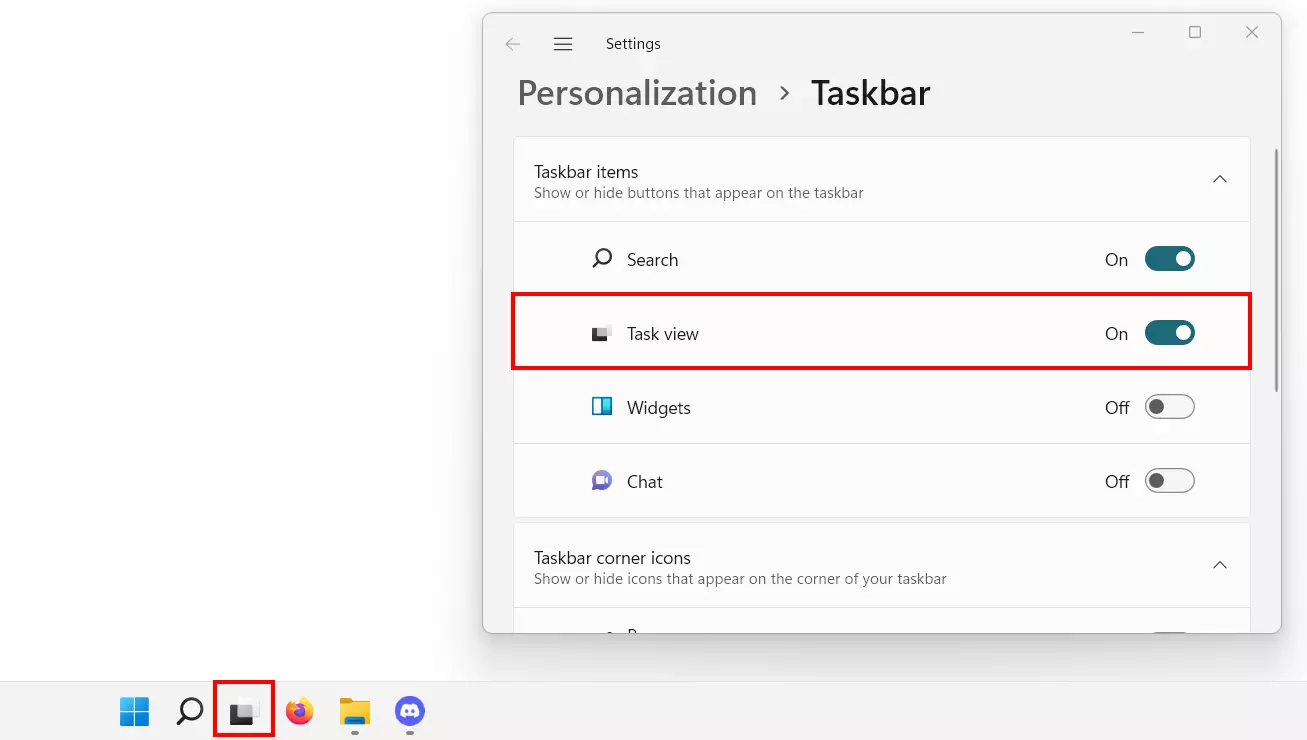
If the taskbar icon isn’t available, you’ll need to activate it first. To do this, right-click on the taskbar and select the menu item “Taskbar”. In the following menu, click the “Task view” entry slider to the right (“On”).
Step 2: Create a new virtual desktop
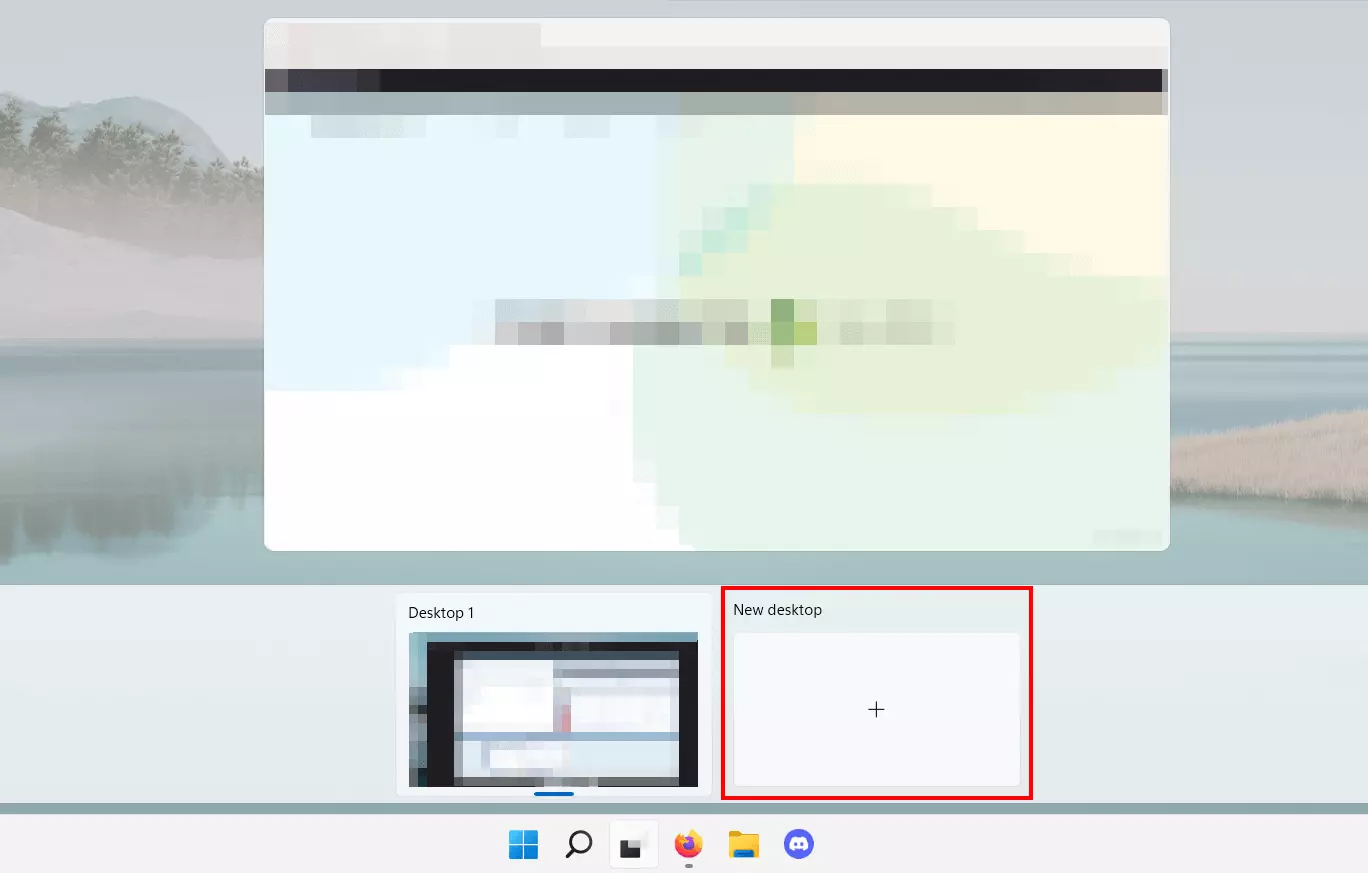
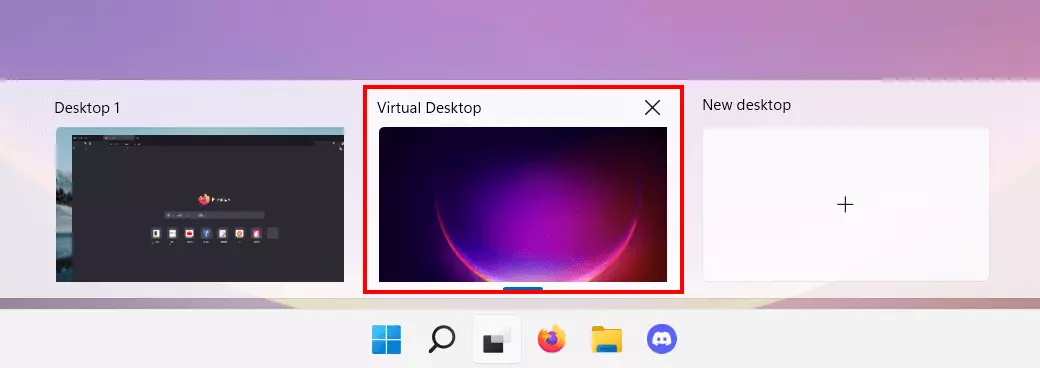
The tool displays two areas. In the upper corner, you will see thumbnails of windows that are currently open on your desktop. Select “X” to close the corresponding program. In the lower area, Windows 11 lists the (virtual) desktops. To create a new desktop, press the “New desktop” button.
Step 3: Create Windows 11 virtual desktop
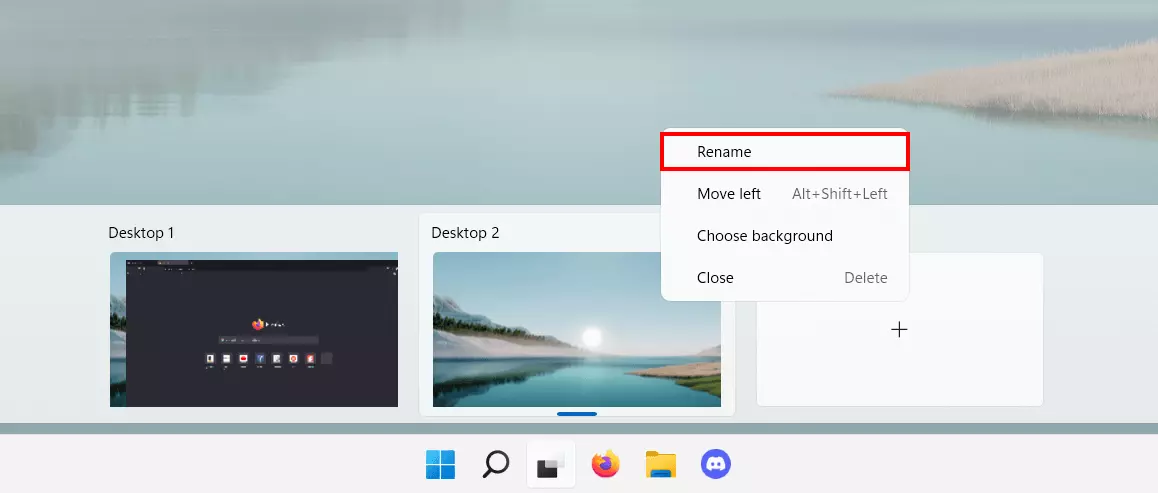
Once you’ve created a new desktop, it will be listed in the “Active applications” overview. Windows 11 automatically assigns numbers to identify the different surfaces. The actual desktop is named “Desktop 1”; for all other desktops numbering is simply continued.
However, you can edit the name of a virtual desktop by right-clicking on it and choosing “Rename”.
Once the basic configuration is in place, you can customize the interface to your liking. For example, you could create a set of desktop shortcuts that differ from those of your standard desktop. Or simply access programs or windows that should only run on the selected desktop.
How to swap between your Windows 11 virtual desktops
Virtual desktops are a convenient way to manage active applications and structure a user interface. Switching between the different interfaces is simple and fast, either via mouse click or using a key combination.
Desktop change via mouse click:
Call up the “Active applications” tool via the icon in the taskbar. In the list below, you can see an overview of all available desktops. Left-click the virtual Windows 11 desktop you wish to switch to.
Desktop change via keyboard shortcut:
An even faster way to toggle between your virtual desktops is using the key combination [Ctrl] + [Windows] + [Right] or [Left]. Use the arrow keys to select the next or the previous desktop from the list.
Be sure to create regular backups of your files to prevent data loss. One of the simplest ways to do so is using the Windows 11 backup function available by default. You can use it to back up your entire system or individual files.


