Partition a hard drive in Windows 11: How it works
Hard disks are usually integrated into the hardware setup as a single drive. However, if you want to separate the Windows installation from your games, programs, or sensitive documents, it makes sense to partition the hard drive. Continue reading to find out how to do this in Windows 11.
- 2 GB+ storage
- Sync across all your devices
- Spam filter and ad-free
Step by step: How to partition hard disks in Windows 11
It has been possible to partition the hard drive at any time since Windows 7. This can usually be done without losing any data – but unfortunately, there is no guarantee that data will not be lost. It’s important to create a backup if you plan to format a hard drive which already contains important data.
Read the following article on how to create a backup in Windows 11!
Step 1: Open Disk Management
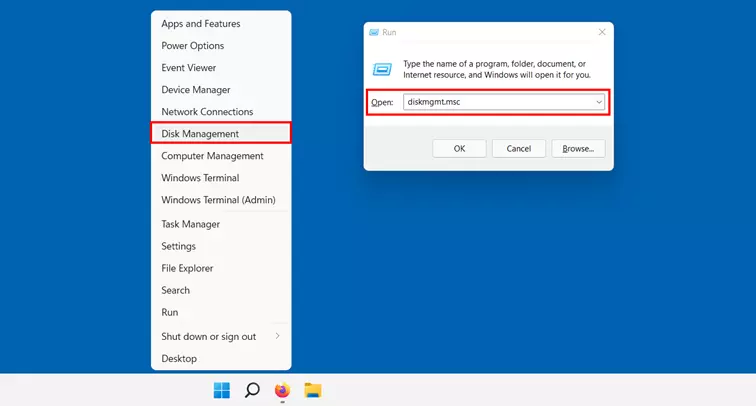
No additional software is required to partition a hard drive in Windows 11. The operating system has its own tool exactly for this purpose, known as the Disk Management. There are two options to start this tool:
- Use the key combination [Windows] + [R] to open the “Run” dialog box and choose the command “diskmgmt.msc”.
- Right-click on the Start menu icon in the taskbar and select “Disk Management”.
Step 2: Selection of the data carrier
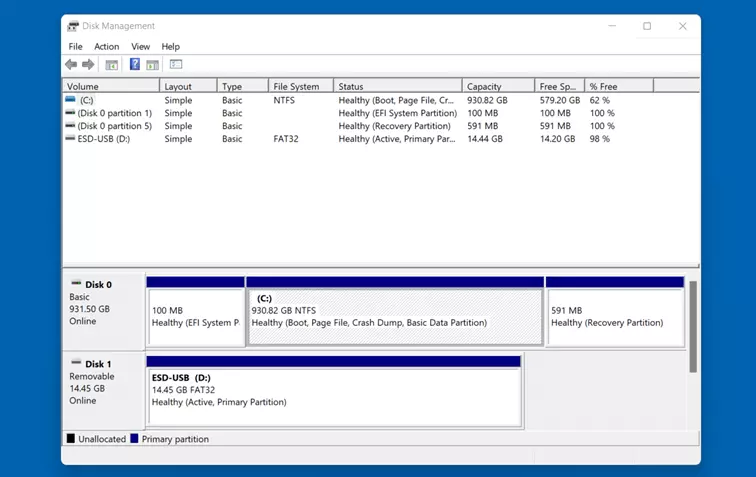
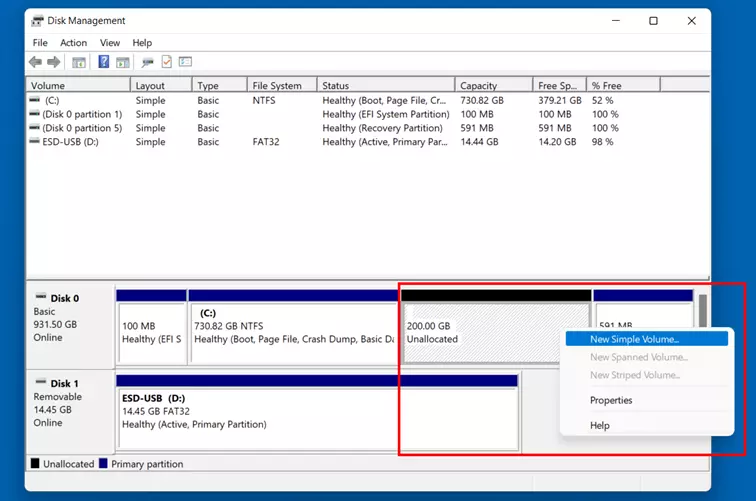
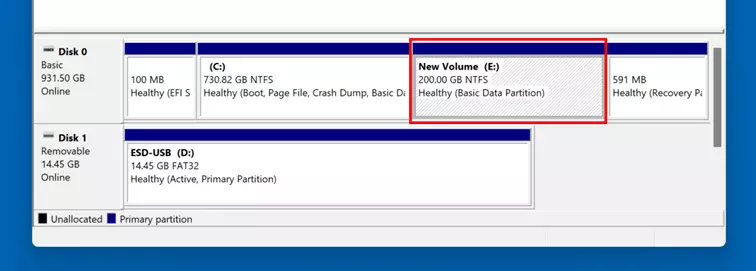
The Disk Management lists all the hard disks and removable media which are connected to your device. Firstly, select the hard disk you want to format. In Windows, you will see two overviews – sorted by volume and sorted by disk. Clicking on one of the volumes in the upper window will automatically show the corresponding disk overview below.
Windows 11 is installed on the hard disk marked as “Disk 0”. In addition to partition “C:” (or the respective drive letter selected), you will also find other partitions that Windows 11 automatically generates during installation for firmware and system recovery files.
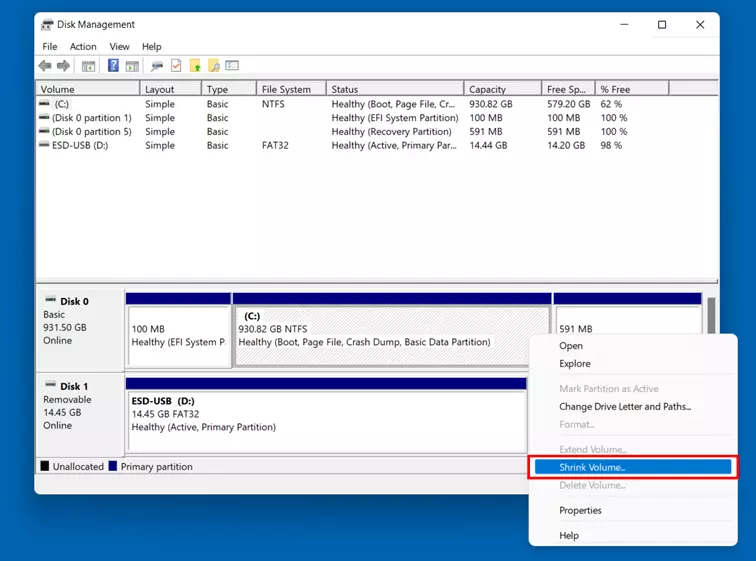
Step 3: Shrink volume
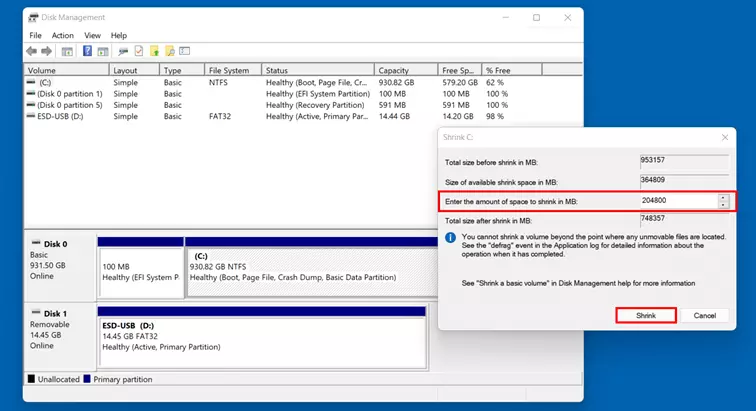
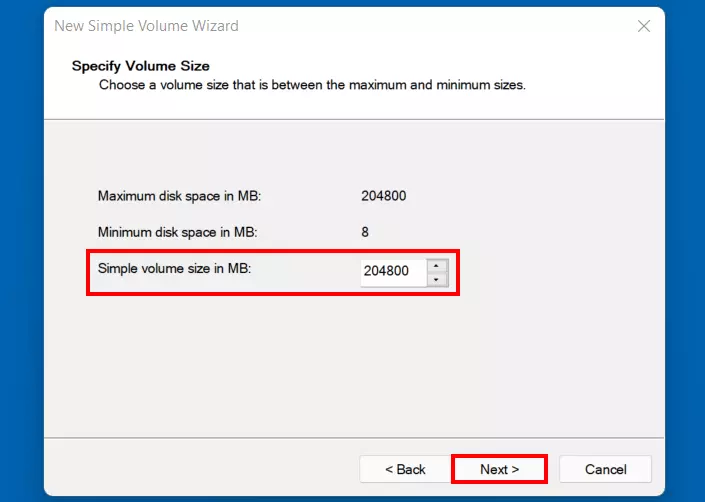
In the following dialog box, you can specify how much space the new partition should have. By default, Windows 11 will offer to shrink the entire available memory on the hard disk. If you want to assign a smaller amount of memory to the partition, simply adjust the value beside “Enter the amount of space to shrink in MB”. You can specify the value in megabyte. For example, to reduce the current volume of the partition by 200 gigabytes, specify the value “204800”.
Finally, click “Shrink”.
Step 4: Create partition
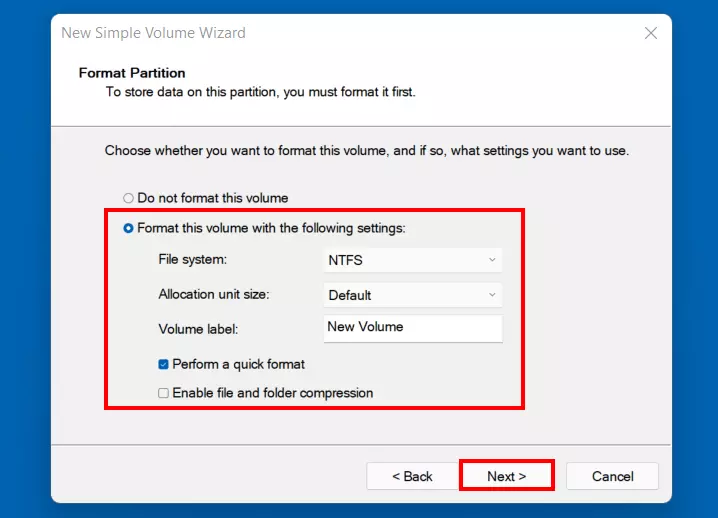
In the last step of the disk partitioning, you must set the formatting options and the name of the new partition. For this, choose the option “Format this volume with the following settings” and select:
- the File system – the classic choice for Windows systems is: NTFS
- the size of the Allocation unit size, also called cluster size (recommended setting: “Default”)
- the Volume label (name of the partition)
Check the “Perform a quick format” box and finish partitioning the hard disk by clicking “Next” and “Finish”.
Windows 11: Delete and merge hard disk partitions
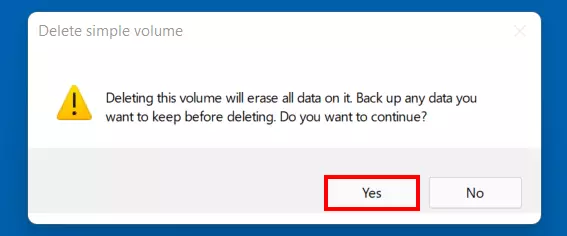
Once your hard disk is partitioned, you have the flexibility to delete the new partition(s) at any time and add it/them to another existing partition. However, any data on the deleted partition will be lost during this process! Ensure you back up any important files in advance.
Step 1: Open Disk Management
In the first step, as with the creation of new partitions, open Disk Management:
- use the key combination [Windows] + [R] and choose the command “diskmgmt.msc” or
- right-click on the Start menu icon in the taskbar and select “Disk Management”.
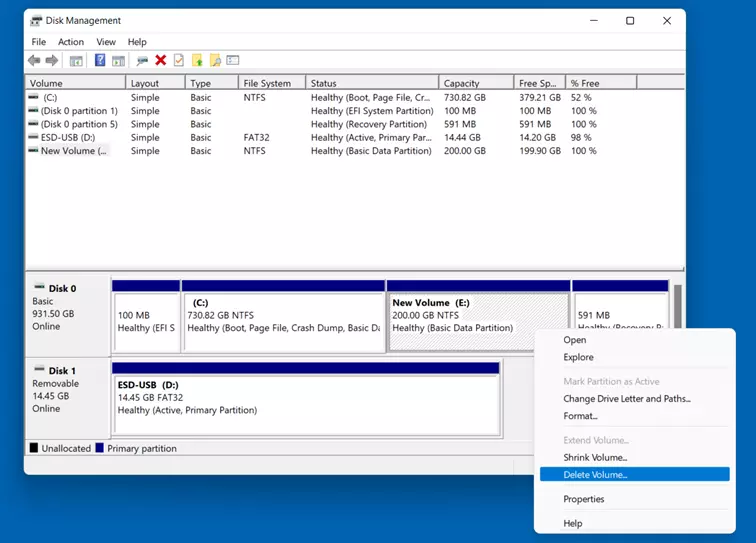
Step 2: Select and delete partition
Step 3: Extend volume
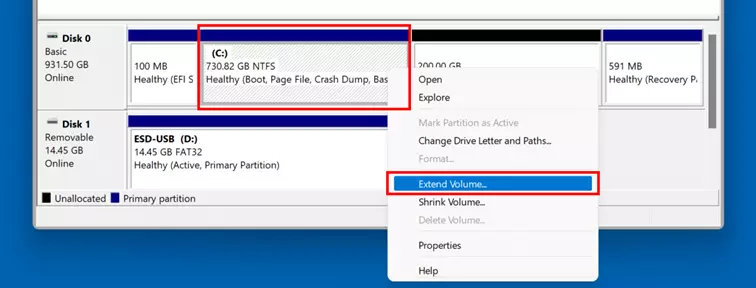
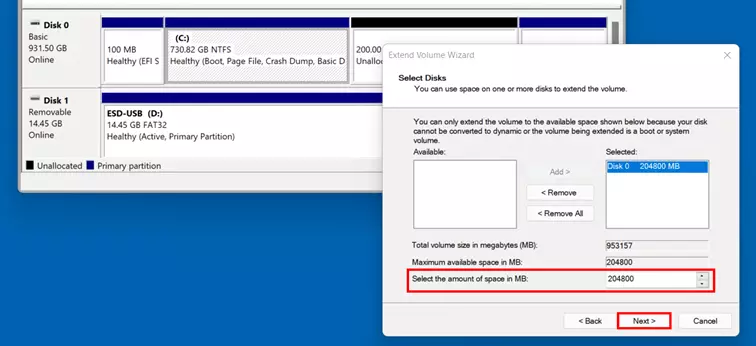
After you have deleted a hard disk partition in Windows 11, the space of this partition will appear in the Disk Management with the label “Unallocated”. You can now assign the quota to another existing partition on the same hard drive by right-clicking the partition you would like to extend and clicking “Extend Volume”.
In the wizard, click “Next” to begin. In the following overview, you will see how much storage space is available for extending the partition – in this case, the available storage corresponds to the 200 gigabytes that are “unallocated” after performing the previous step. Either accept the suggested maximum value or choose an individual value by adjusting the number beside “Select the amount of space in MB”.
Click “Next” and “Finish” when prompted to complete merging the partitions – which will be immediately available in the new form.
Is rebooting your device taking more and more time? Learn how to set up the startup folder in Windows 11 to speed up the startup process.


