How to backup Windows 11
Data backup is a topic of growing importance in corporate environments but also the private sphere. Whether it’s photos and videos or work documents that aren’t stored in the cloud, data loss could cost you.
Find out how you can back up the system or files in Windows 11 to an external data carrier that can be used for recovery in the event of data loss.
- Simple registration
- Premium TLDs at great prices
- 24/7 personal consultant included
- Free privacy protection for eligible domains
Backup in Windows 11: step-by-step guide
Windows 11 lets you create an image of the entire system state. In this case, all system settings and personalization, files and folders are transferred to a select backup data medium in order to restore the system in case of failure. The following instructions will guide you through the individual steps of the Windows 11 backup process.
Ever heard of the 3-2-1 backup rule? Our guide tells you more about this data backup strategy.
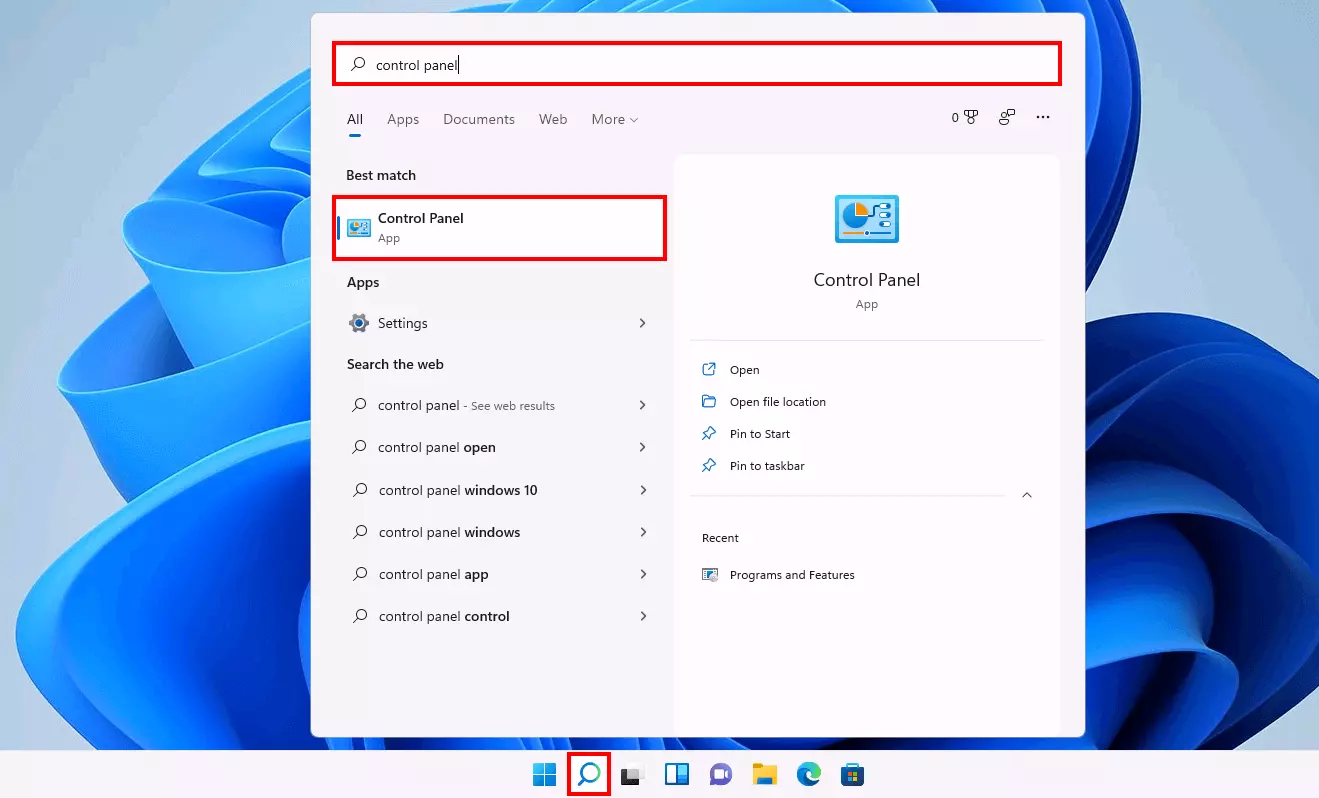
Step 1: Call control panel
Windows 11 provides the option to back up files in the cloud via OneDrive. This can be set up via the “Settings” menu. However, for a backup to an external data carrier, you’ll need to access a backup function that’s been around since Windows 7.
To access the Windows 11 backup function, you will need administrator rights.
Step 2: Launch Windows 11 backup function
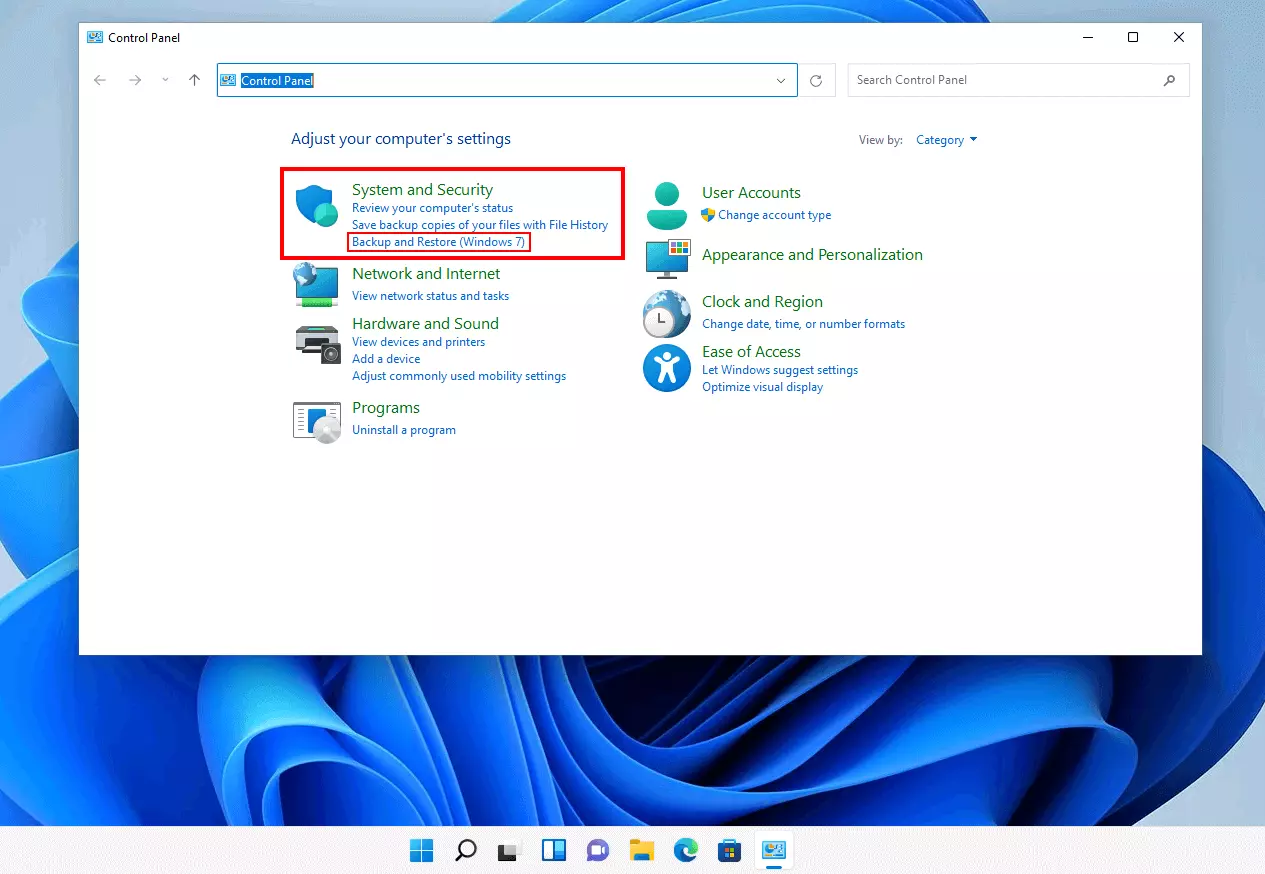
In the next step, launch the backup function by clicking on “Backup and Restore (Windows 7)”. Though the name hardly suggests as much, you can use the tool to back up the system and files in Windows 11. If you have activated the category view, you will find the entry in the “System and Security” category:
Step 3: Select backup media
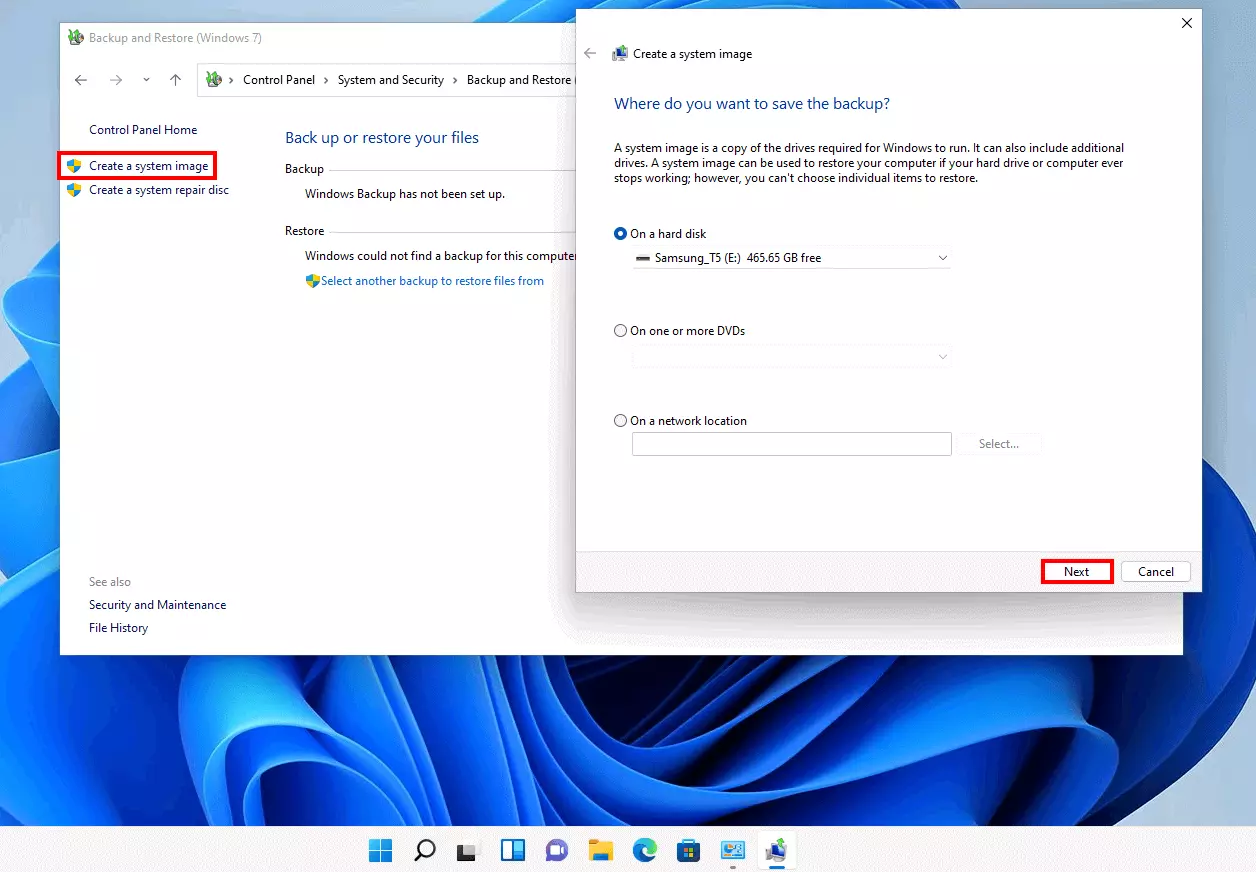
Click on “Create a system image” in the left-hand menu to launch the backup wizard. You can now transfer the backup of Windows 11 to an external hard drive or USB stick, a DVD or to a network address. Windows automatically searches for connected media and lists them as selectable media. However, you can also connect or insert the media of your choice and update the listing.
Once you’ve made your selection, continue the backup process by clicking “Next”.
Step 4: Begin backup
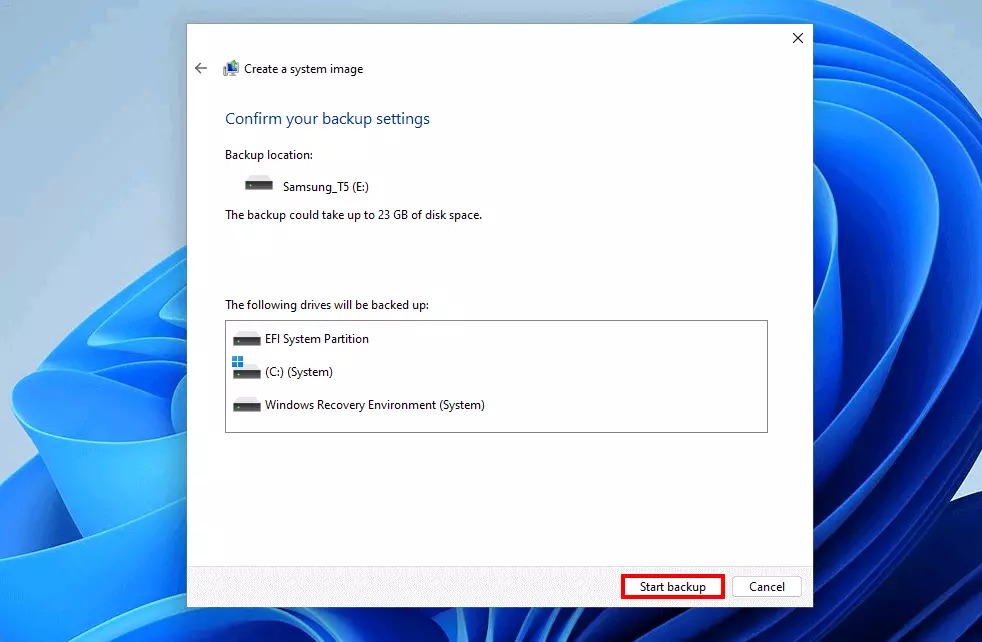
Windows 11 will present a list of drives that can be backed up. It also shows a rough estimate of the size of the files to be backed up. In our case, for example, around 22 gigabytes of storage space are required on our external storage medium. Click on “Start backup” to launch the Windows 11 backup.
- Regular virus and malware scans
- Automatic backups and simple file recovery
Back up your files with Windows 11 – here’s how
Users who don’t want to back up the entire Windows system but only select files can perform a kind of mini backup in Windows 11 which is also executed with the “Backup and Restore” function. We will explain the procedure below.
Step 1: Launch “Backup and Restore”
Launch “Backup and Restore (Windows 7)” for a partial Windows 11 backup. To do so, start the Control Panel and then look for the entry in the list of tools.
Step 2: Set up backup
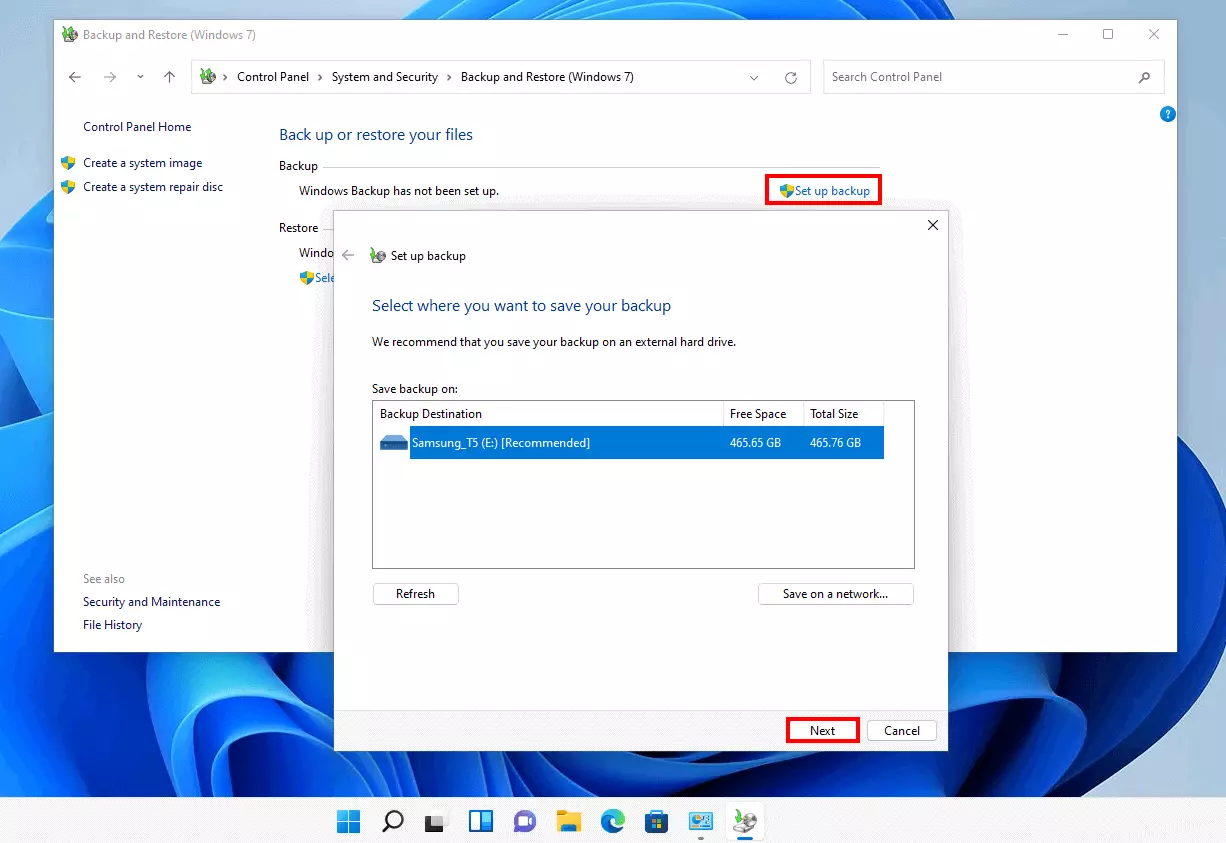
From the “Backup and Restore” menu, click the “Set up backup” button. Windows 11 will check whether you have previously integrated a suitable medium for saving the files for export. If that’s not the case, you can do so later. Once you’ve selected your storage medium, click “Next” to continue setting up the backup.
Step 3: Determine files to save
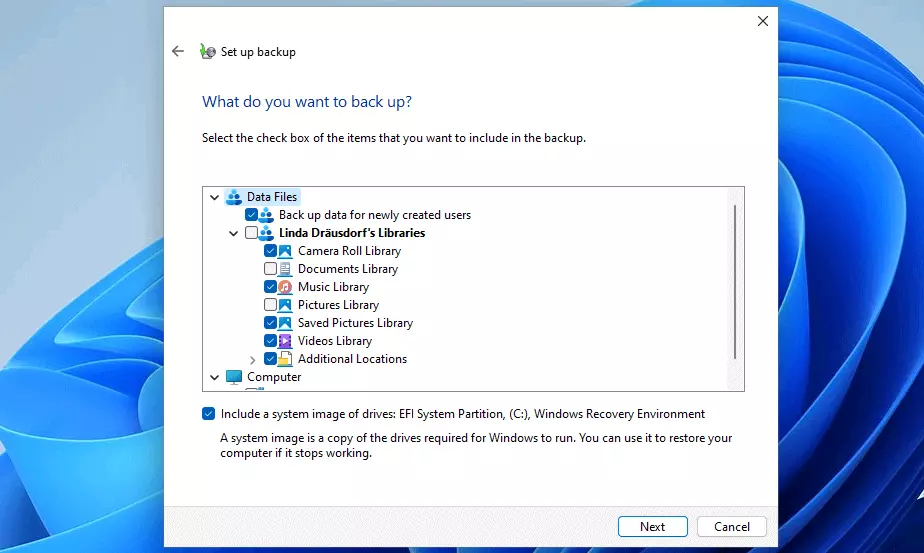
Keep the selection as is if you want Windows 11 to auto-decide which files to backup. If you want to determine the files to be included in the backup, select “Selection by user”. Select the files to be included in the backup by placing a check mark next to the respective entry. Click on “Next” to confirm the selection.
Step 4: Windows 11 backup of personal files
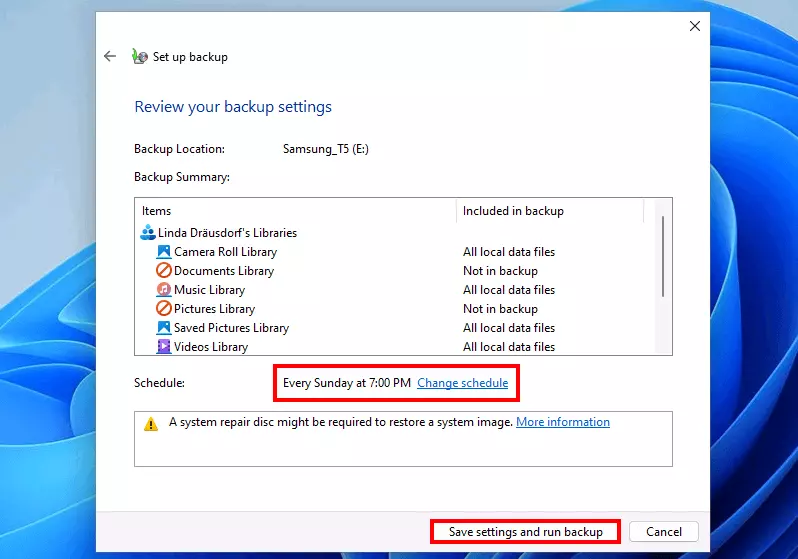
A backup summary will appear in the next window and a suggested time for regular backups. Click “Change schedule” to adjust the frequency, day and time or if you do not want to use the regular backup.
Finally, confirm your settings by pressing “Save settings and run backup”.
Interested in learning more about Windows 11? Our Digital Guide provides several topics:
- Create a screenshot in Windows 11
- Speed up Windows 11 performance


