Activate on-screen keyboard in Windows 10, 8, and 7
Windows’ on-screen keyboard is ultra helpful if you’re unable to use an external physical keyboard for your PC or Windows device. The on-screen keyboard is a standard input tool in Windows 7, 8, and 10 that lets you navigate the system and use text input without a classic keyboard.
- Simple registration
- Premium TLDs at great prices
- 24/7 personal consultant included
- Free privacy protection for eligible domains
Quick guide: Activating the on-screen keyboard
Windows 10 on-screen keyboard
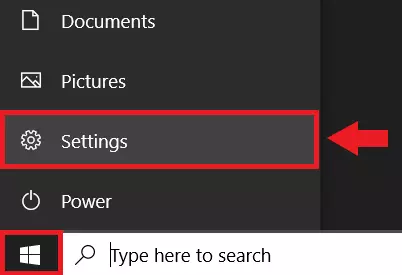
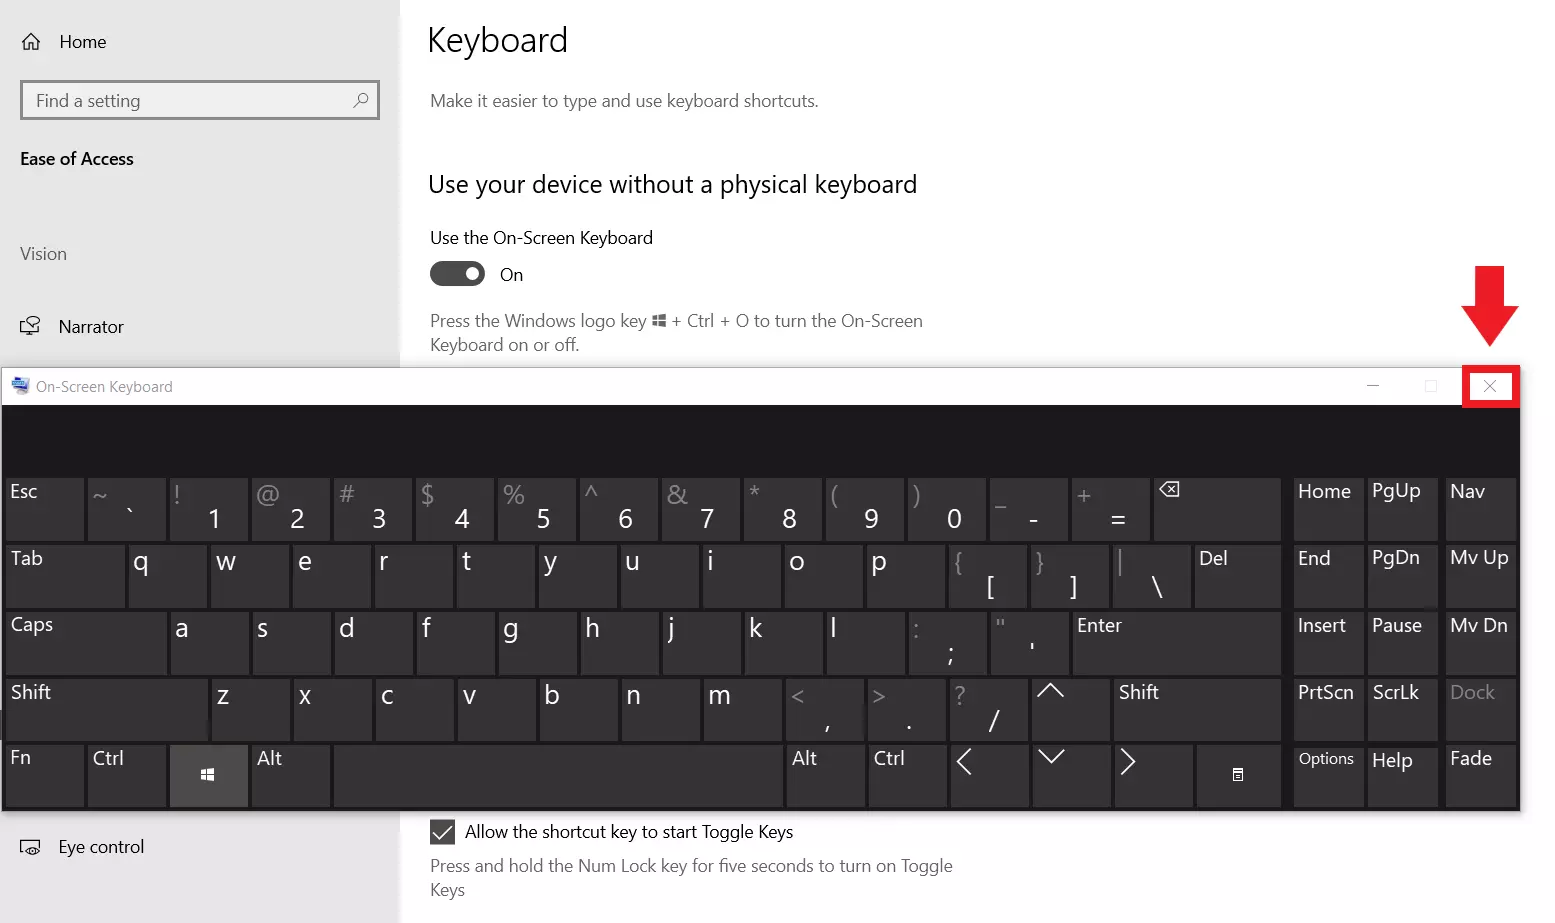
- Open “Settings” via the Windows Start menu or via [Windows] + [I].
- Click on “Ease of Access”.
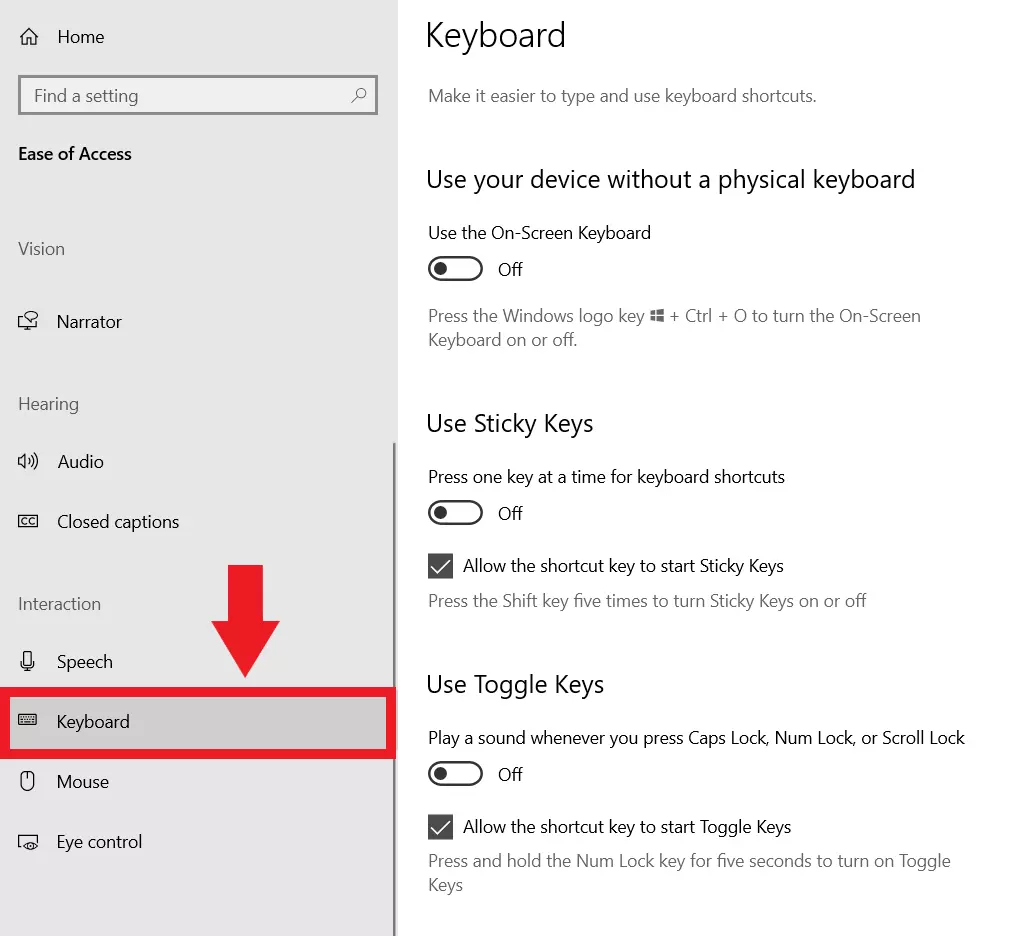
- Open the “Keyboard” menu.
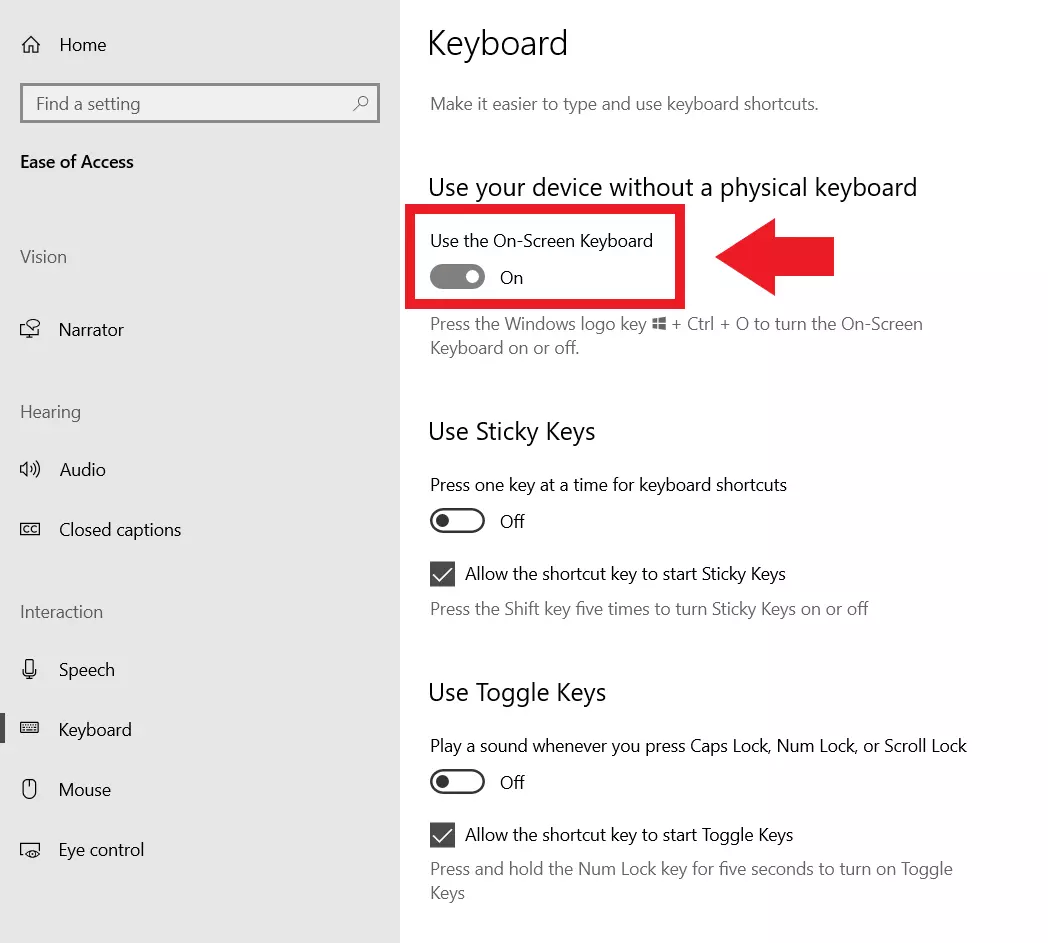
- Set the toggle under “Use your device without physical keyboard” to “On”.
- The visual on-screen keyboard will now appear onscreen.
- Click on “x” to close the on-screen keyboard.
Windows 8 on-screen keyboard
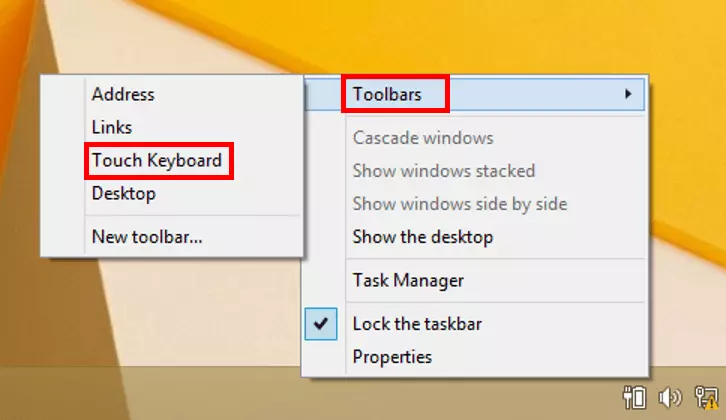
- Right-click in a free area in the lower taskbar.
- Click on “Toolbars”.
- Activate “On-Screen Keyboard”.
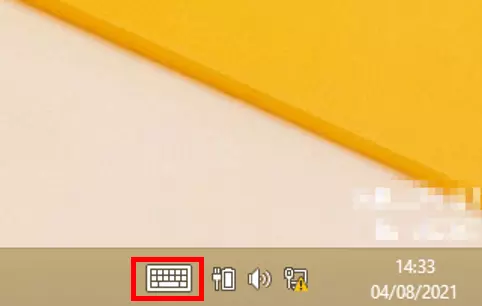
- Click on the keyboard icon in the lower right corner of the taskbar to open it.
- Click the icon again to close the keyboard
Windows 7 on-screen keyboard
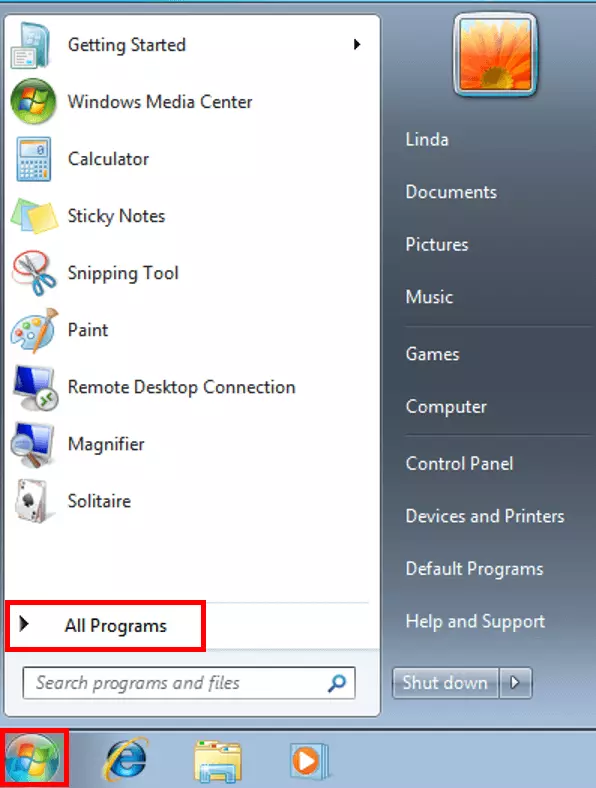
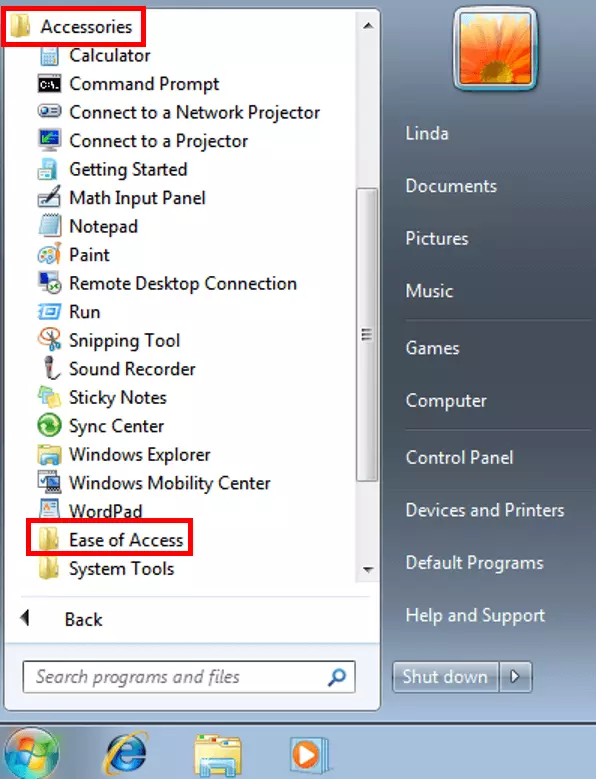
- Click on the Windows logo at the bottom left.
- Go to “All Programs”.
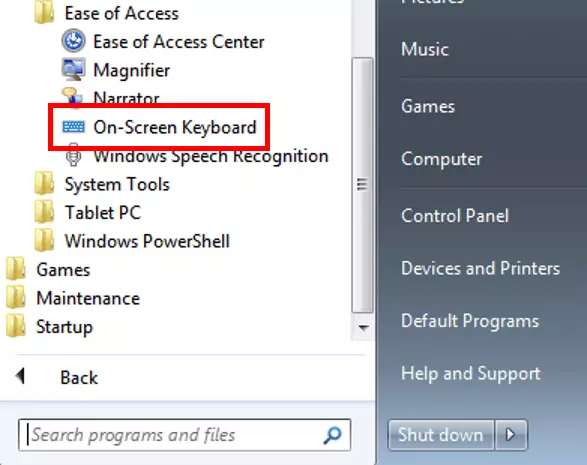
- First select “Accessories” and then “Ease of access”.
- Click on “On-Screen Keyboard” to open the keyboard.
- Click on the “x” to close the keyboard.
On-screen keyboards in Windows: What are they for?
For many, a normal, physical PC keyboard is as natural to their computer use as the screen. But what happens if your keyboard is broken or not responsive? Fortunately, Windows has a visual on-screen keyboard in case problems with the physical keyboard arise. This is also helpful if devices are infected with keylogger malware and there is a risk that malware will record sensitive data input such as login data or bank details via a physical keyboard.
With a Windows on-screen keyboard, you have all the standard physical keys and can make visual keystrokes with and without tablet mode, with a mouse, or, if parts of the keyboard don’t work, with selected key groups.
You want to use the on-screen keyboard, but you don’t know which Windows version it is? The Windows shortcut Windows + Pause will take you to the system information displaying your Windows version.
To enable or disable the on-screen keyboard on Windows 10, 8, and 7, follow our detailed step-by-step instructions or our quick guides.
Open on-screen keyboard in Windows 10
Shortcut for onscreen keyboard
The fastest way to open the on-screen keyboard in Windows 10 is the shortcut [Windows] + [Ctrl] + [O]. This way, the on-screen keyboard can be activated immediately if a physical keyboard is available or intact.
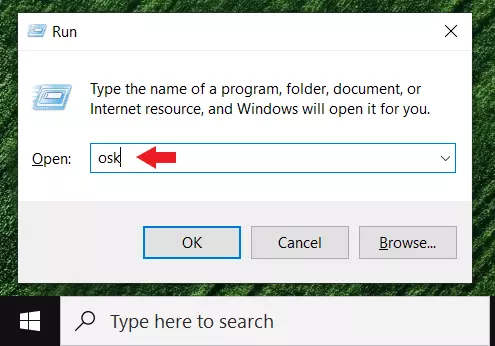
Alternatively, on Windows 10, 8, and 7, you can open the “Run” command prompt window by pressing [Windows] + [R] and display the on-screen keyboard with the Windows CMD command “osk”.
It is also possible to open the Windows on-screen keyboard via the “Settings”, which you can open with the shortcut [Windows] + [I]. Select the submenus “Ease of Access” and “Keyboard” and then activate “Use On-Screen Keyboard”. We will show these steps again in more detail below.
Via mouse / without keyboard use
Should you have persistent problems with the physical keyboard in Windows 10, should Windows not start correctly or should you fear that keylogger malware has infected your device, it is recommended to reset Windows 10. Before this happens, you should back up data including hidden Windows files and folders in a timely manner and on a regular basis.
Open on-screen keyboard in Windows 8
Step 6: Alternatively, the Windows on-screen keyboard can be opened by swiping inward from the right edge of the screen, typing “on-screen keyboard” into the search bar, and clicking it.
Activate an on-screen keyboard in Windows 7
Windows 7 users should consider upgrading their Windows system to a newer version. The Windows 7 support ended back in 2020, which means that Windows security vulnerabilities will no longer be closed.
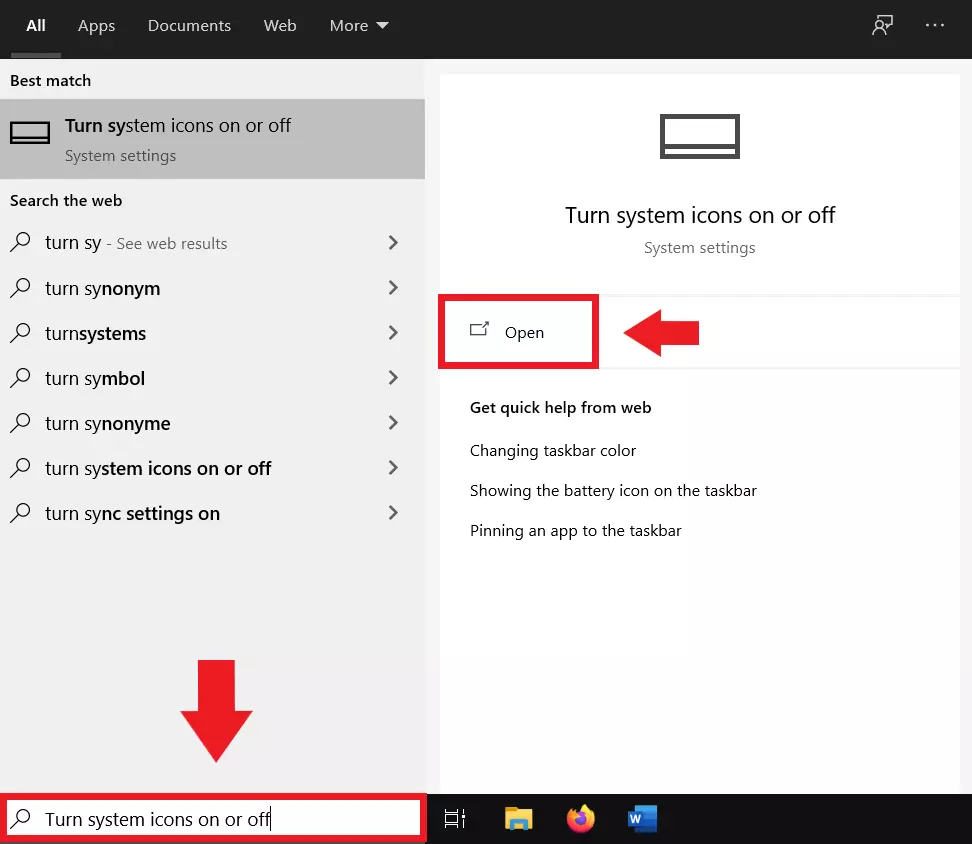
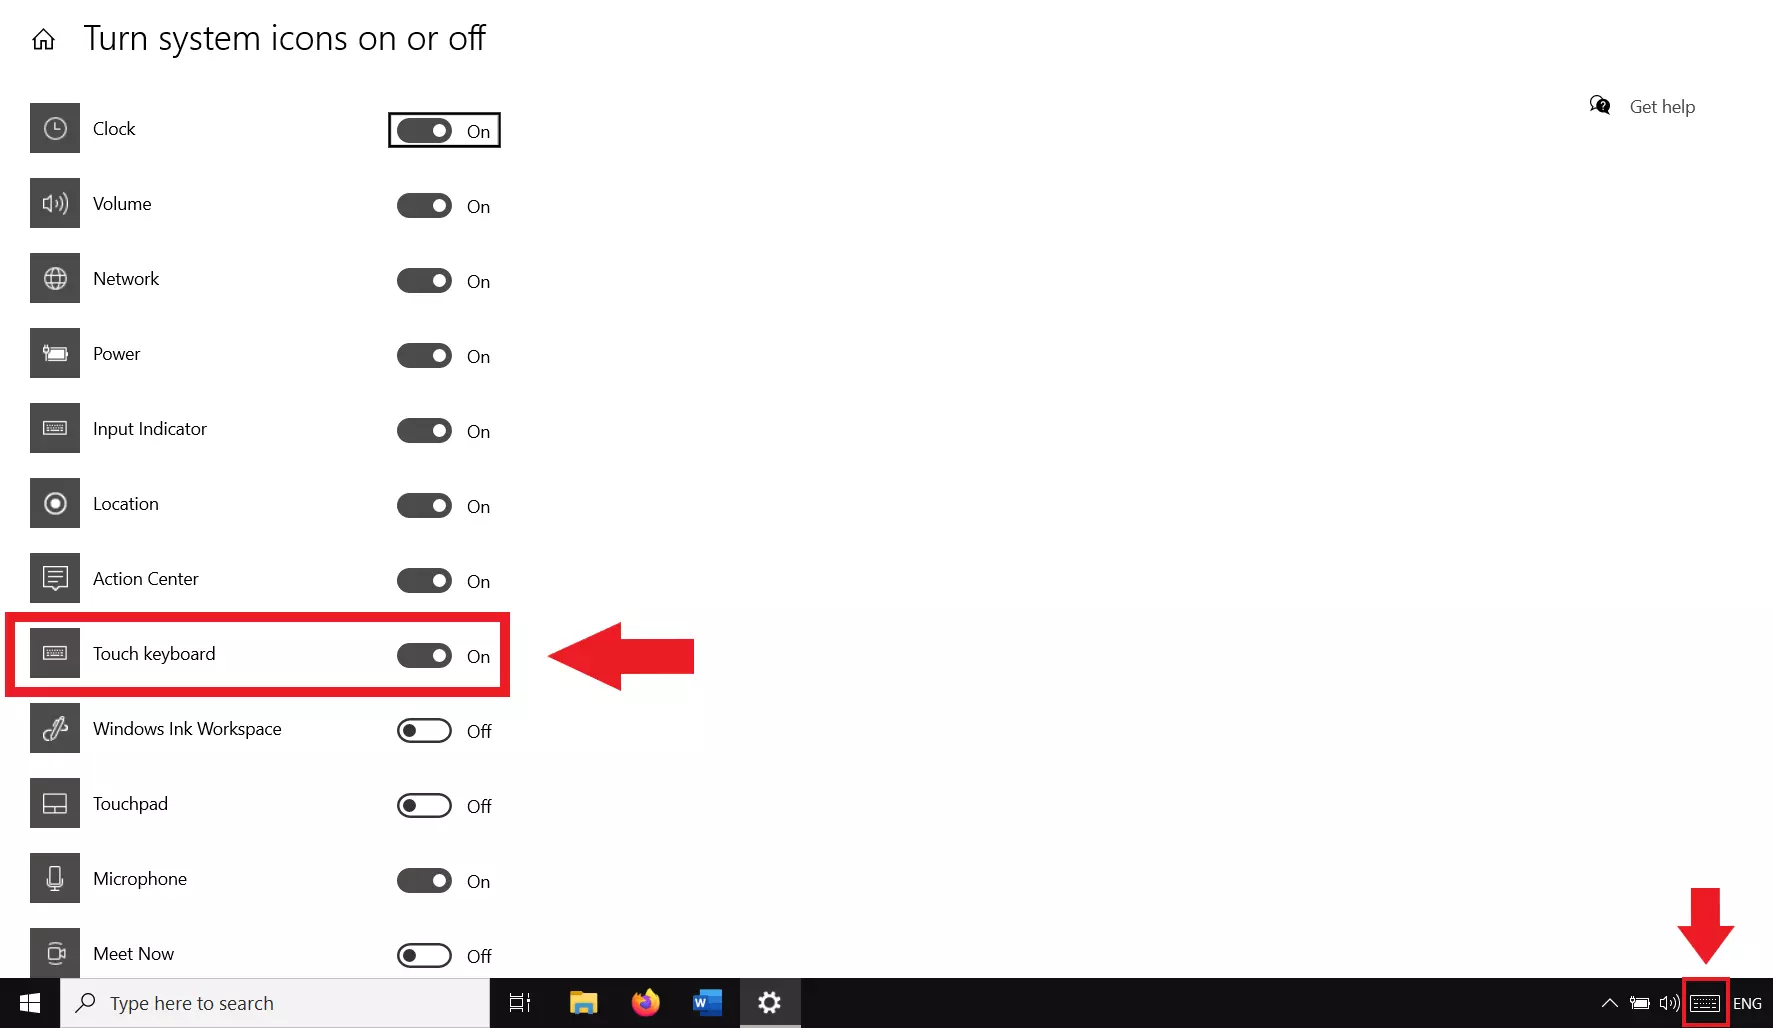
Pin an on-screen keyboard to Windows 10 taskbar
Those who rely on the visual on-screen keyboard may already have problems with the Windows system. Use IONOS HiDrive cloud storage to make reliable backups of your data in time and prevent data loss.


