How to downgrade Windows 11 to 10
If you’re not a fan of Windows 11, you can return to Windows 10 for up to 60 days after upgrading. Downgrading from Windows 11 can be initiated from within the settings of the Microsoft system. However, when you want to downgrade after the trial period has ended, you’ll need to reset Windows 11 by reinstalling the previous version.
- Simple registration
- Premium TLDs at great prices
- 24/7 personal consultant included
- Free privacy protection for eligible domains
Windows 11 downgrade: quick guide
Downgrading from Windows 11 to 10 is simple:
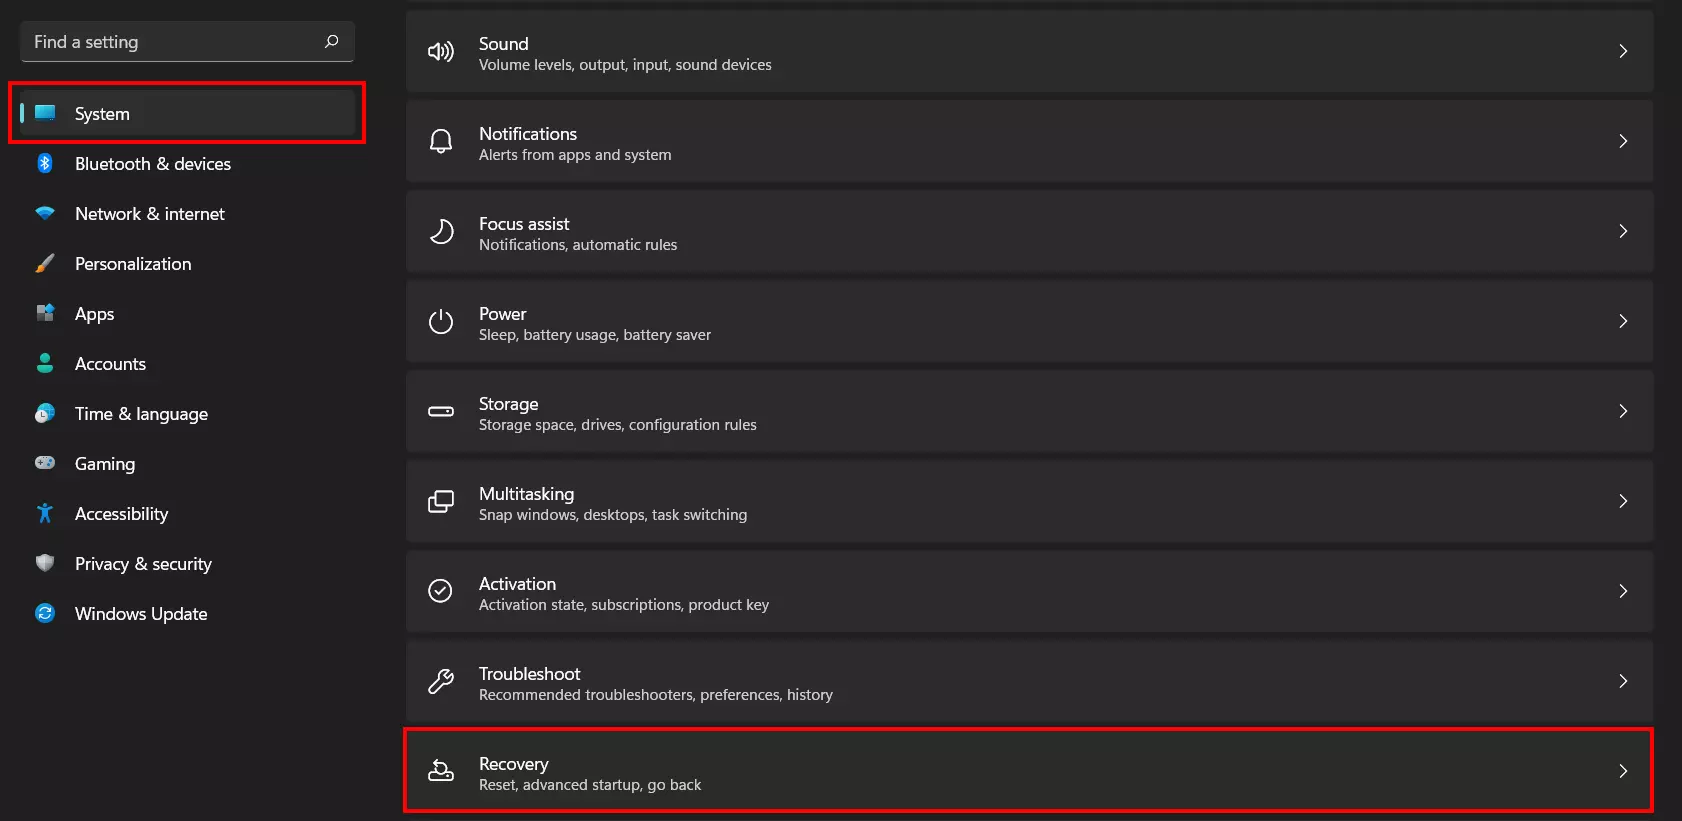
- Launch Settings via the Start menu or use the key combination [Windows] + [i].
- Select the “Recovery” option in the “System” section.
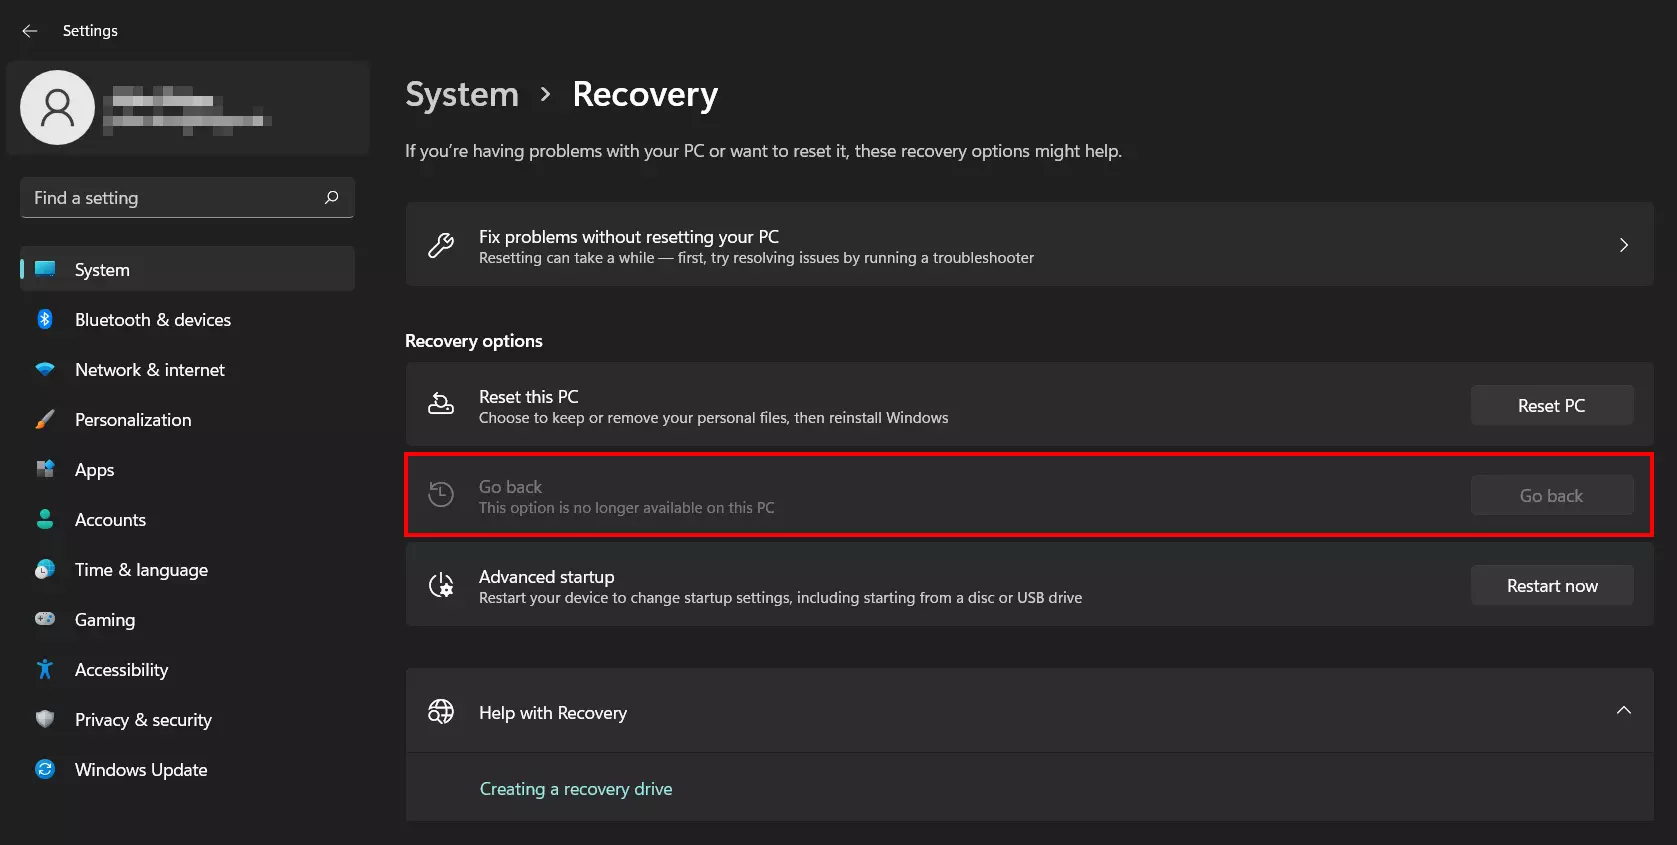
- Click “Go back” in the category of the same name.
- Enter the reason for uninstalling Windows 11 and return to Windows 10. Click “Next”.
- Confirm your entry to begin the Windows 11 downgrade.
If “Back” (step 3) is grayed out, the recovery function is no longer available for your device. This is usually because a trial period has expired or you’ve deleted the Windows.old folder. A downgrade is not possible if you performed a fresh installation of Windows 11 (i.e. without installing older Windows versions beforehand).
Here’s what to do before downgrading Windows 11
If you’re no longer using Windows 11 and wish to return to Windows 10, there’s not much to consider. Though the recovery feature makes it easy to downgrade while not affecting your system files, you shouldn’t leave anything to chance. Before downgrading, perform a Windows 11 backup and save your most important data to an external drive. This step is even more important if you are reinstalling Windows 10.
In both cases, be sure to use the option to find the Windows 11 key. In this way, you’ll have the product key to hand at all times, should it be requested during the new installation or during the downgrade.
Step by step guide to uninstalling Windows 11
Downgrading from Windows 11 to 10 is the simplest option to return to Windows 10. As mentioned, this option won’t be available if you have freshly installed Windows 11, the trial period has expired or the Windows.old folder has been deleted.
The most important steps for a Windows 11 downgrade are:
Step 1: Extending the trial period for Windows 11 downgrade
Returning to Windows 10 is possible within the first 10 days after installing Windows 11 (upgrade) by default. But if you have administrator privileges, you can extend the trial period up to 60 days. Extending the deadline is a good option when you’re unsure whether you want to uninstall Windows 11.
- Call up the search function via the magnifying glass icon in the taskbar.
- Type “cmd”.
- Click on the “Run as administrator” button when the “Command prompt” is displayed.
- Execute the command “DISM /Online /Set-OSUninstallWindow /Value:60”.
Step 2: Access recovery menu
Step 3: Downgrade from Windows 11 to 10
In the recovery options, click the “Go back” button, which you can locate beneath the entry of the same name. Now, specify the reason for your downgrade. Simply follow the instructions to uninstall Windows 11 and return to Windows 10.
Uninstall Windows 11: new installation of Windows 10
If this is the case, you can uninstall Windows 11 by performing a complete reinstallation of Windows 10. Proceed as follows:
- Go to the official Microsoft download page for Windows 10.
- Click “Download tool now” and save the file to your device.
- Launch the MediaCreationTool by double-clicking it.
- Accept the licensing conditions.
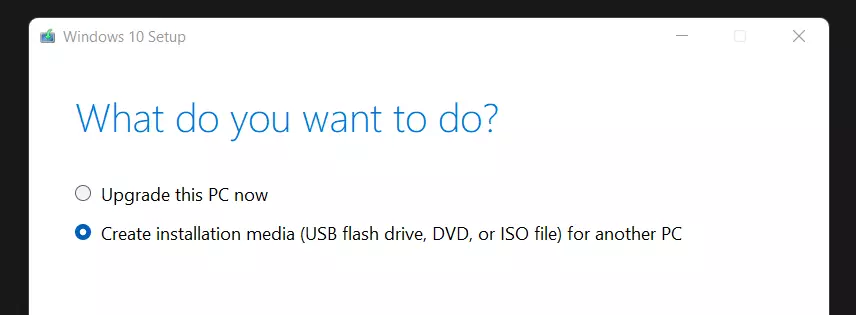
- Select the option “Create installation media” and press “Next”.
- Select the desired system language and Windows 10 edition as well as the appropriate architecture and click “Next” again.
- Now you can transfer the installation files for Windows 10 to a USB stick (required storage space: 8 GB) or create an ISO file for an installation DVD.
Never worked with bootable media before? Read our detailed guide on the topic and learn how to create a bootable USB stick and install Windows from it.


