Windows.old: explanation and instructions for deleting the folder
Anyone who uses Windows and regularly cleans up their system by removing unnecessary data will repeatedly come across folders and files whose functionality and use are unknown to them. It is thus better to leave this data alone when performing a system cleanup and delete other files instead to free up the desired disk space. While you are playing it safe by doing so, this often results in much more memory being used than necessary.
A good example of this is the Windows.old folder, which is often found in the system partition (in addition to the current Windows version folder). In this article, you will learn exactly what this folder is as well as why and how to delete the Windows.old folder.
- Simple registration
- Premium TLDs at great prices
- 24/7 personal consultant included
- Free privacy protection for eligible domains
Windows.old: What exactly is this system folder?
The “Windows.old” folder is a kind of backup copy of an older version of Windows. It contains the various files and settings from the previous installation of the Microsoft system which are necessary to restore the old version. Normally, Windows.old is automatically deleted after a specified period (ten days), but in practice this does not always happen leaving the folder, which is often several gigabytes in size, on the system partition alongside the current Windows folder.
You might encounter such a scenario when you perform a new Windows installation on a hard drive where Windows (the same or a different version) is already installed. In this case, the Windows.old folder is often generated but not always automatically deleted by the Disk Cleanup tool. In some cases, the backup folder will remain on the system after the specified storage period has passed following a system upgrade (e.g. from Windows 8 to Windows 10) or a Windows version update.
In many cases, the Windows.old folder stores more than just system-relevant data. It also stores data from third-party applications which is the main reason why the folder is often so large and is excluded by the Disk Cleanup tool.
How to delete Windows.old
If you were successful when switching to a new or alternative version of Windows a while back and you are satisfied with the system, you can confidently delete the Windows.old folder in the event that it can still be found on your hard drive after the new installation or upgrade/update.
Before deleting Windows.old, you should look at your system folder again! Check whether there are any personal files there that you may still need but have only saved in this location.
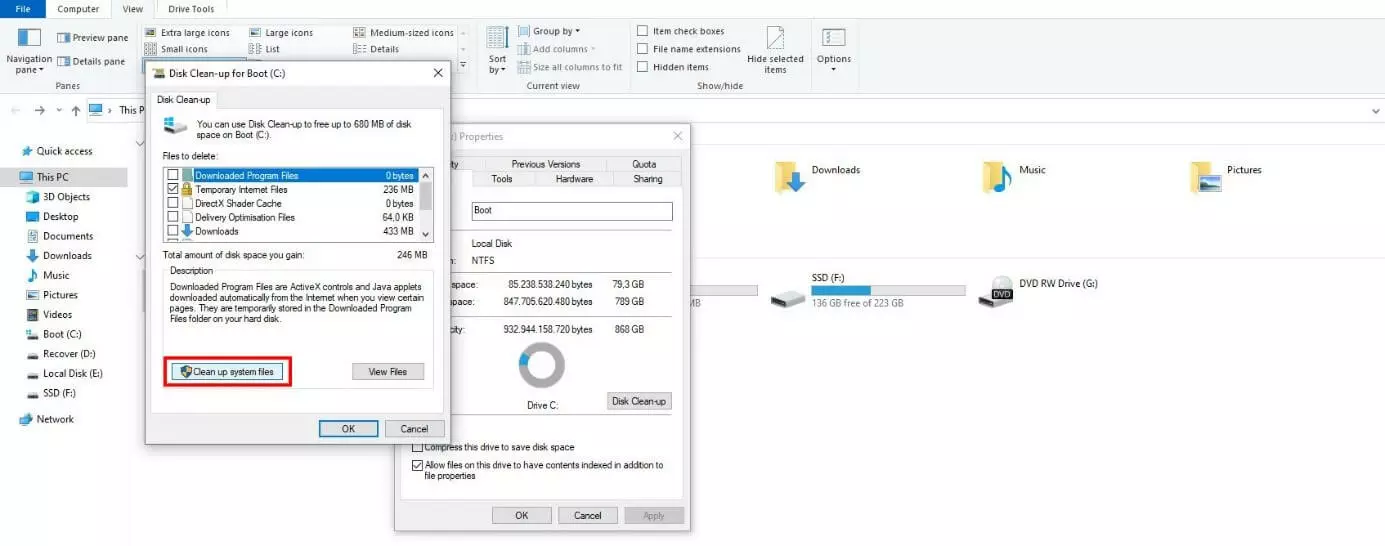
As with all system-relevant files in Windows, you cannot easily delete Windows.old as you normally would other files. To do this, you'll need the Disk Cleanup tool mentioned earlier which is the tool that performs the deletion process automatically. When the automatic clean-up process does not work, you will need to perform the action manually using the following steps:
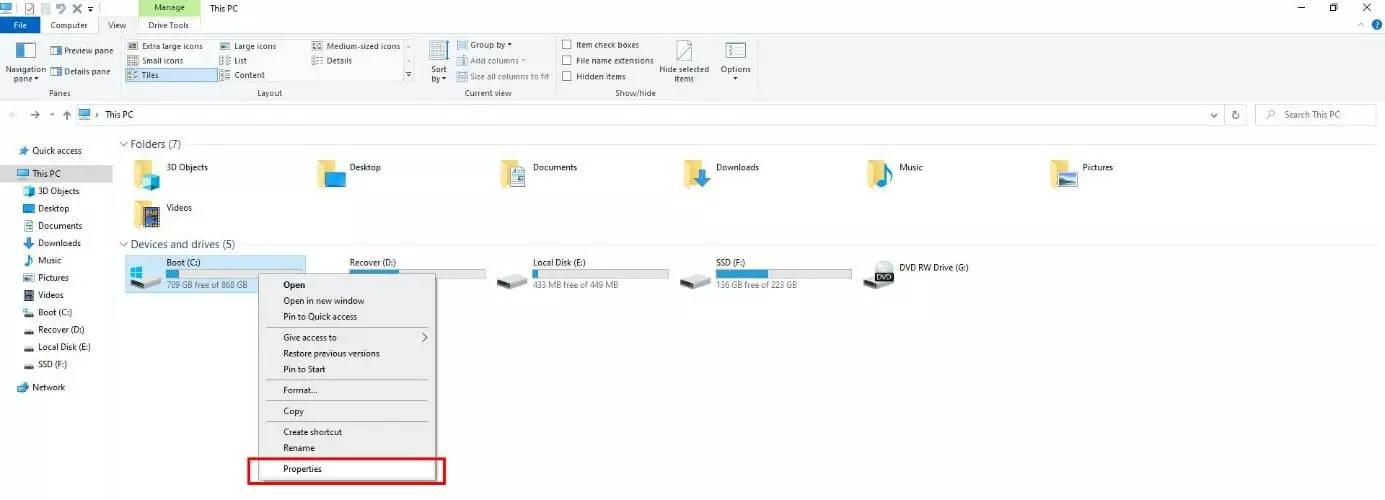
Step 1: Open the file explorer via the Windows Start menu or the keyboard shortcut [Windows] key + [E]. Then, click on the icon labeled “This PC”. Next, right-click on the drive containing Windows or the Windows.old folder and select “Properties” from the menu:
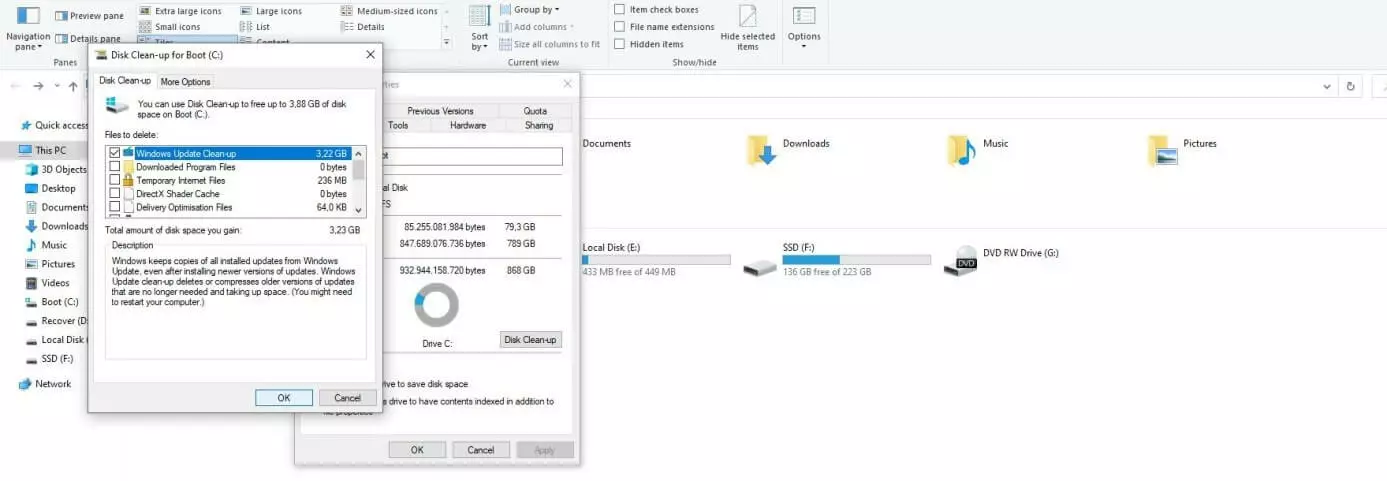
Step 4: Windows will display a list of system files that you can delete using Disk Cleanup. Check the box next to “Windows Update Cleanup” and confirm your selection by clicking the “OK” button. This will delete all data related to previous Windows updates or versions, including the Windows.old folder. This process may take some time.
Deleting Windows.old in Windows 10: how it works in newer versions
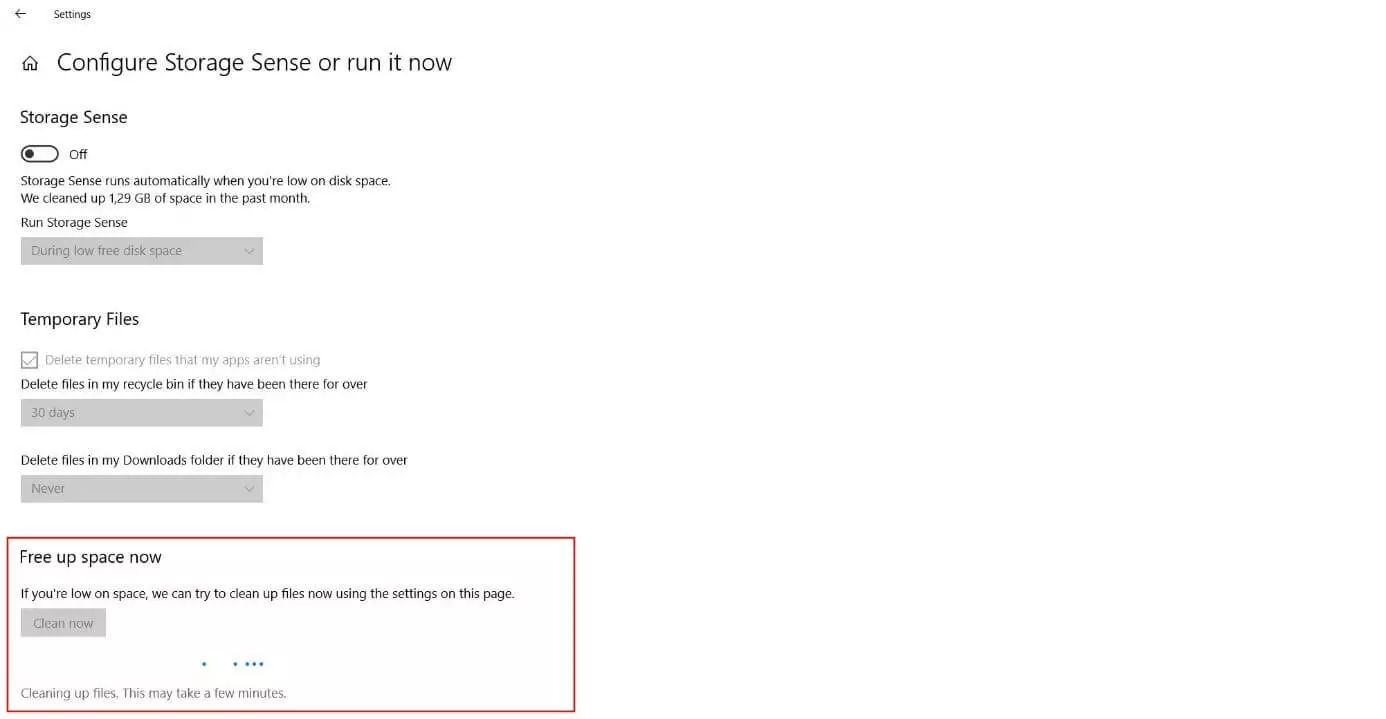
In Windows 10, Microsoft completely overhauled many of the system’s older structures and grouped together several features and functions in the “Settings” section. While this is generally very practical, it also means that the Disk Cleanup tool cannot always display or find outdated Windows files. If you find this to be the case, you can try to delete the Windows.old folder via that same "Settings" menu.
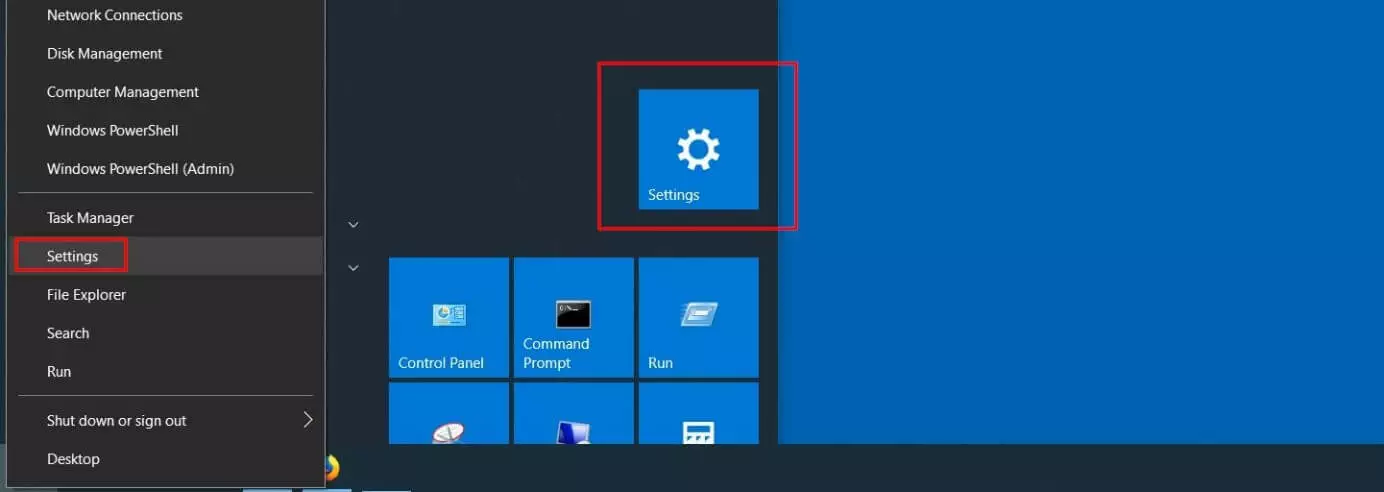
Step 1: Access the Windows 10 settings by opening the Start menu and clicking on the “Settings” tile (gear icon). Alternatively, you can select the Windows icon (Start menu) by right-clicking and selecting "Settings" from the menu:
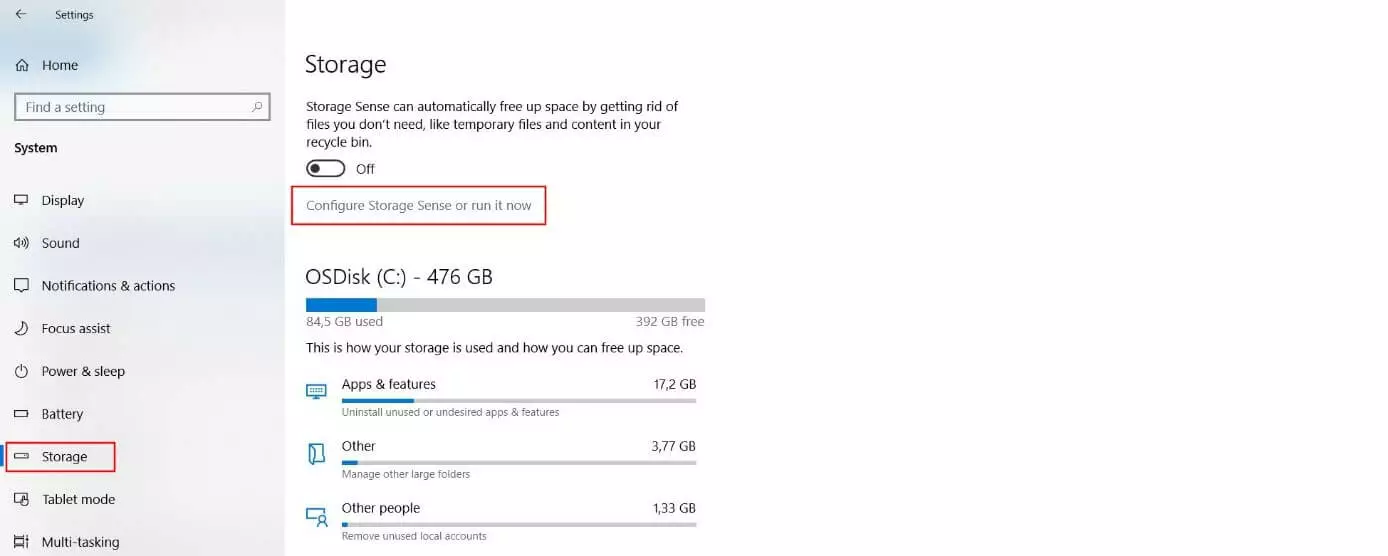
Step 3: From the menu located on the left-hand side of the page, select “Storage”. Then, click on the link labeled “Configure Storage Sense or run it now”:
Is Windows.old a practical solution as a long-term backup?
Windows can save the Windows.old backup folder for up to ten days or a whole month for the purpose of restoring the system to its previous state before the folder is automatically deleted. It could technically be used as a backup to restore the system later after the defined period has passed if the folder has been left on the hard disk or if you also backed it up to an external storage device. However, this rarely works in practice since Windows automatically disables the usual system restore process that uses the Windows.old data. Furthermore, the included system files and settings, which take up a lot of disk space for a backup, quickly become obsolete.
If you want to have a long-term back-up solution after a successful system update or upgrade, we recommend using the built-in “restore points” in Windows instead. These system images are much more reliable for the purpose of restoring Windows and take up much less disk space than the Windows.old folder.


