How to Back Up a Mac
Losing data is not only frustrating, it can become really expensive in the worst case scenario. In order to secure data effectively, users of technical devices can create regular backups. Apple devices like iPhones and MacBooks also allow backups – protecting important data such as documents, photos, and videos from loss. In an emergency, this data can be seamlessly recovered thanks to practical backup copies. If a Mac has to be sent in for repairs, creating a backup is an essential preparation step since some repairs make it necessary to erase the hard drive.
Find out in the following sections what options are available for creating a backup of your Mac and how data backups work in individual cases.
Data backups on Mac devices: available options
If you’ve lost your Mac device, the hard drive is broken or data is accidentally lost, the initial frustration can be overwhelming. But if you’ve created a backup solution that saves your data at regular intervals, the lost data can be recovered in just a few clicks. To create a Mac backup, Apple provides a range of options as standard that you can choose from:
- macOS backup software Time Machine (available since macOS 10.5)
- Manual backups for your Mac data
- Cloud-based Mac backups in the iCloud
Alternatively, you can also use a third-party solution (desktop or cloud variant) for backing up MacBooks and other devices.
Mac backups: preparations
If you decide to back up to the cloud, you’ll only require your login information to get set up and run backups. As a prerequisite, you’ll need to have an account with the respective service. In the case of the iCloud, you enter your Apple ID that you also use for signing into iTunes and similar services.
For manual backups with a desktop program like Time Machine or a third-party provider, you will have to have an external storage medium. An external hard drive with a USB or Thunderbolt interface is ideally suited to this. SSD drives are recommended that are not only robust and resistant to shocks and falls, but also offer higher performance than conventional HDD drives.
To be best prepared, you should ascertain the approximate storage size of the files to be saved: If you only wish to back up individual folders manually, you can view the size in the properties. For complete backups – as is the case with a Time Machine backup – the external storage medium should have at least twice as much memory capacity as your Mac device.
Time Machine backups: a step-by-step guide
The standard program Time Machine probably offers the easiest way to save and recover data and settings for your Mac. Time Machine has been part of the macOS operating system since version 10.5 and comes pre-installed on Mac devices. To get your Mac ready for a Time Machine backup, you’ll only need an external storage medium. Read on to find out how data backups with this software work.
Time Machine – setup and use for backing up MacBooks
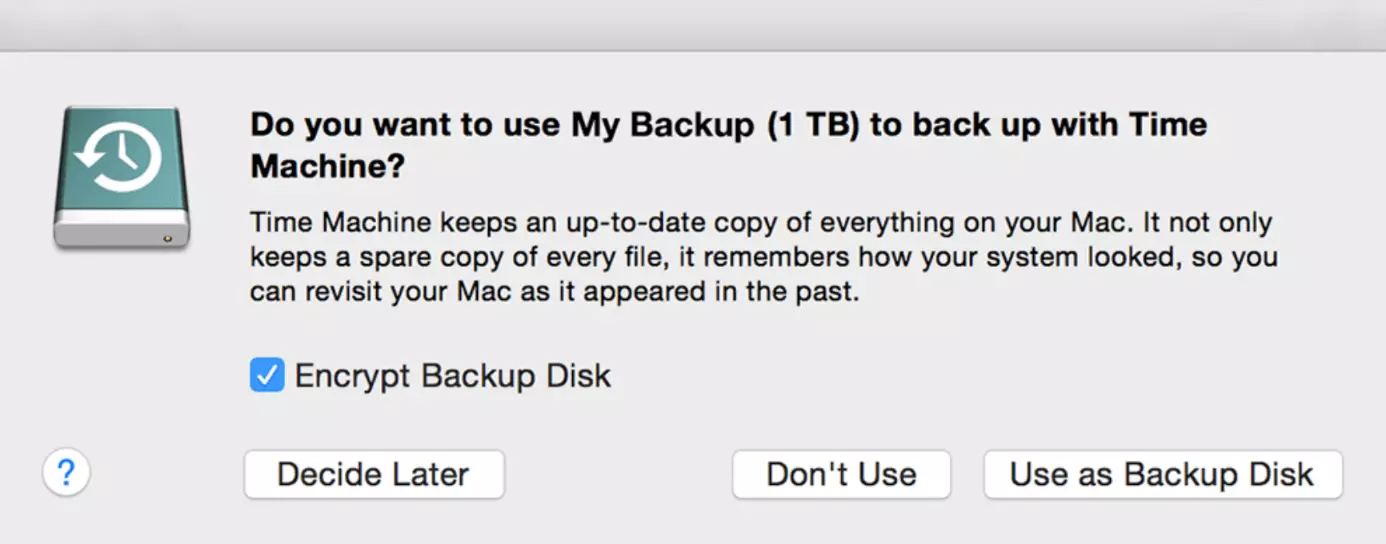
In order to start the backup process with Time Machine, you should first connect an external storage medium with enough free memory to your Mac device. A dialog window will then automatically open, where you can confirm the connected storage medium as the “backup disk”.
If the dialog doesn’t automatically open for you, you can select the hard drive manually as the storage medium for the Time Machine backup:
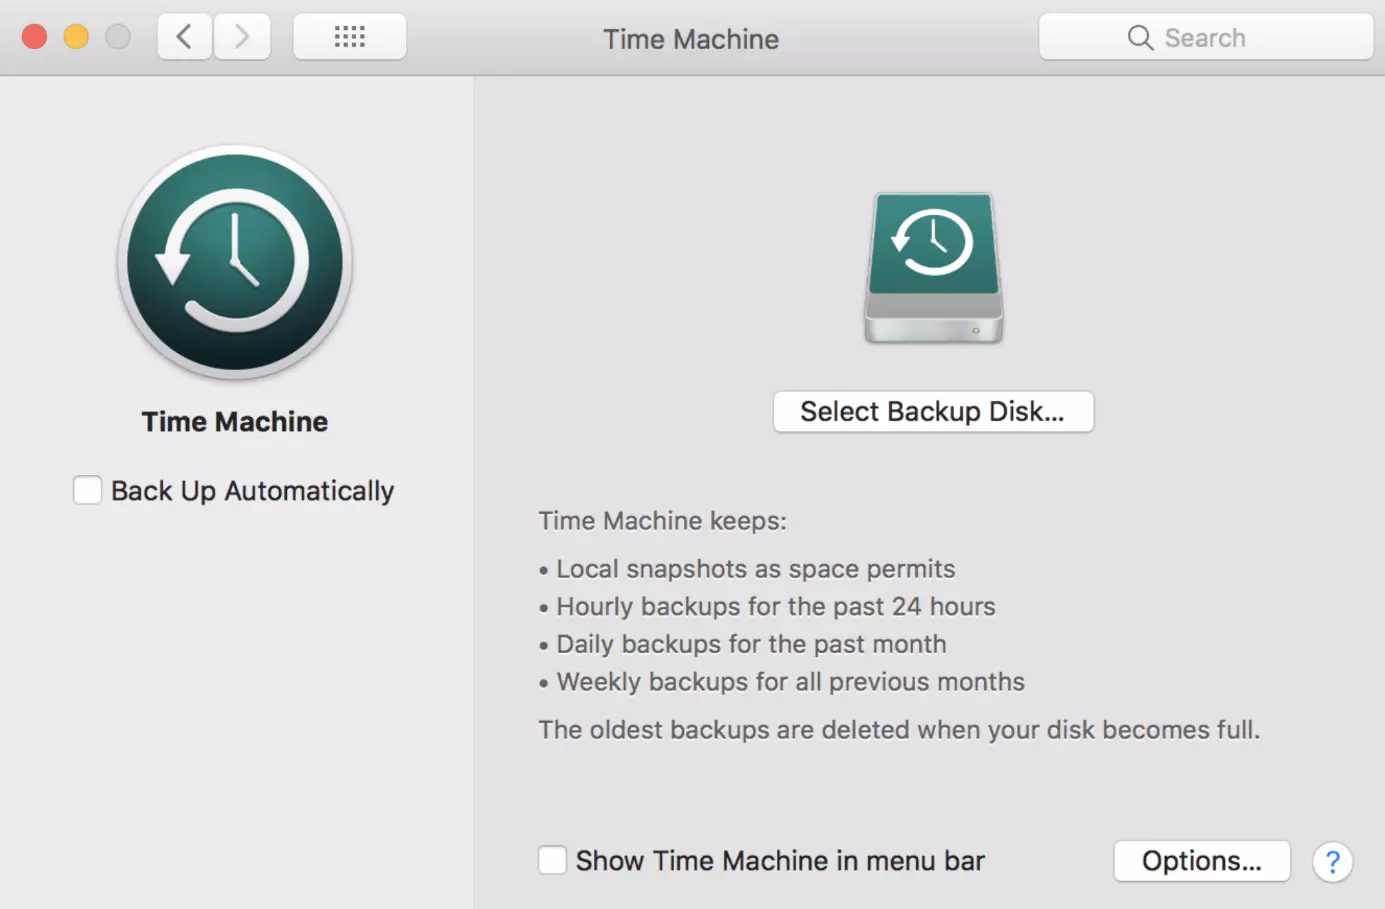
- Start Time Machine via the Apple menu by selecting “System Settings” and then “Time Machine”.
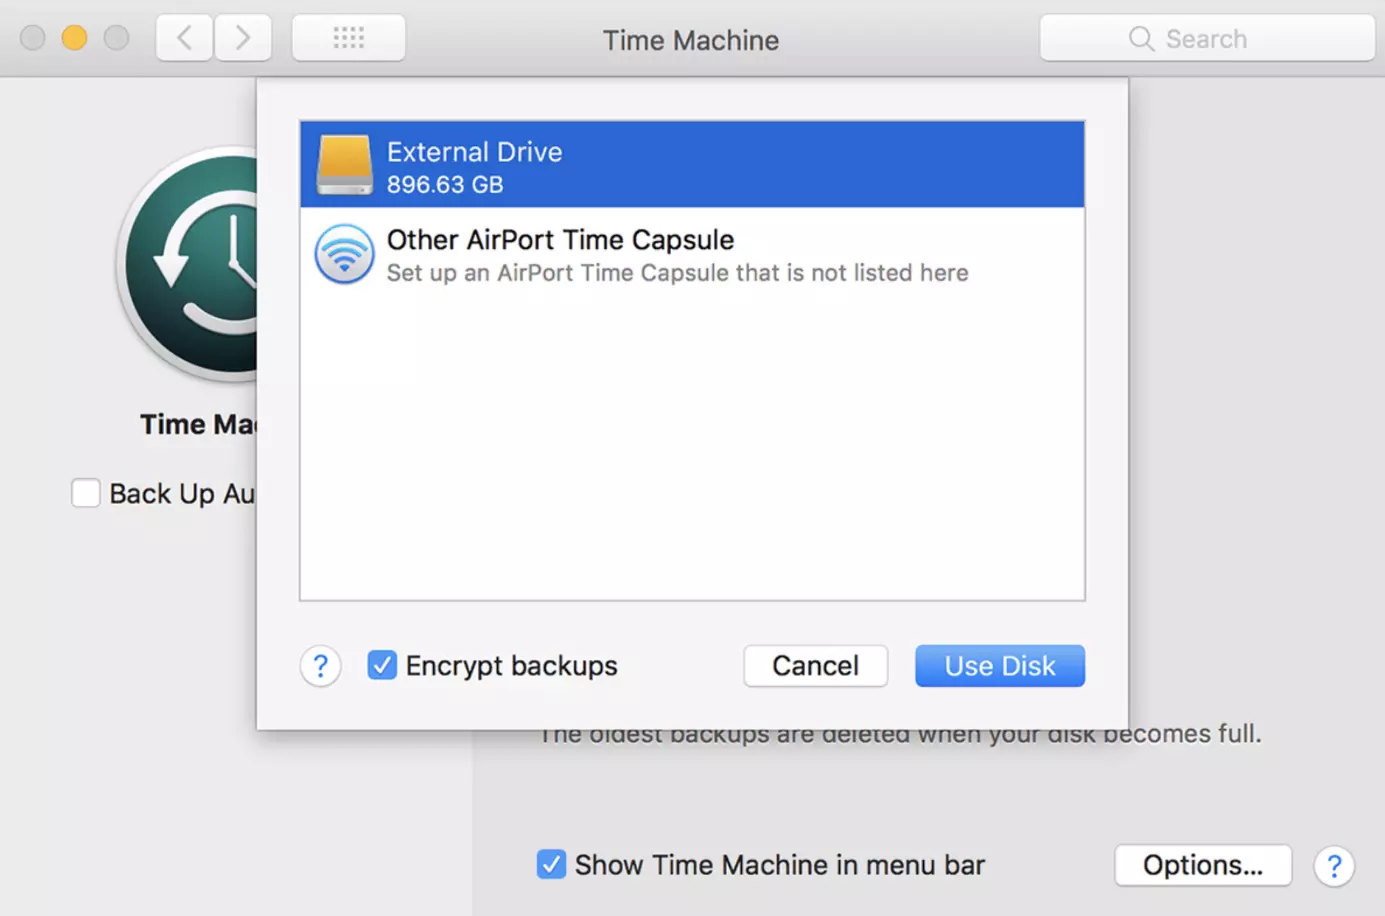
- Press the button “Select Backup Disk”.
- Now select your external hard drive and activate the checkbox “Encrypt Backup Disk” if you also want to protect your Mac backup with encryption. Then click “Use as Backup Disk”.
Once setup is completed, your Mac device should immediately get started creating a backup. The first backup typically takes a little longer, but your computer can still be used without any restrictions.
To activate regular automatic backups for your Mac with Time Machine, you’ll need to activate the checkbox “Automatic Backup” in the settings menu of the backup program.
Time Machine alternatives: third-party programs
Besides Time Machine, there’s a whole range of other programs from third-party providers that allow you to run Mac backups. One good but paid alternative is the program Carbon Copy Cloner, for example. The software developed in the USA always creates a one-to-one copy of your Mac, which is why the storage requirements are never greater than the actual memory occupied by your internal hard drive. In comparison, Time Machine saves more and more versions of your data, which typically takes up more storage space.
Creating a cloud-based Mac backup – how it works
Cloud-based storage services also offer a way to create Mac backups. Here, the data isn’t stored on an external storage medium, but on a server in a data center operated by the respective provider. For Apple devices, the native service iCloud is available for this purpose; it has the advantage that it’s very well integrated in macOS and iOS.
But you can also use other cloud solutions like Google Drive, OneDrive, or the HiDrive cloud storage offered by IONOS in order to save your Mac data backups in the cloud.
The general advantage of cloud-based storage services is that the data can be accessed from anywhere. What’s more, data can easily be synchronized across different devices:
- Store, share, and edit data easily
- Backed up and highly secure
- Sync with all devices
How to back up Macs to iCloud: a step-by-step guide
To set up iCloud or iCloud Drive on a Mac device and use it for regular backups, simply follow the steps below:
- Open the “System Settings” via the Apple menu.
- Select “iCloud” in the left column and sign into the cloud service with your Apple ID.
- Select “iCloud Drive” and click on the “Options” button.
- Place a checkmark for “Desk” and “Documents”.
- Next, confirm your selection with “Finish”.
Since only the folders “Desk” and “Documents” can be selected, a cloud-based backup will be created for them, but not for the “Download” folder for example.
Do it yourself: how to create a manual Mac backup
Another way to save a copy of photos, videos, documents, and other files is to copy the data directly onto an external storage medium. Simply connect the desired storage medium to your Mac and select all the data or folders in Finder that you’d like to back up. You can then duplicate them to your external storage medium using copy and paste. This method is especially suitable when you only want to backup individual folders or files.
Keep in mind that you are responsible for regularly updating the backed-up files yourself when you choose the manual backup approach. So if you make changes to the original files, you’ll also need to carry them over to your manual backup if you want them to remain up to date.


