Google Tag Manager: the hub for your tracking and testing snippets
If you include external services in your web project to measure its success or the number of advertising campaigns launched, you usually need to juggle a large number of snippet codes. In addition to a certain know-how in programming, this requires a high degree of oversight. Without the ability to directly access the code base, you would always need to contact the responsible programmer to implement new analytics and tracking services. In an effort to counter this, Google published the Google Tag Manager a few years ago, which simplifies the integration of different codes considerably.
What is Google Tag Manager?
In October 2012, Google released the Google Tag Manager (GTM) as its in-house management system for the integration and management of JavaScript - and HTML - tags. While the first version was primarily designed for Google’s Analytics, AdWords, and DoubleClick solutions, version 2 (2014) of the Tag Manager has been supporting an ever-increasing number of third-party tags, especially with the release of the official API. Google Tag Manager is not limited to just implementing analysis and conversion tool: remarketing and affiliate tags as well as snippets from testing tools, such as AB Tasty or Mouseflow (heat mapping tool), can be implemented into a web project (website or mobile app) using the software.
For a list of officially supported tags, visit the Google Support Forum.
How exactly does the Google Tag Manager work?
When using Google Tag Manager, you cannot completely avoid interacting with the source code. However, unlike snippet integration without the Tag Manager, you only need to interact with the HTML framework once. To start, insert the container snippet in the form of two small code sections in the header and body area. All the other implementations are done in the terminal via the Google Tag Manager interface. The container snippet acts as a central place from which all tags that you configure through the browser are collected. Later changes to a snippet can be made directly in the Tag Manager. Should you no longer need a tag, simply delete it from the container.
Tags, triggers, and variables: the core components of Google Tag Manager
To ensure the container snippet detects the desired user interactions and information, and that it is then forwarded to the respective service, you must ensure that you create the correct tags and triggers in Google Tag Manager. Variables can be used to specify both these basic elements of the Google tools. For all three components, there are precast templates – you can also adjust these to your needs in the settings. The exact functions of the tag, trigger, and variable are shown in the following short briefs.
Tags
Tags are the central controlling units of the Google Tag Manager. They determine what information is sent to which services and are in code form. In principle, tags are nothing more than the snippets you would include in the HTML code. In addition to the standard tags, there are special JavaScript tags that do not serve to pass information but trigger additional tags. However, the Google Tag Manager generally loads all tags contained within a container independently of each other and in parallel to the other elements of the web project. Through an intelligent caching mechanism, the number of requests that the webserver must deal with is optimized.
With the tag blacklist you can also define tags or tag types that your website or app should never include.
Trigger
Triggers let you define the requirements under which a specific tag is used in Google Tag Manager. Specifically, it is about which user actions or events lead to a code being performed – and so "triggering" it. These can be, for example, simple page views, loaded windows or the appearance of error messages, but also active clicks of visitors to a particular button. You can, of course, also fill out a form, sign up to a newsletter, or watch a video as a tag trigger. It is possible to use the same trigger for multiple tags.
Variables
If you want to change the settings for defined tags and triggers, you can use the Tag Manager variables. For tags, variables provide the ability to capture dynamic values. If, for example, information such as the handover of the transaction or the handover of the purchased products is to be tracked in an online shop, variables can be regulated. Triggers behave in a similar way - variables are used to specify the triggers: while you only use a trigger to define that a tag should be executed when a page impression occurs, you can use a variable to specify which page(s) or URL(s) should be involved.
Snippets implemented with Google Tag Manager – the benefits
The Google Tag Manager operates on a diverse base of areas for every event, working with integrated tracking and analysis tools. We have collected the advantages of this Google software:
- Intermediate storage of tags minimizes server requirements and reduces the loading time of web projects.
- General streamlining of source codes
- Simple, convenient integration and management of tags using a dedicated web interface after one direct interaction with the source code
- Permanent blocking of undesired snippets and snippet types enhances the security standards of your website/app.
- Diverse ready-to-use templates for tags, variables, and triggers available
- Automatic verification of tags in the preview and debugging modes
- Recording of all tag activities, such as changes to the Google Tag Manager account settings
Tutorial: using Google Tag Manager for your own web project
How can Google’s Tag Manager be used for your own website or app? Since the Tag Manager is web-based, no installation is necessary and you can access the interface via any standard browser. Also, there are no costs involved to use the tool, so in principle you can start immediately. Indeed, the only requirement is a valid Google account. If you already use services such as AdWords, Gmail, or Google Drive, you already have an account - otherwise you will need to create an account to access Google Tag Manager.
Step 1: set up a Google Tag Manager account
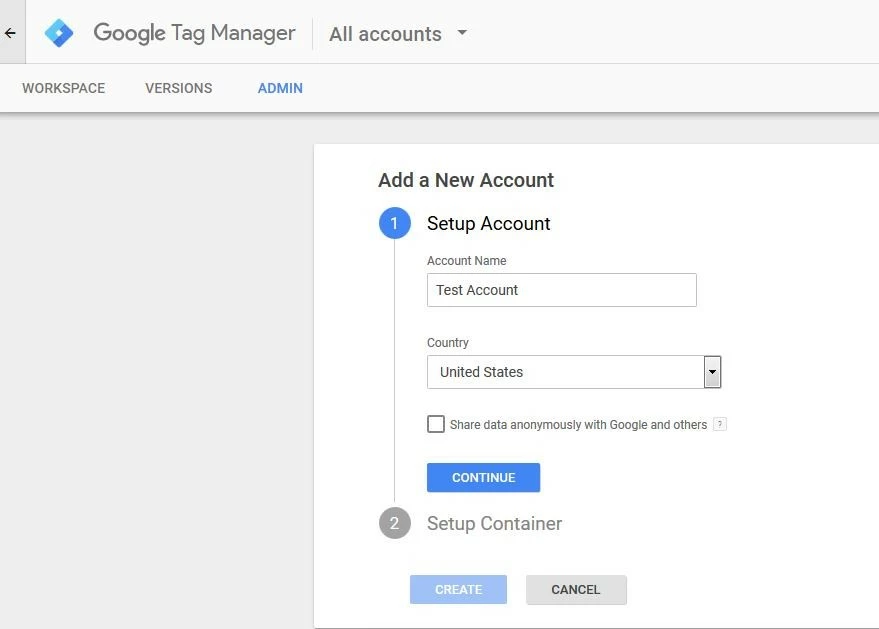
Go to the Tag Manager from Google homepage and log in with your Google account to begin setting up. A new menu will open automatically, through which you can add your Tag Manager account. Enter your desired account name and country of residence. Click the “Continue” button to confirm the data entered.
Step 2: container setup
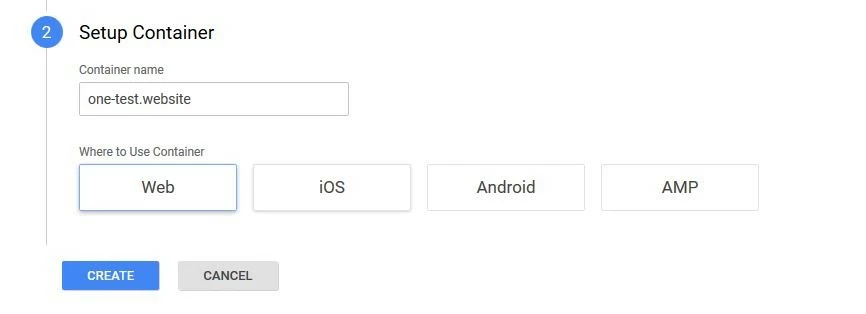
The next step is to set up the container in which you will later insert the snippets of your choice. Choose a name for it - for a website it is sensible to use the URL, especially if you plan on managing multiple different projects (each with their own containers) through your Tag Manager account. To complete the container creation, specify the type of project (default website, AMP, or app) and click “Create.”
Step 3: integrate the Google Tag Manager container snippet
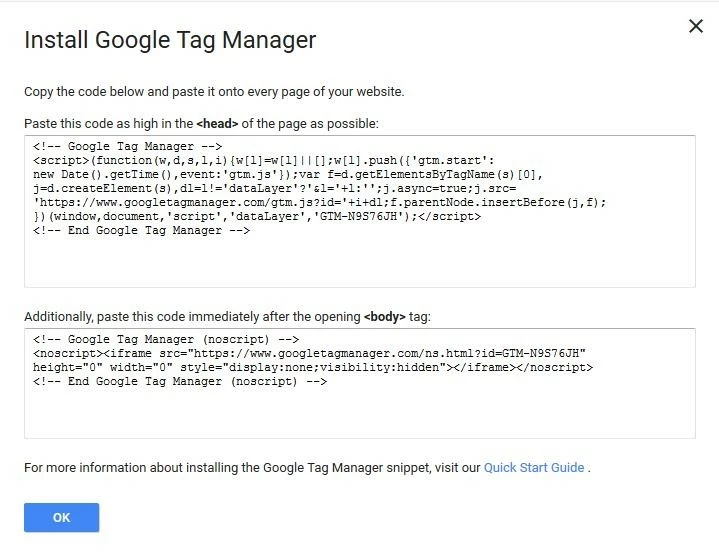
It takes a brief moment for the Google tool to generate the container. If the setup was successful, the Tag Manager will present the two-parts of the container snippet. The first part of the code you then copy and paste into the header of your page, and the latter you should put in the body area of the desired HTML document (directly after the opening body tag). This ensures the snippet will be loaded as early as possible, and the most accurate measurement data is delivered.
The Google Tag Manager code can be viewed at any time after. To do so, simply go to the tab “Manage” and click on “Google Tag Manager install.”
Step 4: adding tags
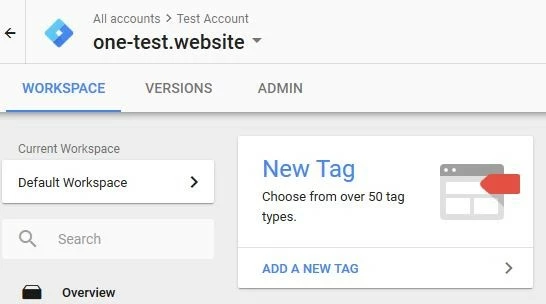
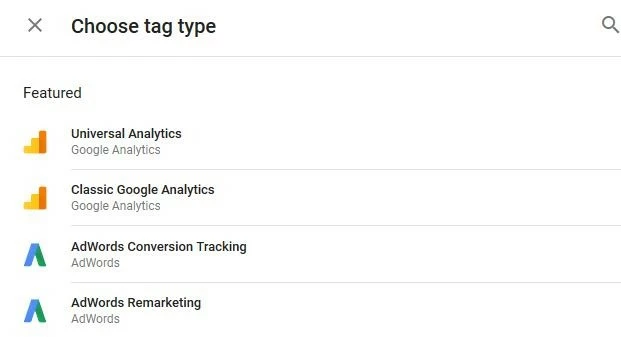
Once you have integrated the Tag Manager code, you can begin filling the container. The first step is to create tags to implement the actual tracking and analysis codes in your website or app. We will use the well-known Google Analytics as an example. Simply find your work area via the tab of the same name and select “new tab” or “add new tab.”
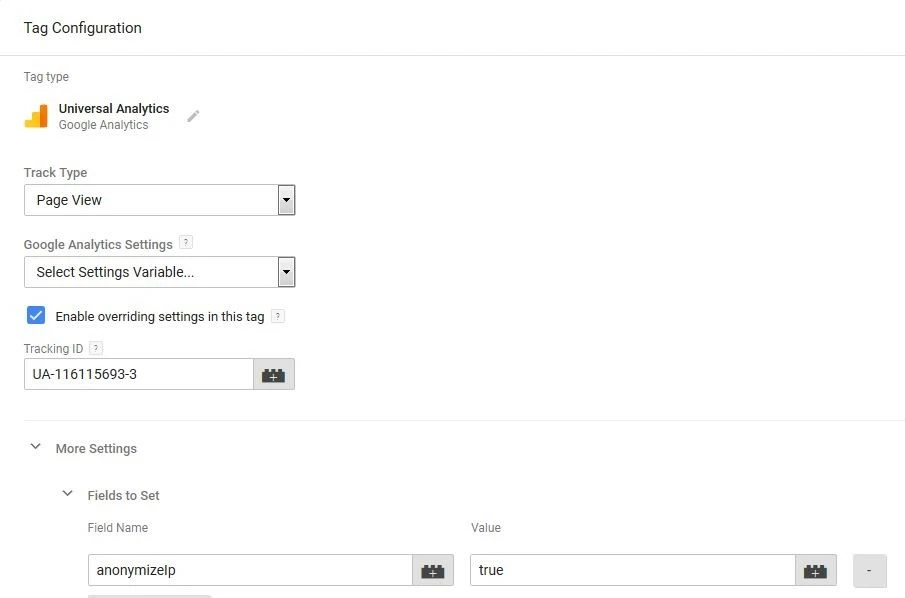
Determine what analytics should be tracked (in this tutorial: page view) and check the option “Enable overriding settings in this tag” (required if there is no variable added). You can then enter the analytics tracking ID in the corresponding field. To use Google Analytics in accordance with data protection laws, add the field name "anonymizeIp" under "More Settings" -> “Fields to set” and set the value to "true." As a result, the IP addresses recorded by your web server are forwarded anonymously to Google.
Save the new Google Analytics tag on the same-named button and in the pop-up window “Save tag.” You can then takeover the suggested tag names.
Step 5: add trigger
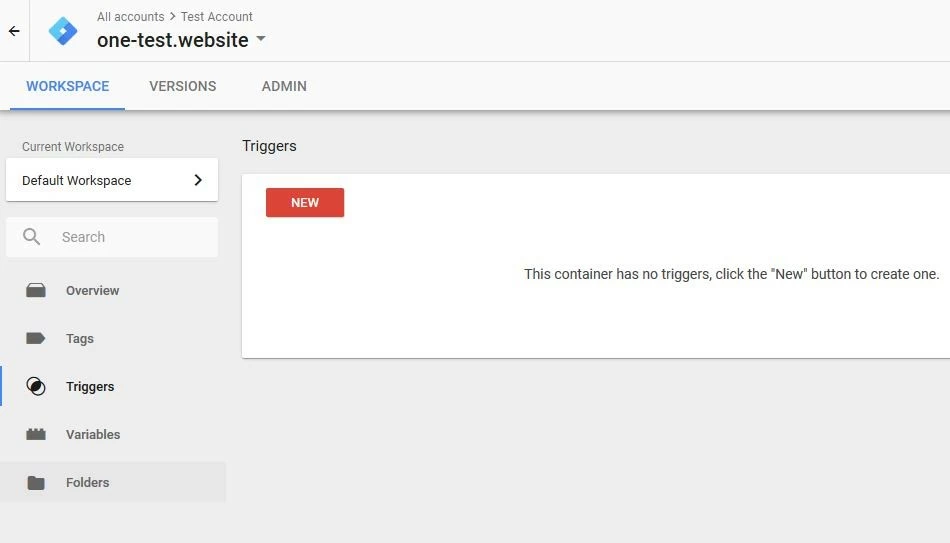
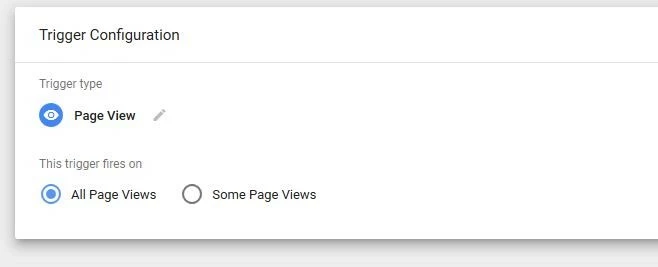
Click on the “Trigger configuration” field to get an overview of the available trigger types. Look for your desired trigger and click on the corresponding entry. If you have a trigger event for which no template exists, select “Custom Event.” In this Google Tag Manager tutorial, we will take the trigger “Page View” that was used as the tracking target in the previous step. This type can also be set to apply to all or only specific cues.
Press “Save” and choose an appropriate name for the new trigger.
Step 6: connect trigger and tag
Step 7: test the functionality of the tags
Google Tag Manager gives you the ability to test the functionality of the connected tags and trigger before you make the live change in the snippet container. To do this, click on “see in preview mode.” After a short wait the following message will appear, informing you that the Tag Manager’s preview mode is active.
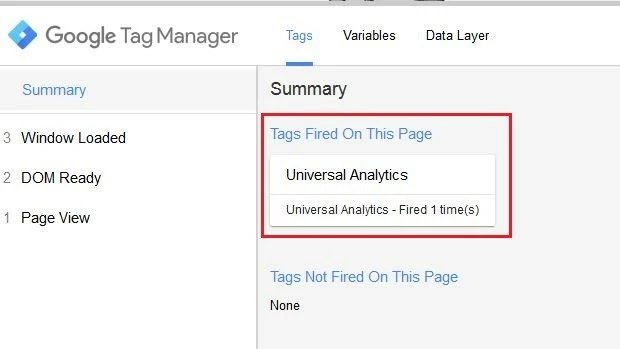
If you have started the preview mode, open your web project in a new tab. At the bottom edge of the screen, Google’s Tag Manager console will open and you will see in the “Summary” section which tags have been executed. Since we have configured it so that Google Analytics should be played directly from the page view in this tutorial, the console lists the tag as “tags fired on this page.”
To test tags or triggers that need specific user-interaction, for example clicking a button, you must first perform the appropriate action.
Step 8: publish container
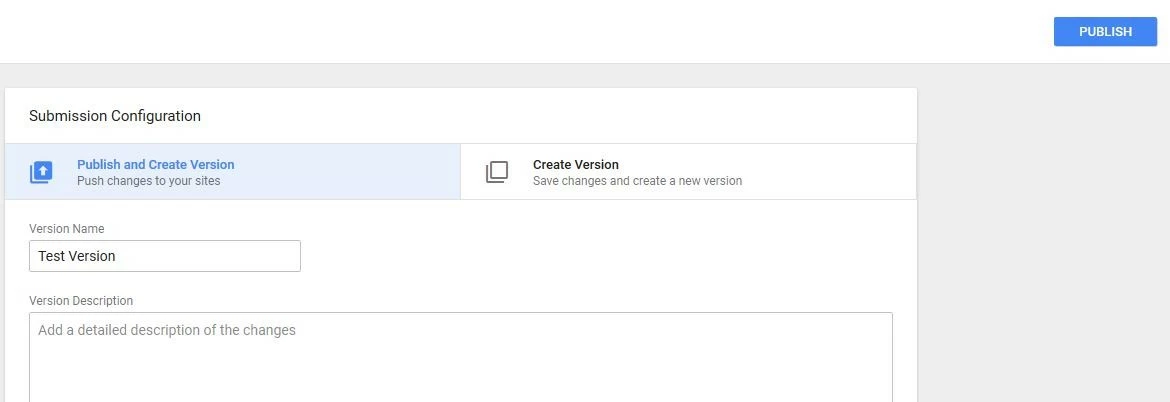
With your container set up as you require, it is time to integrate it into your live web project. This requires creating a new version and publishing it. Click on the “SUBMIT” button, which can be found in the top right-hand corner, select “Publish and Create Version,” and give the container a name and description (optional), which is especially recommended for large tag collections.
Click on “Publish” to complete the live version of your first tag container.


