Track changes in Word
The Track Changes feature in Word gives you an overview of the edits, formatting changes and comments made in a Word document. Tracking changes is particularly helpful when working in a team.
How to track changes in Word quick guide
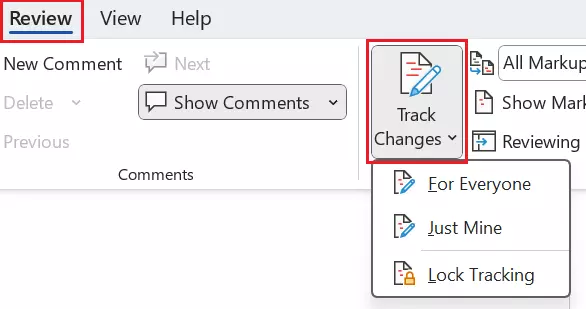
- Go to Review in the menu bar in Word.
- Click on Track Changes to activate the feature.
- You can also change the appearance and markup settings for Word’s tracking feature. You can do so using the different options located next to Track Changes in the Tracking section.
- Store, share, and edit data easily
- Backed up and highly secure
- Sync with all devices
How to enable Track Changes in Word
The instructions shown here apply to Office versions from 2016 onwards and for Microsoft 365.
In Microsoft Word’s main menu, select Track Changes under Review. Then select For Everyone or Just Mine depending on which changes you want to highlight. The tracking mode is now activated, and any changes made to the document will now be documented. How these changes are displayed depends on the settings you choose.

If Track Changes is grayed out in the Word menu bar, someone may have locked the document. In this case, you’ll have to first unlock the Word document before you can make or track changes. To do this, go to File>Info>Protect Document>Restrict Editing. If protection has been set up for the document, you can try to unlock the document. You may, however, need a password to do this.
You can also activate track changes with the Word key combination [Ctrl] + [Shift] + [E].
Standard way to display tracked changes
If you have not made any changes to the display settings, new text will be underlined and displayed in a different color. Additionally, comments with information about formatting changes will appear on the right side of the page.
If you hover the mouse over text that has been added or changed, a comment will appear with detailed information about the changes. Each user receives a different color and changes can be commented on by other users just like with the Word feature for comments.
Alternative ways to display tracked changes
You can adjust various settings to change how tracked changes are displayed. You can choose to have your changes shown in full detail, with reduced detail or not displayed at all.
In the markup section, you can further define how changes are displayed. For example, you can specify whether formatting adjustments or deletions should be considered as changes.
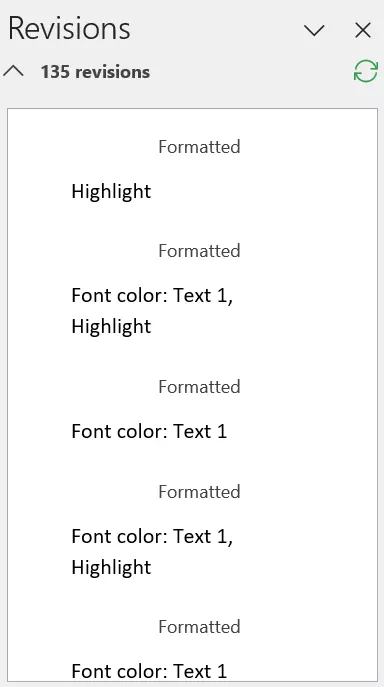
Another display option for viewing changes is with the Reviewing Pane in the Tracking section. The pane will show you what changes were made and who made them but does not include information about when the changes were made. The Reviewing pane is especially handy for quickly seeing whether a document still contains changes that need to be accepted or rejected. At the top of the pane, you can see how many open revisions there are.

The Track Changes feature is not exclusive to Word. You can also track changes in Excel.
How to accept or reject changes
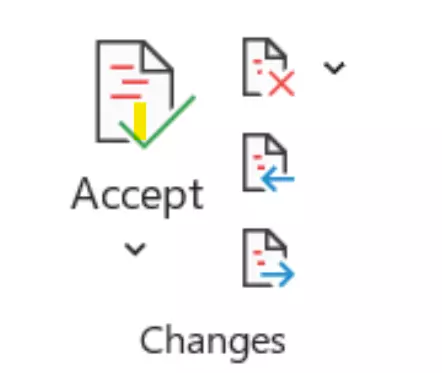
In the Review tab, you’ll find options for accepting or rejecting changes. Use the Next and Back buttons to go through the changes one by one. With the Accept and Reject buttons, you can decide whether to accept or reject a change. Once you’ve made your decision, Word will automatically jump to the next change. Once accepted or rejected, a change will disappear from the list and no longer be displayed as a change in the document.

If you click on the arrow below the Accept or Reject buttons, you’ll find further options for faster editing. For example, you can accept or reject all changes at once.
How to track changes and print in Word
Keep in mind that tracked changes are also displayed when a document is printed. This includes both changes located in the margin and in the text. If you do not want them to appear in the printed document, you have two options:
-
Open the File tab and select the Print option. Under Settings, select the button Print All Pages. At the bottom, you’ll find Print Markup. If you remove the checkmark next to this, the document will be printed with the changes intact but without them being highlighted as changes. You can check the print preview to make sure.
-
If you change the display settings to No Markup before printing, the document will be printed without special formatting being applied to the changes. Alternatively, you can select Original to print the previous version of the document without any of the changes.
How to turn off track changes in Word
If you want to turn off Word’s Track Changes function, do the following:
- Go to the Review tab.
- Click on Track Changes (located in the Tracking section).
- Click the Track Changes button again.
Once you switch off the feature for tracking changes, any changes that are made going forward will not be tracked. Previous changes, however, will still be displayed and can still be accepted or rejected.
Remember to turn off Track Changes when you no longer need it and to accept or reject all remaining changes. This is especially important if you want to share the finished Word document with others. Otherwise, recipients will see earlier versions of the text.
With Microsoft 365 Business from IONOS, you get the perfect Office package for collaborative work. Free setup assistance included!

