How to unlock a Word document
Word users can write-protect their documents by setting a password. Doing so prevents unauthorized people from making changes to a file. To unlock the Word document for editing, all you have to do is use the password. We show you how it works.
- Store, share, and edit data easily
- Backed up and highly secure
- Sync with all devices
How to unlock a Word document quick guide
You can remove Word password protection by following the steps below:
- Go to File in the ribbon and then click on Protect Document and Restrict Editing.
- Click on Stop Protection at the bottom of the right-hand sidebar and enter the password.
The following instructions apply to Microsoft 365 and Word versions 2021, 2019 and 2016. Some steps may differ for older Word versions.
How to remove a Word password step by step
You can use a password to protect your Word documents in all locally installed Word versions. You also need the password to then unlock the Word document:
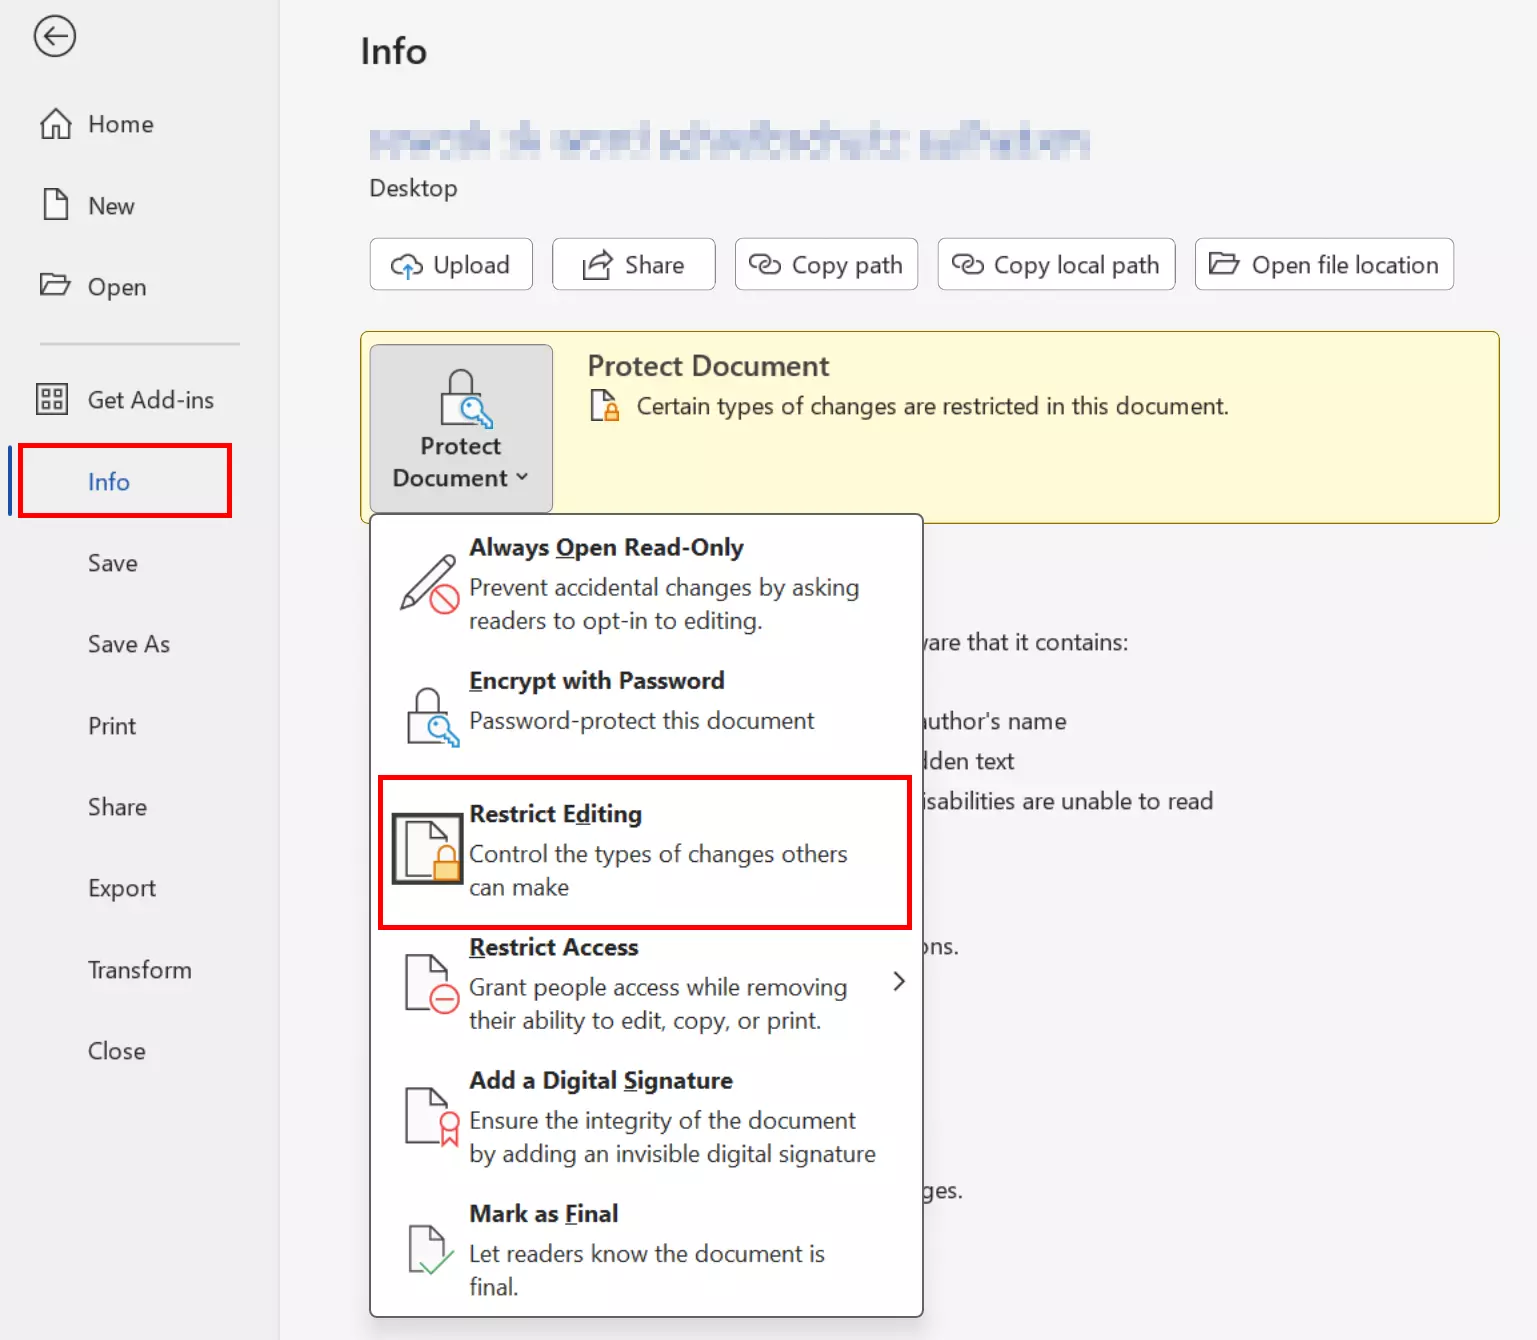
Step 1: Go to the File tab and switch to the Info section. If the document is protected, the *Protect Document button should be highlighted in yellow:
Step 2: Click on Protect Document and select Restrict Editing.

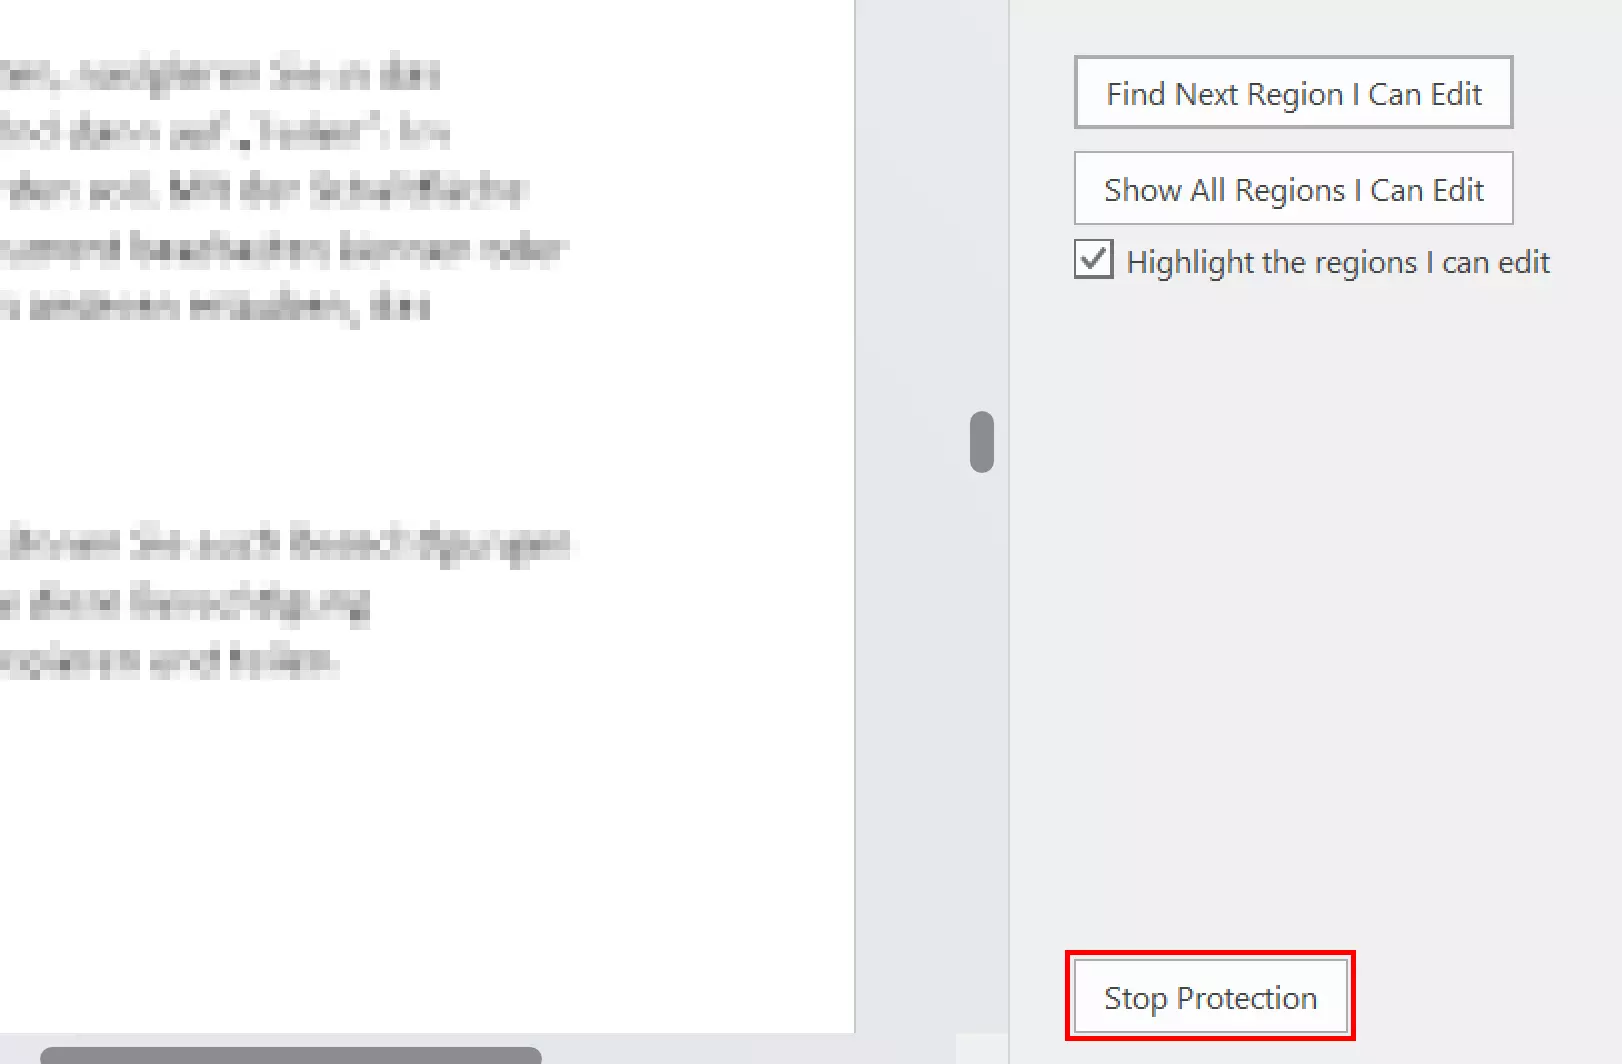
Step 3: In the right sidebar in the document window, click Stop Protection at the bottom.

Step 4: Enter the password to unlock the Word document.
This method only works for simple write protection at document level. If file write protection is set in the user permissions in the file system, you must log in with a username that has write access rights.
If your Word document won’t open even though you’ve entered the correct password, the document may be corrupted. There are several causes for this. Fortunately, the software provides tools to recover a damaged Word document.
Unlock a Word Online document
You can also unlock a Word document for editing in the online version of Microsoft Office. Here, the owner of the file determines who can edit the file and who can only read it. These permissions are set by the logged-in user and can only be changed by the file owner using the share link.
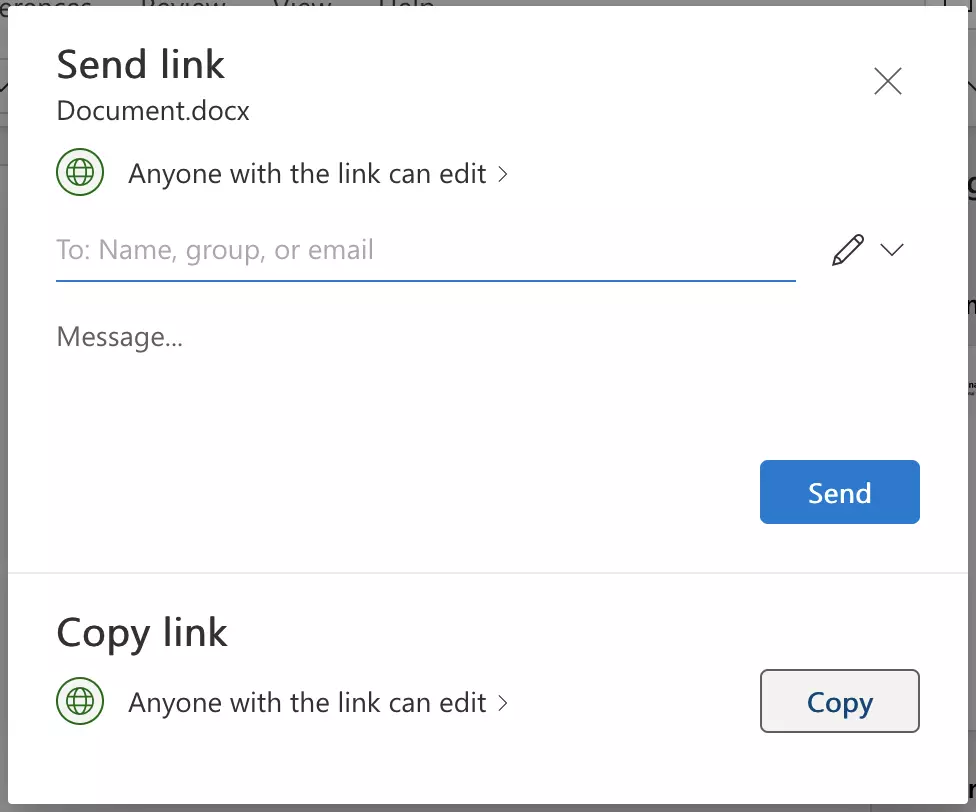
To edit the permissions for other users, go to the document, click on the Share button at the top right, and then on Share. You can then enter who the document should be shared with. The button on the right enables you to determine whether the specified persons can actually edit the document or only read it. By removing the write protection, you give others the rights to edit the document.
If you want to share the document with others via a link, you can also set permissions for this. By clicking on Anyone with the link can…, you can edit this permission. When you are finished, you can copy and share the link.

HiDrive cloud storage, the cloud storage solution from IONOS, enables secure central storing, sharing and editing of all types of data. ISO certification and GDPR ensure that valuable customer data is protected to the highest level. Data can be accessed via the browser, smartphone app, WebDAV, SMB or Git.
Remove protection from Word without a password
Even though strong passwords mean increased security, they can be difficult to remember. That’s where password managers come in handy. Unfortunately, some of them only work in the browser and not in local installations of Word.
If you forget the password needed to edit your document, there are various programs online for finding Word passwords. Unfortunately, they are often expensive. However, in many cases these programs aren’t necessary because the write protection can be overridden using a few simple Windows tools, even if you don’t have the password.
Step 1: Click File in the upper left corner and select Save As.
Step 2: Select the desired folder and find the file type “Word XML Document (*.xml)” in theSave as type list box. Then save the document in this format.
Step 3: Open the XML document with the Windows editor Editor, which you can find via the context menu Open with.
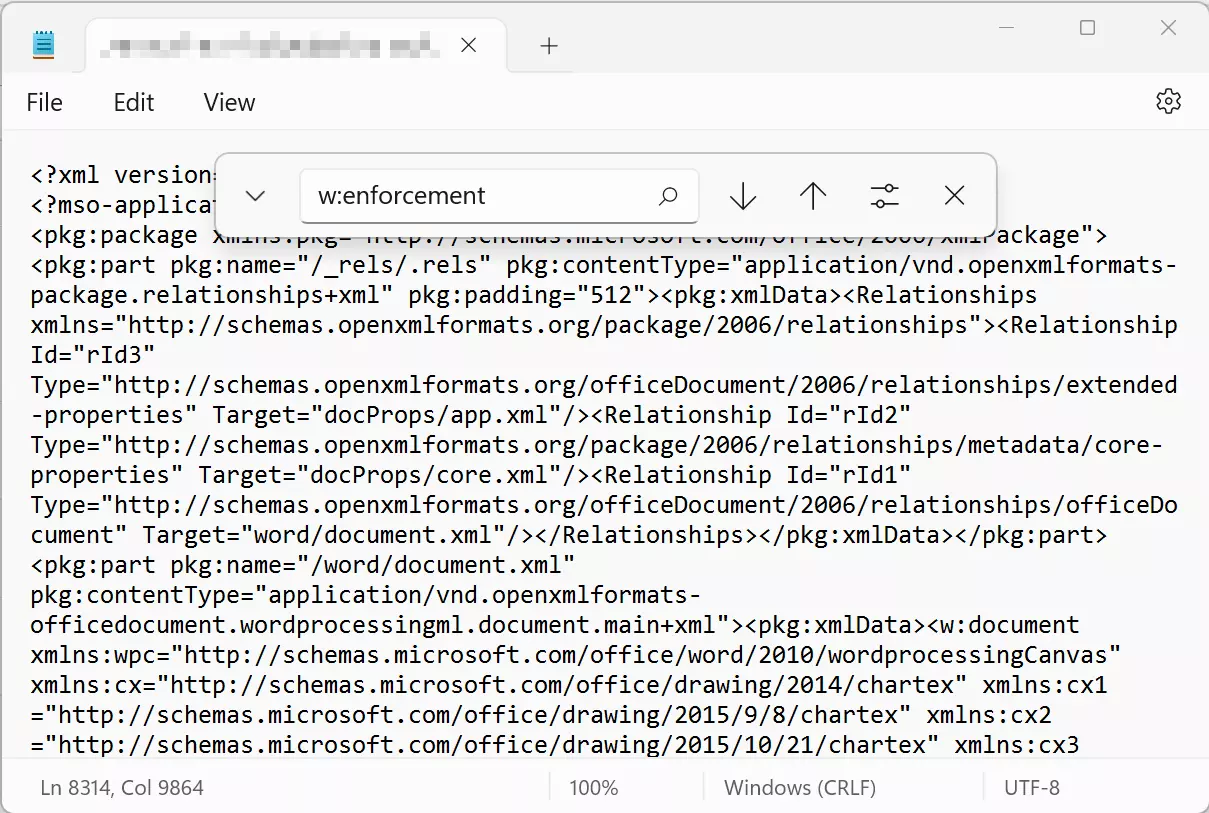
Step 4: Search for the string “w:enforcement” in the document using the key combination [Ctrl] + [F]. You’ll find an entry w: enforcement=“1” or w: enforcement=“on”.

Step 5: Replace “1” with “0” or “on” with “off” and save the document.
Step 6: Open the modified XML document in Word and save it in the usual Word format.
The write protection has been removed without you having to enter a password. Encrypted Word documents cannot be unlocked this way because the contents are encrypted and cannot be displayed in plain text.
You can password-protect ZIP files in a similar manner. It is possible to block users from opening or modifying an encrypted ZIP file by setting a password. Alternative tools won’t be able to access its contents either.
Our article on “How to read Word aloud” might also interest you.

