PowerPoint speaker notes: this is how you use the practical help feature
A popular tip for a successful PowerPoint presentation is “less is more.” This piece of advice refers to creating slides with as little text as possible. In this way, listeners focus more on what is being said and are less distracted by the slides. As a presenter one also feels less tempted to read off the presentation.
For a successful free-form talk, presenters will ideally learn as much of their speech content by heart. But even the best of us can forget things or stumble. As a memory aid during the presentation, the Microsoft program offers a practical solution: PowerPoint speaker notes. The digital notes help you to avoid forgetting content and remain out of a listeners’ sight. We explain how to create and use speaker notes in your presentation step-by-step.
- Store, share, and edit data easily
- Backed up and highly secure
- Sync with all devices
Speaker notes in PowerPoint: this is how you use the practical support tool
Often, speakers use two screens while giving a presentation. A monitor is used for the presentation software, while another computer screen or projection screen displays your presentation to listeners. In doing so, PowerPoint enables you to display different content on the monitors. While the listeners only see the presentation itself, you can, for example, have your PowerPoint presentation proceed with your notes in Presenter View. Below we show you how to use this convenient feature.
Step 1: Display PowerPoint speaker notes
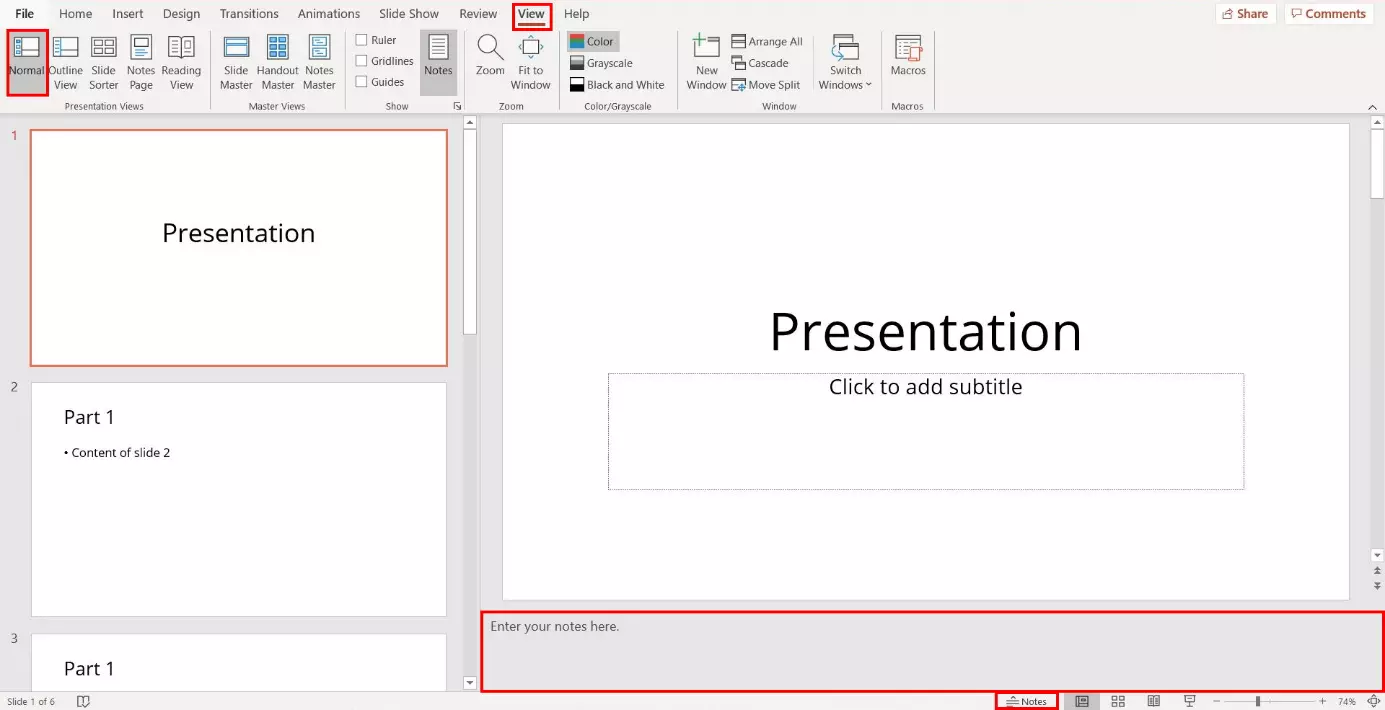
In your presentation’s preparation phase, you create the PowerPoint speaker notes. Check to see if the appropriate feature is already being displayed. To do this, in the “View” tab of the menu switch to the “Normal” presentation view. Under the selected slide a gray area with the text “Click to add notes” should be displayed. If this area is not available, you can open it with a simple click. With a left-click select the “Notes” button in the status bar beneath the slide, or, alternatively, in the menu ribbon. The note area will open. You can close the field at any time with another click.
If the “Notes” option is not available in your status bar, open the content menu with a right-click and select “Notes.” A check mark appears next to the option and the button for notes is displayed in the status bar.
Step 2: Add PowerPoint speaker notes
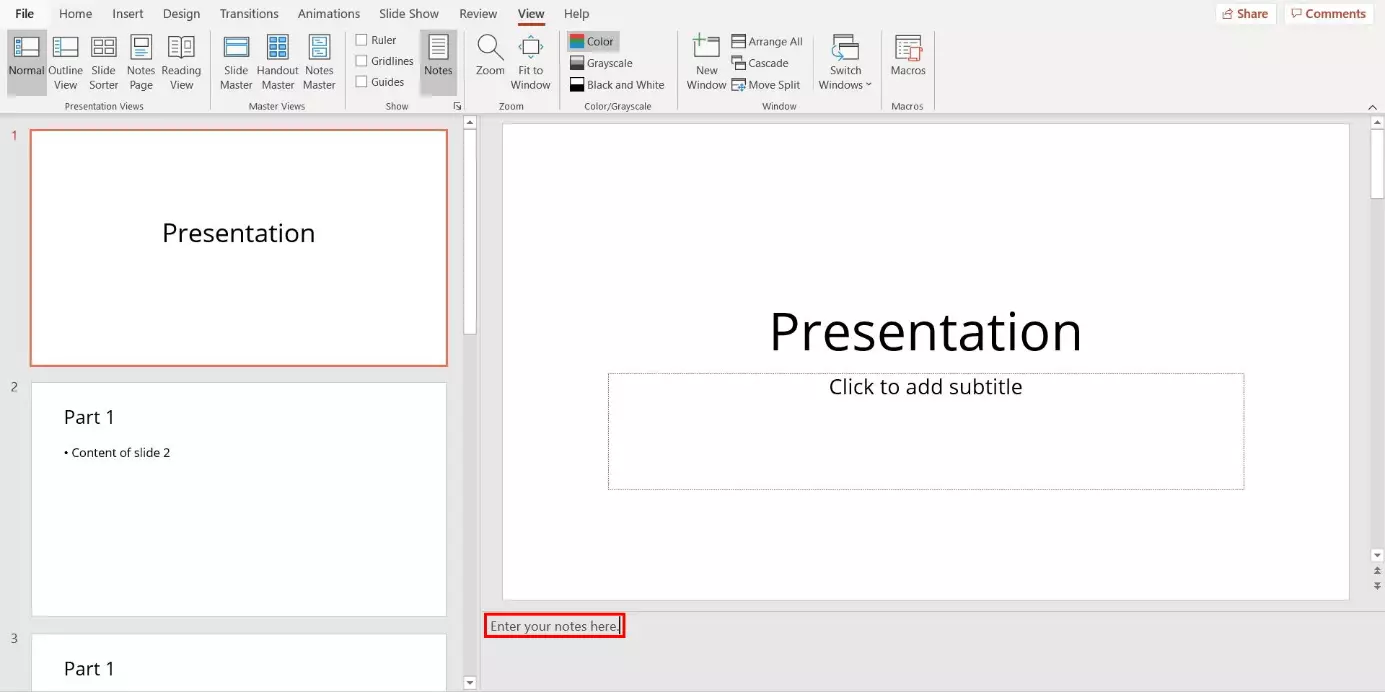
Within the displayed area you can add your PowerPoint speaker notes. Enter your explanatory notes for the slide in the appropriate field. In Presenter View you will see these later during your presentation. Repeat this step for each slide.
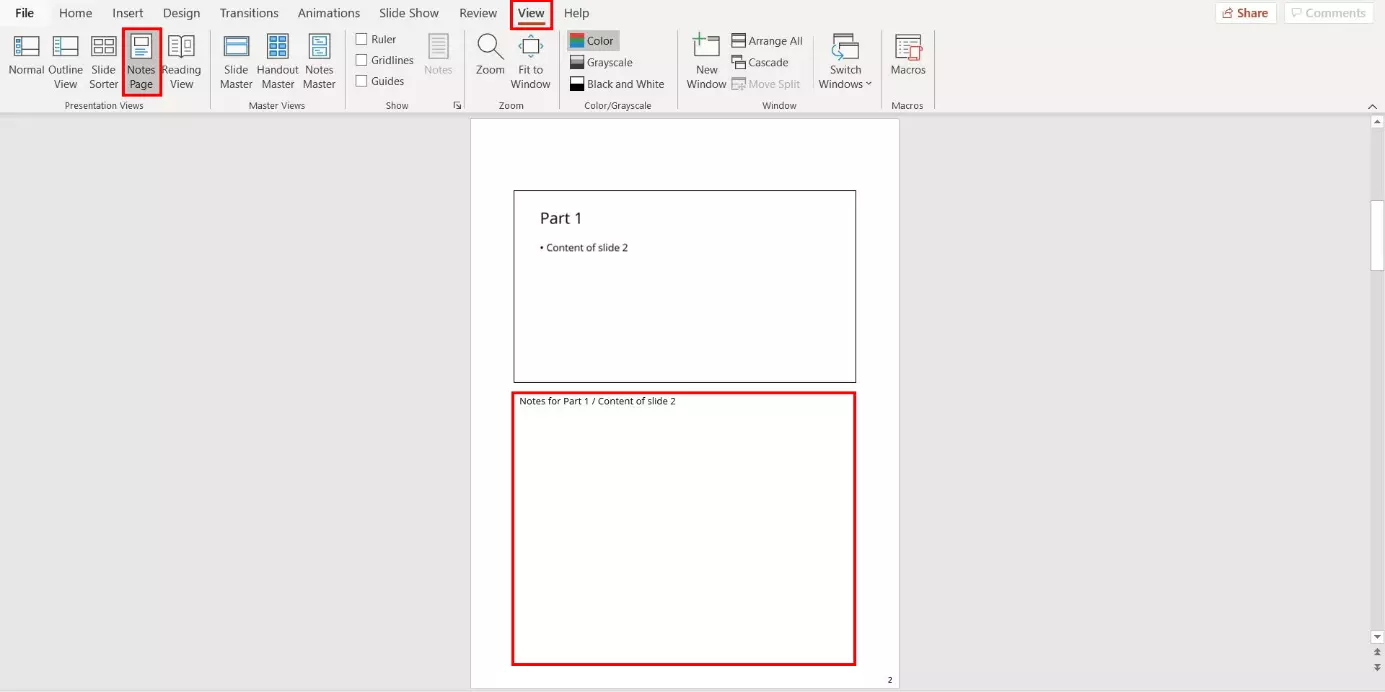
The presentation view “Note Page” provides another option for adding notes in PowerPoint, providing additional space for notes. That’s why a switch is worthwhile if you add long text blocks to your explanatory notes.
PowerPoint offers various presentation views with different advantages. Outline View, for example, is suitable for creating a clear structure.
To add notes, select the “View” tab in the menu and then the “Notes Page” button. PowerPoint now displays a slide per page along with the associated notes. In order to perform changes, a switch in the normal view is not necessary. Click on the appropriate notes area and then perform the desired adjustments.
Step 3: Display PowerPoint speaker notes
For your presentation, it is required that you set up your operating system and presentation software for displaying PowerPoint speaker notes. To do so, it is necessary to set up different displays on your screens. Frequently, after the projector or a second monitor has been connected, the option “Enhance Display” appears automatically. Select it with a left-click. If your computer doesn’t display it, press the [Windows] and [P] keys on your keyboard. A menu will appear where you can select the “Enhance Display” option.
Furthermore, it is necessary to activate the so-called “Presenter View” in PowerPoint. This view is intended for the monitor and displays the slides together with your PowerPoint speaker notes. If you have PowerPoint 2003 or a more recent version, the presentation software automatically sets this view as the default. If this is not the case, then follow the instructions in Step 4.
Technical complications are unpredictable and are especially inconvenient during a presentation. For this reason, PowerPoint gives you the option of printing out your slides and notes with just a few clicks. This feature ensures that you have your PowerPoint notes in hand during your speech.
Step 4: Activate Presenter View
In order to active Presenter View, PowerPoint offers two options:
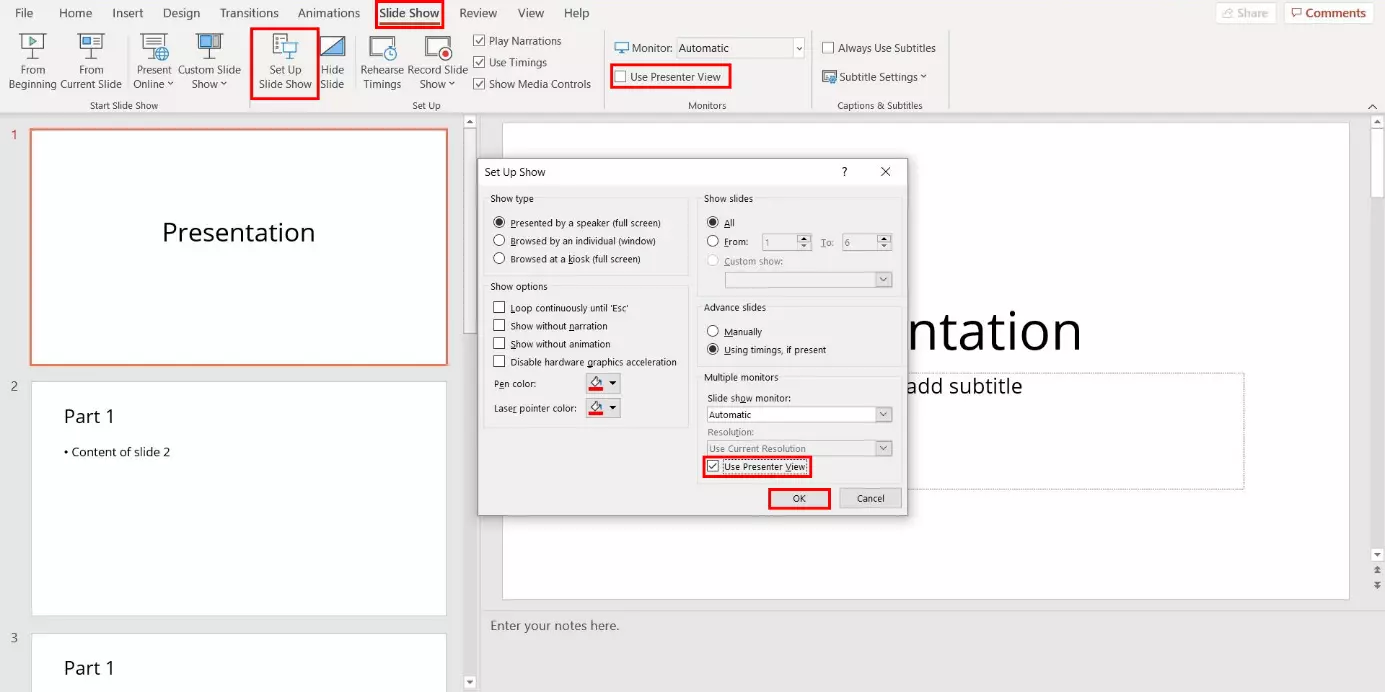
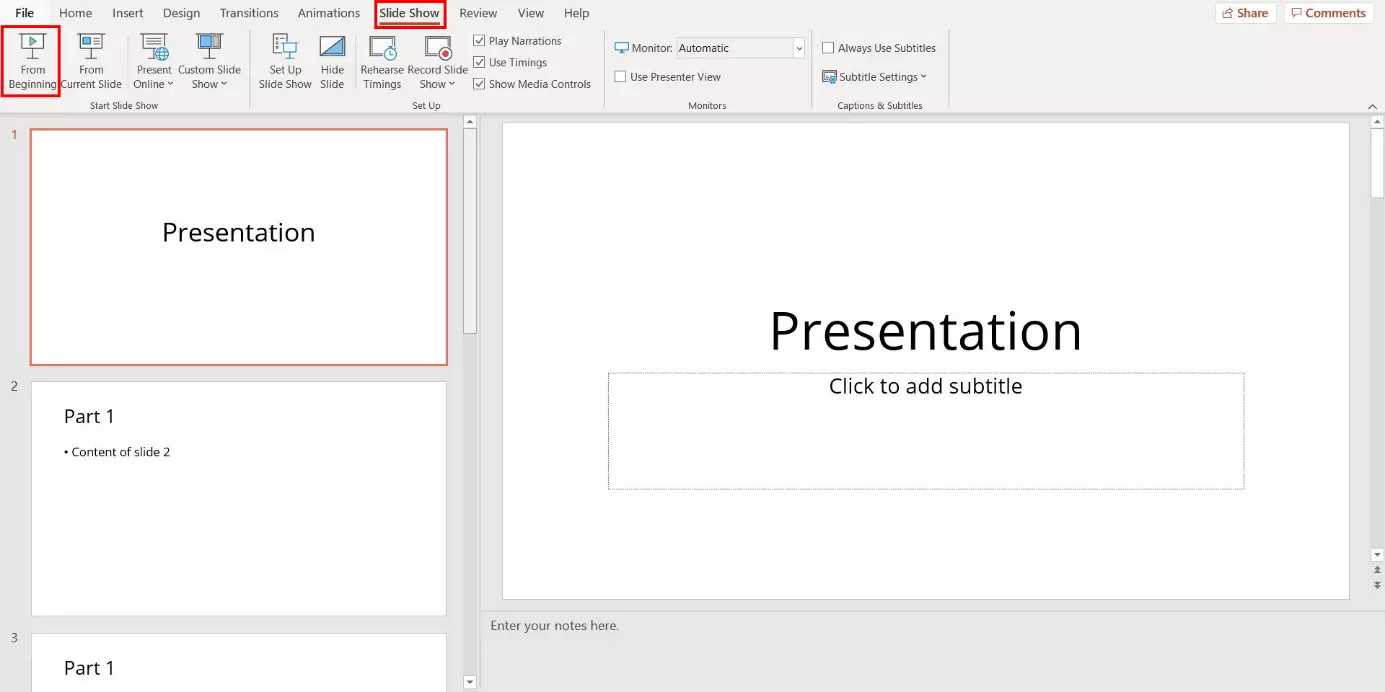
- Via the menu: Select the “Slide Show” tab in the menu and tick the “Presenter View” check box.
- Setup via the “Slide Show” dialog window: Select the “Setup Slide Show” option in the menu with a left-click. After that the dialog window of the same name will open. Select the “Use Presenter View” box. Confirm by clicking on “OK.”
In order to display only the presentation slides on both screens during the presentation, deactivate Presenter View. To do this, remove the tick mark shown in the box.
Step 5: Select the slide show monitor
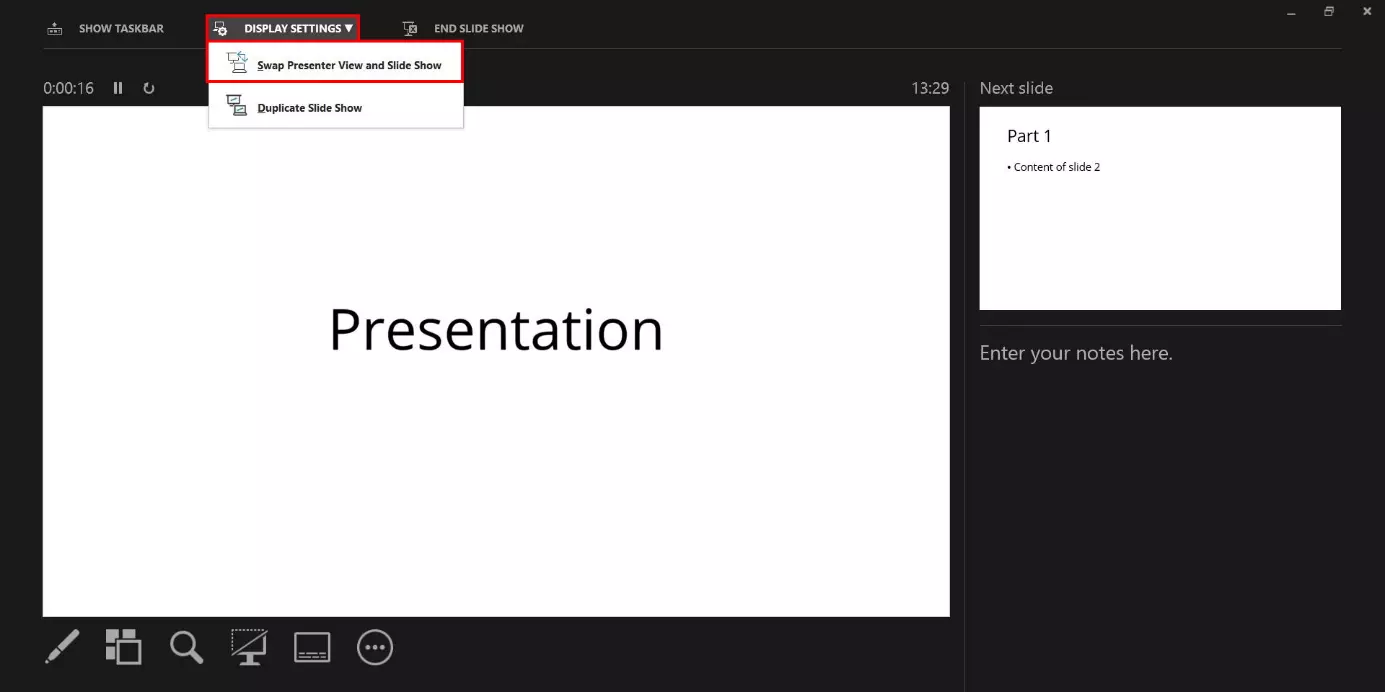
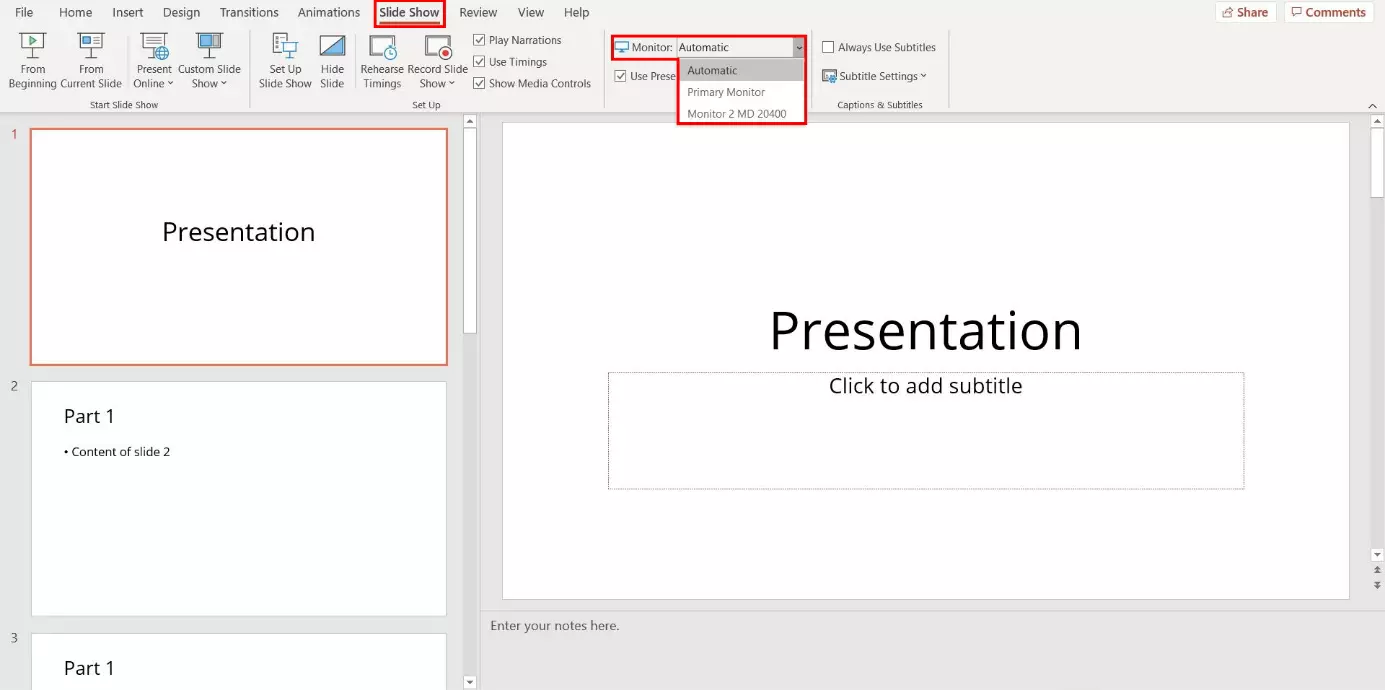
Is Presenter View with its PowerPoint speaker notes appearing on the screen that is intended for the audience? This can be quickly rectified. To solve this, PowerPoint provides two options:
Within Presenter View
Above the menu ribbon
A PowerPoint table of contents provides listeners with an overview of your presentation at the beginning of your talk. Find out how to add one to your presentation in our article “Create a PowerPoint Table of Contents”.


