How to turn spell check on and off in Word
Spelling mistakes in published documents, personal letters, and work emails can be embarrassing. At worst, your audience may question your expertise or interpret your mistakes as disrespectful. Of course you might have simply made a typo while typing too fast or you just overlooked errors when proofreading. To avoid these mistakes, you can set Word to automatically flag misspelled words and even suggest corrections.
Turning spell check on and off in Word
If spell check is turned on, Word marks misspelled words with a wavy red line and flags grammatical errors with a wavy blue line. This way, you can quickly correct misspelled words. However, these highlighted errors can be distracting when you’re writing. For this reason, Word gives you the option of disabling spell check while you type. When it’s time to proofread your work, you can turn on spell check in Word and show the flagged errors. That way you’ll see any spelling mistakes at a glance and can easily correct them.
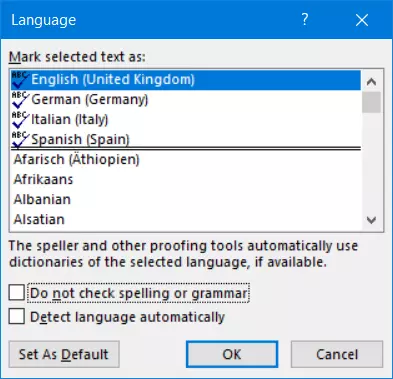
- For spell check to work in Word, you have to set the right editing language. Select the text (the quickest way to do this is to use the keyboard shortcut Ctrl + A) and then click the language selection box in the status bar.
3. Do not rely on the option for detecting the language automatically. This feature often causes errors if the text contains words in other languages. Turn off “Detect language automatically” and click “OK”.
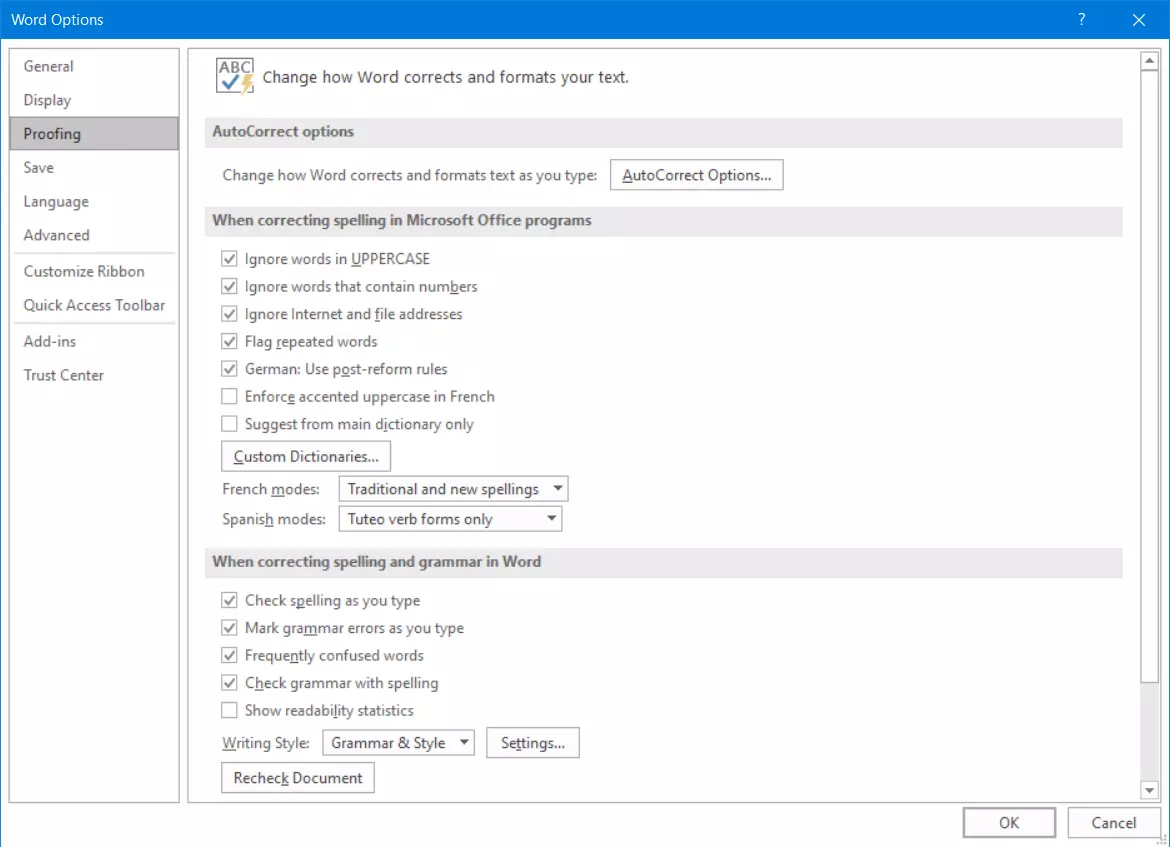
4. Open the “File” tab. Select “Options” and open the “Proofing” group.
5. To turn the Word spelling checker on or off, check or uncheck the boxes for “Check spelling as you type” and “Mark grammar errors as you type”.
If spell check is not working, meaning Word is not marking any mistakes or is flagging errors incorrectly, there can be several causes. In most cases, you can quickly resolve the issue. In another article, we present troubleshooting strategies you can use if spell checker is not working in Word.
Accepting suggested corrections
If you turned off AutoCorrect while writing and want to go back and check your spelling in Word, you can turn this feature on by selecting the checkboxes for the options you want to use. However, this feature, especially the grammar check, is more of a helpful aid than a real check. It often misinterprets certain word combinations as errors and does not always detect grammatical errors. For this reason, it’s best not to rely on the automatic proofing tools.
If you right-click a word highlighted with red or blue lines, Word displays a context menu with suggestions that you can apply with a single click. However, if more than two letters are incorrect or mixed up in a word, Word can no longer predict which word you originally intended to use.
Checking spelling and grammar manually
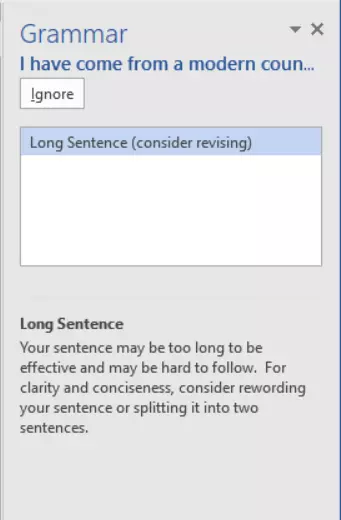
The grammar check feature is especially useful because Word points out stylistic issues and grammar rules that can help you avoid mistakes in the future.
- Store, share, and edit data easily
- Backed up and highly secure
- Sync with all devices
Enabling automatic spell checking in older versions of Word
The last few versions of Word have an icon showing the status of the spelling checker in the status bar at the bottom of the window. In current versions of Word, you can right-click this icon to display a context menu for customizing the status bar. In older versions of Word, this context menu contained the options “Hide spelling errors” and “Hide grammar errors” and also provided direct access to spell check settings.
See our other articles on Microsoft Word for more useful information and helpful tips:


