How to make an Excel file read-only
Excel spreadsheets often contain sensitive information such as numbers, formulas and calculations. An accidental click in the wrong field or an incorrect entry can quickly mess up an entire table. When you make an Excel file read-only, the file’s contents cannot be manipulated or accidentally edited.
- Store, share, and edit data easily
- Backed up and highly secure
- Sync with all devices
Quick guide on how to make an Excel document read-only
- Open the Excel table that you want to activate the read-only feature for.
- In the Save as dialog box, click on Tools > General Options.
- In the window that pops open, you can enter a password in the field Password to modify.
- Click on OK.
Excel read-only should not be confused with encrypting Excel files with a password. Encrypted Excel files offer additional password protection in order to prevent unauthorized access to files.
Why should you make an Excel document read-only?
Complex Excel spreadsheets usually contain a lot of important data, which is linked together through cell references and formulas. By making an Excel file read-only, you can prevent unwanted changes to the data in your spreadsheet.
Adding read-only password protection to an Excel file gives you the power to determine if changes can be made to your Excel table and who (via the password) can make them. If you want to enable editing again, all you have to do is remove Excel read-only. The process for doing so is similar to removing the read-only feature for individual Excel worksheets or unlocking a Word document for editing.
Step-by-step instructions on how to make an Excel file read-only
Making an Excel document read-only is quick and simple. Just follow the steps below to activate this feature.
The instructions provided in this article can be used for the Microsoft 365 edition of Excel as well as for all Excel versions from 2016 onwards.
Step 1: Open the Excel file you want to make read-only. Go to the File tab and select Save As from the menu on the left. Click on More Options to open the Save As dialog box.
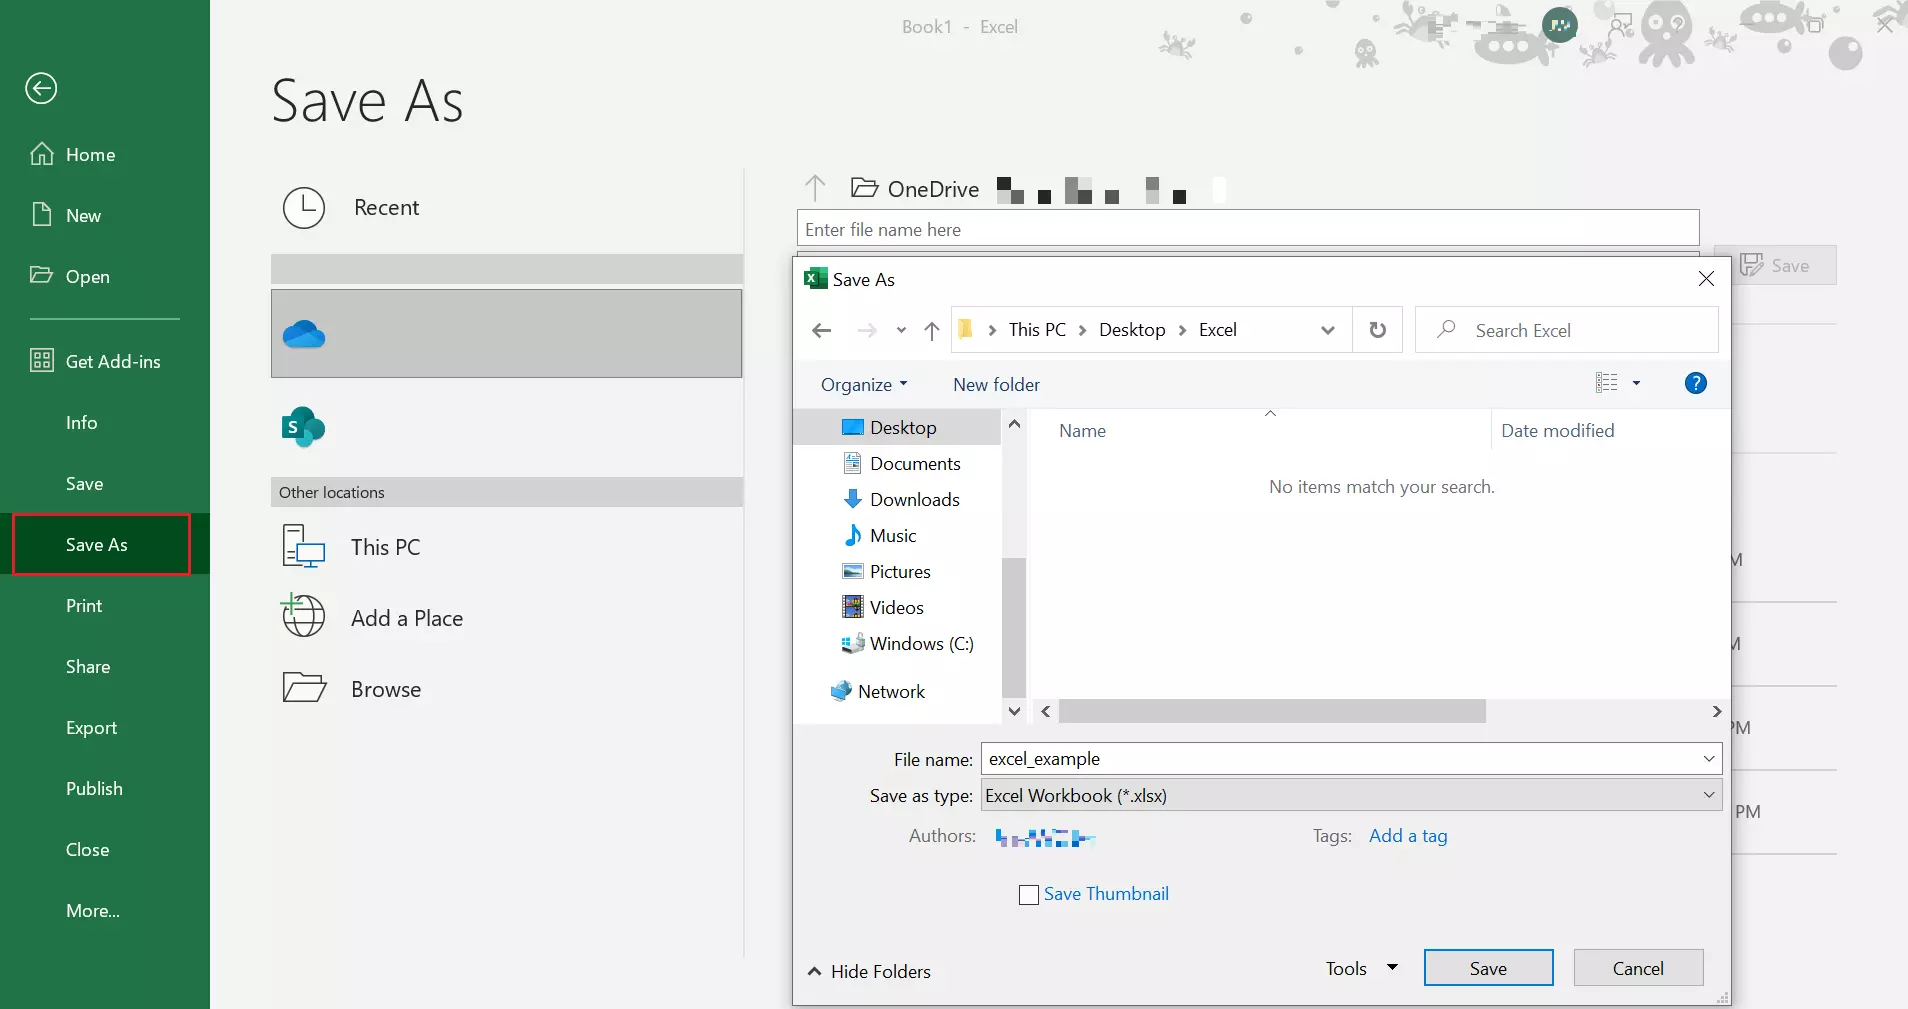
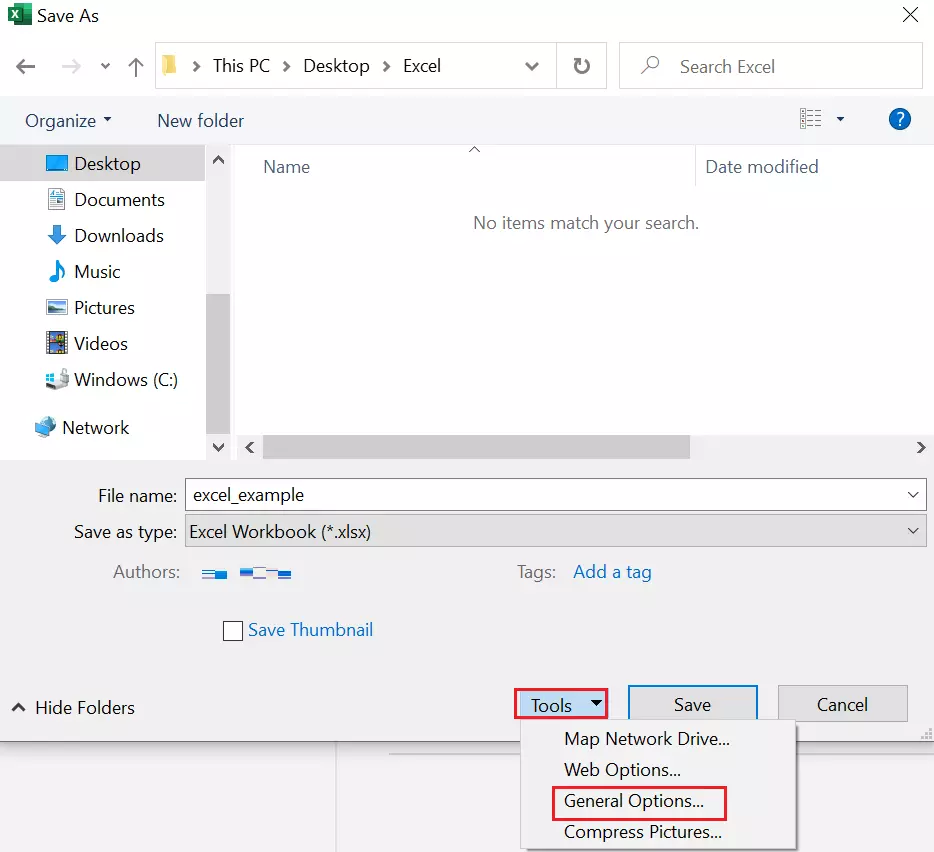
Step 2: In the Save As window, click the Tools button to the left of the Save button. A small context menu will open. Select the item General Options.
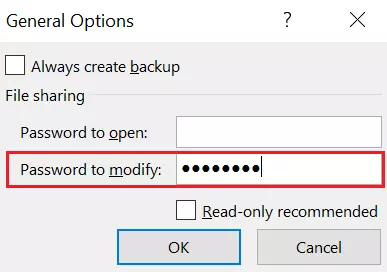
Step 3: Enter the password of your choice in the Password to modify field. This can be any word or combination of keys. It doesn’t need to meet any specific criteria. Check the box next to Read-only recommended to inform other users that the file has been set to read-only when they open it. Keep in mind that you’ll need the password to make changes to your Excel file in the future, so make sure to keep it somewhere safe.
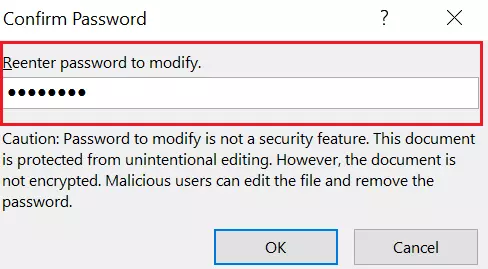
Step 4: Excel will prompt you to reenter your password (Confirm Password). Repeating a password ensures that you haven’t made a mistake in the previous entry. Click OK to close the window.
Step 5: Click Save to activate read-only in Excel.
You can make working in Excel easier by using Excel shortcuts.
How to make an Excel sheet read-only (without a password)
If you want to add a note to your Excel spreadsheet that recommends the read-only mode to users but doesn’t require a password, simply follow steps 1 to 3 above. When you get to the General Options dialog box, don’t write anything next to Password to modify. Instead, just add a checkmark next to Read-only recommended and users will receive a notification when opening the file.

How to open a read-only Excel file with a password
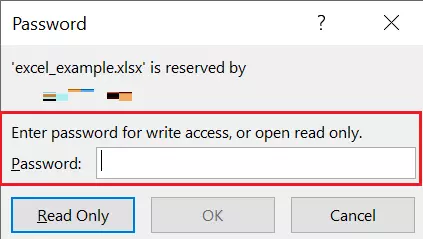
When you open a read-only Excel file, the program may prompt you to enter a password. The following dialog window will pop up:
- Store, share, and edit data easily
- Backed up and highly secure
- Sync with all devices
You’ve now got two options:
- You know the password: Enter the password and click OK. If Read-only recommended has been activated, a second dialog window will appear where you can choose to open the file in read-only mode or not. If you click Yes, the file will open in read-only mode. You’ll need to reenter the password if you want to make changes to the document. If you click on No, the file will open in standard editing mode, and you can modify the file as you normally would. You’ll also be able to save it without having to enter another password.
- You don’t know the password: Leave the Password field empty and click on Read Only. You can now view the file in read-only mode but won’t be able to modify it.
Having trouble starting Excel? Our Digital Guide article provides tip on what you can do when Excel isn’t working.
If you want to learn more about other topics in the world of Excel, check out the following articles:

