COUNTIF in Google Sheets: how to use the function in Google’s spreadsheet program
The COUNTIF function is a well-established function in Excel as well as other programs such as Google Sheets. COUNTIF lets users count different values based on one or more conditions. Google Sheets, the web-based Office solution, provides a practical alternative to Microsoft’s Office.
COUNTIF in Google Sheets finds a wide range of application, from counting dates to calculating similar products or names in a list. Conditions can be text-based, which means that not only numerical values are counted. In accounting, the COUNTIF function is also used to create registers and listings for the last few months to help users gain a quick overview of their received invoices and amounts due.
The generic formula for conditional counting in Google is as follows:
=COUNTIF (range; criteria)Using COUNTIF in Google Sheets: step by step
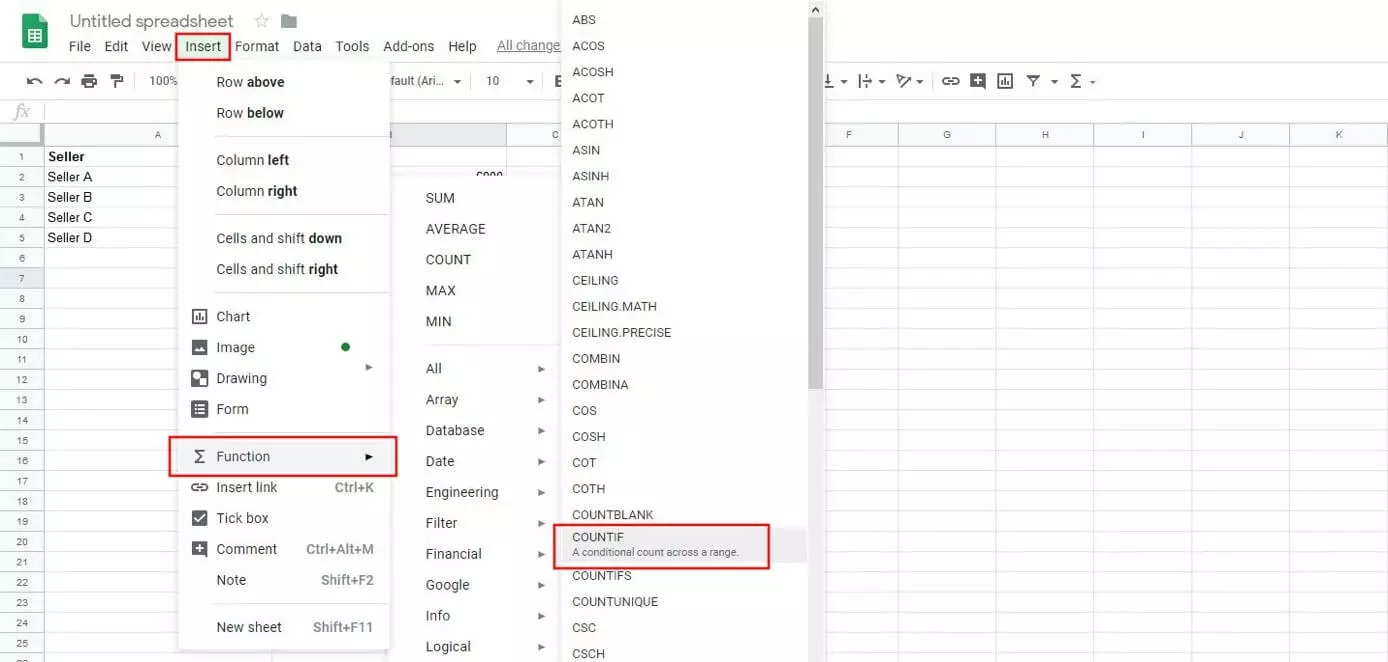
The COUNTIF function is a great solution to calculate multiple values in a data set using one or more conditions. Once you know the generic formula (above), the remaining steps in Google only take a few minutes. The individual steps are as follows:
- Launch a new or existing Google Sheets spreadsheet.
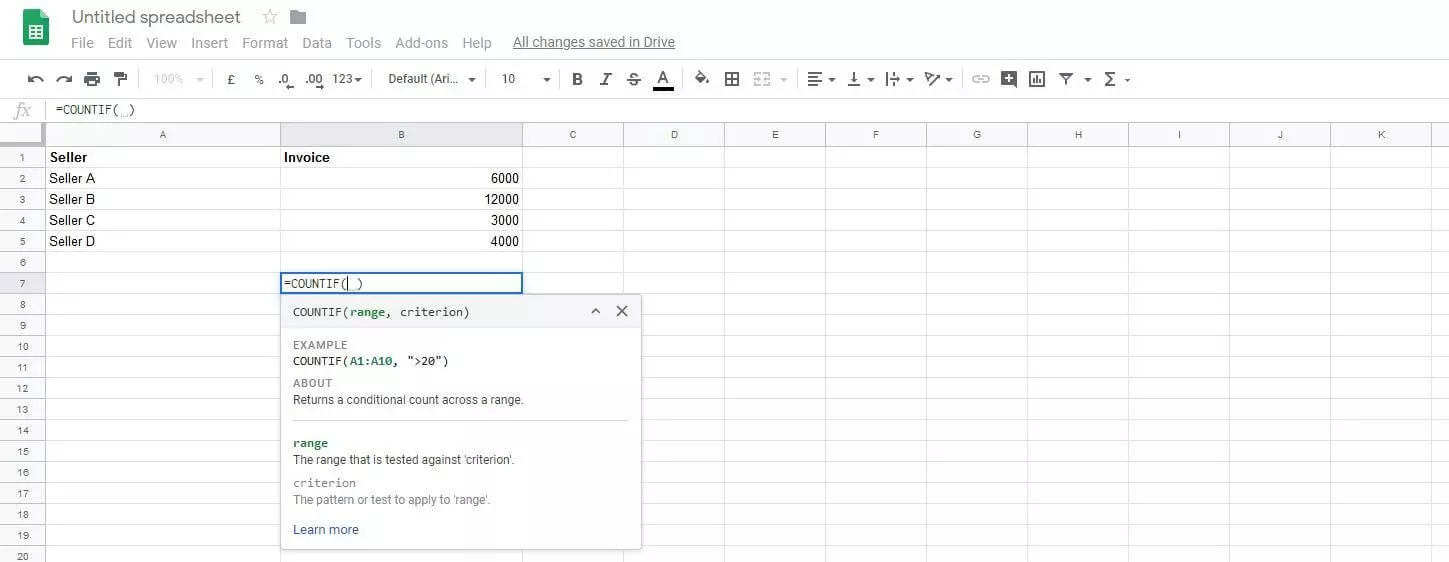
- Let’s assume you want to view the number of invoices that contain a lower amount than 6,000. Select an empty cell to enter the formula and specify the range of cells (cell numbers) you want to begin the count from. In the example below, counting will begin in cell B2. Place a colon to specify “from-to.” Counting will now begin in cell B2 and finish in cell B5.
- You’ve now specified the counting range, but haven’t added a condition for counting. You will need to define your conditions within the formula. In this case, we are looking for values smaller than 6,000. Place a semicolon behind the last cell to be counted (B5, in this case). Use quotation marks to specify the condition "<6000" and close the formula by adding a round bracket.
Just like you can search for values below 6,000, you could have searched for invoices greater than 6,000 using “>” or equal to “=” a specified amount. COUNTIF in Google Sheets also lets you search according to multiple criteria. If, for example, you’d like to count the number of entries below 6,000 and those above 12,000, you could use the following code to specify both conditions.
(=COUNTIF (B2:B500;"<6000";B2:B500;">=12000")You may also want to count invoices according to the date you received them. For example, to count all invoices received before 31.01.2020, use the following code:
(=COUNTIF (B2:B5;"<31/1/2020")Google Sheets lets multiple users work on a spreadsheet at the same time. That means a single list can be processed by individual departments. For example, accounting may wish to know how many invoices are outstanding in a given time frame, while the marketing department may use the COUNTIF function to check how often certain customers made a purchase.
- Store, share, and edit data easily
- Backed up and highly secure
- Sync with all devices


