ERR_CONNECTION_CLOSED: How to fix the connection error
In 2008, Google released the first version of its own web browser Chrome. Despite the strong competition from Internet Explorer and Firefox, etc., the application was successful in the years to come. According to the web statistics portal W3Counter, Chrome's market share today is over 50 percent (as of June 2018). The driving force behind the rapid rise was - in addition to excellent marketing campaigns (particularly also via its own search engine) - primarily the brand name Google itself. Even though the browser performs brilliantly, it is also prone to errors, which leave its users confronted with cryptic messages.
The error message "ERR_CONNECTION_CLOSED", for example, informs you that the connection to the desired website has been closed. As far as the causes are concerned, however, the user is left in the dark, which makes fixing the error an almost unsolvable task especially because the error does not necessarily have to be caused by Chrome. In our article we show you possible sources of errors and some useful approaches to fixing the "ERR_CONNECTION_CLOSED" error.
- Simple registration
- Premium TLDs at great prices
- 24/7 personal consultant included
- Free privacy protection for eligible domains
What does “ERR_CONNECTION_CLOSED” mean?
You may encounter the message "ERR_CONNECTION_CLOSED" when you try to access a website. This is Chrome’s way of informing you that the data transfer, which is necessary to establish the connection, has been interrupted. More precisely, the connection between browser and server was closed, which is also indicated by the name of the error. The web server or proxy server, which processes the request provided by the browser, always initiates the connection separation.
How to fix the “ERR_CONNECTION_CLOSED” error
In addition to the "ERR_CONNECTION_CLOSED" message, several very different solutions are usually also displayed, which emphasizes the real problem with the message: It does not reveal any details about why the connection interruption happened. This means that there is no basic solution for fixing the "ERR_CONNECTION_CLOSED" error, but only various solutions that you can try one after the other. We have compiled the most promising methods for troubleshooting in Windows.
- Simple registration
- Premium TLDs at great prices
- 24/7 personal consultant included
- Free privacy protection for eligible domains
Solution 1: Check internet connection and restart router if necessary
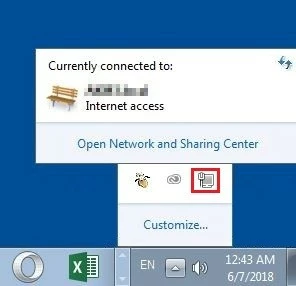
Before you delve deeply into the configuration of the system and browser to find the source of the "ERR_CONNECTION_CLOSED" error and fix it, first check your internet connection. With Windows, for example, you can do this via the network symbol in the notification area (also called the System Tray). There you can see not only the network to which you are currently connected, but also the connection status.
If the connection to the internet is correct, you should find "Internet access" here (see screenshot) - otherwise you should make sure that all cables in your network device are connected correctly. If this is the case, you can also try restarting the router by temporarily disconnecting the power to the device (for 30 seconds or more).
If you are connected to the internet via WLAN and have the option of switching to a cable connection, you should use this option as soon as your browser displays the "ERR_CONNECTION_CLOSED" message. This is because spontaneous disconnections are not uncommon with wireless transmission - especially if you generally have to deal with signal strength fluctuations.
Solution 2: Reset network settings
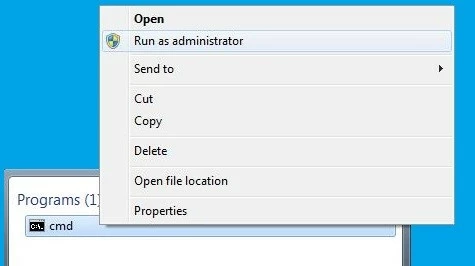
Connection problems that lead to errors such as the "ERR_CONNECTION_CLOSED" message may also be due to errors in the system's TCP/IP setup. However, you can solve this problem by resetting the settings for the TCP/IP stack to their original state. All you need is administrator rights and the command line tool Netshell (netsh), which has been installed by default since Windows 2000. To start the command prompt as an administrator, first access the Start menu (Windows icon) and enter the term "cmd" in the search bar. Then right-click on the cmd application presented as a search result and select "Run as administrator":
Now you can reset the TCP/IP settings with the following Netshell command:
netsh int ip resetBefore you restart the computer to make the changes take effect, we recommend you reset the Winsock interface (also Windows Sockets). All connections of programs that access the internet protocol run through these. Winsock also creates entries for all established and failed connections in the so-called Winsock catalogue. As in the case of a protocol reset, you can use the command prompt program Netshell. The necessary command is as follows:
netsh winsock resetSolution 3: Disable proxy server and VPN connections
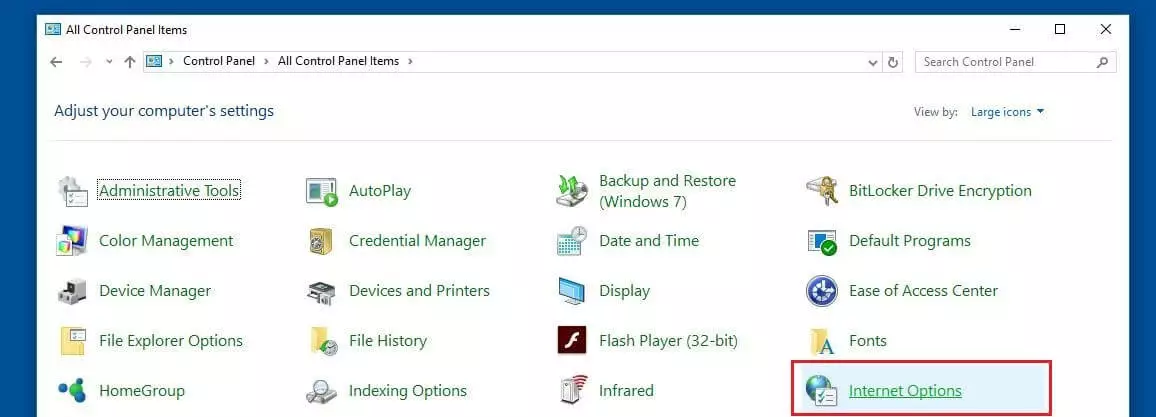
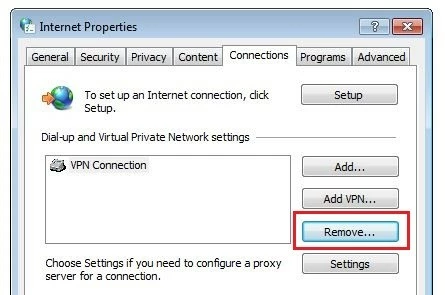
Proxies and VPN connections offer you - each in their own way - the possibility of remaining anonymous during your time on the internet. Both solutions are actively involved in the data transfer process, which is why they can also cause complications and, for example, cause the "ERR_CONNECTION_RESET" error. If you use one of the two bridging techniques, you should deactivate it - at least for testing purposes - or - in the case of VPN - not use it. To deactivate the proxy server, you need the "Internet settings" menu, which can be accessed via the control panel:
Under "Proxy server" uncheck "Use proxy server for LAN" to deactivate the configured proxy.
If you have installed extensions with proxy or VPN functions, you should also disable or delete them.
Solution 4: Clear DNS cache
DNS server name resolution is one of the most important mechanisms of the internet. So that the conversion of domain addresses into their numerical counterparts does not have to be carried out every time a certain website is accessed, both DNS servers and browsers create address entries in the so-called DNS cache. This results in faster loading times, but can also lead to technical problems such as the "ERR_CONNECTION_CLOSED" error if entries are outdated and no longer compatible with the current version of the website. A possible solution is DNS flush, which completely empties the address cache. For example, you can reset the system cache using the following command from the command line:
ipconfig /flushdnsTo clear the Chrome DNS cache, you must first enter the following in the address bar:
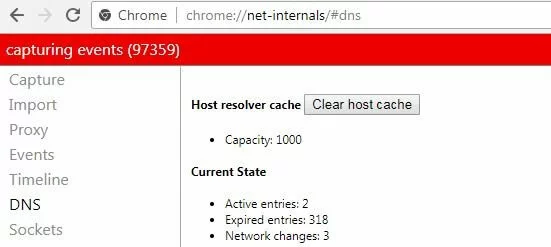
chrome://net-internals/#dnsThis will open the DNS settings in the hidden options menu "Net Internals". In addition to a list of valid and expired DNS entries, here you will find the "Clear host cache" button, which can be used to clear the cache.
Solution 5: Obtain or change DNS servers manually
It’s not only the cache of the used DNS server that can become a problem: If the availability of the server is limited or the server is completely down, the connection may also be interrupted and the Chrome error message may appear. Usually you obtain the address of the DNS server automatically, so that you are assigned a local nameserver from your internet provider. However, you have the option of entering the server manually and thus transferring the name resolution task to another server in order to fix the "ERR_CONNECTION_CLOSED" message. To do this, proceed as follows:
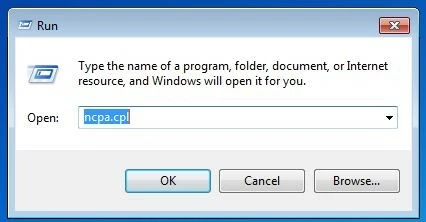
Open the overview of active network connections, for example via the Network and Sharing Center or the key combination [Windows key] +[R] followed by the entry "ncpa.cpl".
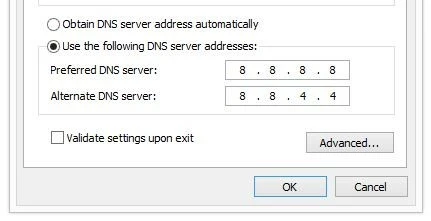
Right-click on the network connection via which you are connected to the internet and click on "Properties" in the pop-up menu (requires administrator rights). Search for the entry "Internet Protocol Version 4 (TCP/IPv4)" and open the protocol’s configuration menu by double clicking. Leave the IP address settings unchanged (automatically or manually entered address) and select the option "Use the following DNS server addresses" in the lower area of the menu. Then enter the server addresses of your choice. For example, the addresses of Google servers (8.8.8.8.8 and 8.8.4.4) are recommended:
Solution 6: Check firewall and anti-virus software and deactivate if necessary
Due to the numerous, diverse dangers that accompany your daily activities on the web, it’s imperative to use security software. But even though modern firewalls, real-time scanners and the like usually do a first-class job, these tools are not infallible. Incorrect configurations, software errors or outdated program files can cause connection errors such as the "ERR_CONNECTION_CLOSED" error. In this case, check whether updating these solves the problem or whether the target website’s address is on one of your security programs’ blacklists. If you do not succeed, you can try temporarily disabling the firewall and anti-virus software and then reloading the page.
Solution 7: Malware check with the Chrome Cleanup Tool
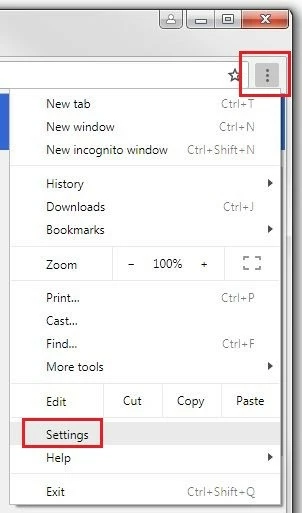
Even the best security setup does not offer 100% protection against malware. Therefore, you can never rule out that your system has been infected with malicious software and this is what’s causing the disconnections. For this purpose, Chrome offers its own solution for detecting and removing malware, which you can start directly in the browser settings. To do this, open the settings menu by clicking on the three-point symbol and selecting "Settings":
To start the tool, click on "SEARCH". If you don't want Chrome to collect information about detected malware as well as your system settings and processes, you need to move the slider to the left under "Report details to Google".
Solution 8: Deactivate extensions and delete them if necessary
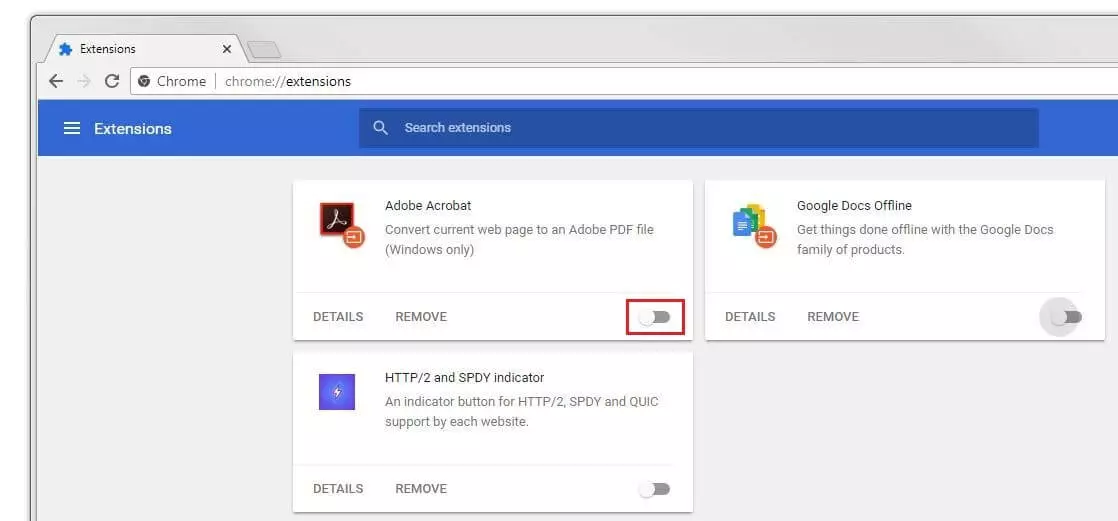
Extensions in Chrome are important building blocks for extending the functionality of the Google browser. There are thousands of free extensions available in the Chrome Store, which are extremely practical in principle, but also cause problems such as the "ERR_CONNECTION_CLOSED" error - especially if the extensions are no longer compatible with the current browser version. To check whether an installed extension is the cause of the error message, deactivate it temporarily. Simply enter the URL chrome://extensions in the address bar and move the sliders below each extension to the left:
If the target page opens after the extensions have been disabled, you know that one or more were responsible for the error. Activate the extensions one by one to find the culprit(s) and then delete them using the "REMOVE" button.
Solution 9: Update Chrome
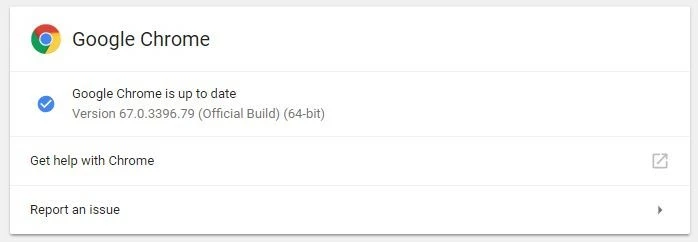
If you do not have the latest version of Chrome installed, you may also get disconnected from time to time. You should therefore make sure that your browser is up to date, which you can do by entering the following URL in the browser bar:
chrome://settings/helpChrome then checks if the current version is installed and automatically starts the update process if you are using an outdated version. If your browser is up to date, you will see the message "Google Chrome is up to date":
Solution 10: Reinstall Chrome
If you have not been successful with the methods listed for fixing the "ERR_CONNECTION_CLOSED" message, your last option is to completely uninstall the browser and then reinstall it. Remember, however, that all settings will be lost.


