How to create a Joomla backup
A Joomla backup means you’ll always be protected against data loss. You can choose to have your project backed up directly by your provider or create the backups manually with or without a plugin. So what are these options, and how do you go about creating a Joomla backup?
- Simple registration
- Premium TLDs at great prices
- 24/7 personal consultant included
- Free privacy protection for eligible domains
Why is it so important to create regular backups?
By regularly backing up your Joomla installation files and user data, you can protect yourself against data loss. Without a Joomla backup, your website could be damaged for any number of reasons, meaning that you’d have to completely rebuild the pages and content.
One of the most common reasons for a Joomla installation not working properly anymore is a faulty Joomla extension. It is not so much that an installed extension does not run, but that the extension makes it impossible to use the backend. If you create a Joomla backup before each plugin installation, you can immediately undo this step and thus regain access to the administration interface.
It is recommended to install and try out new Joomla templates or extensions in a test environment first. If you carry out this step, you are not even dependent on a backup if you have to deal with a faulty plugin!
Another common reason Joomla or your website may not run as you’d like anymore is because of human errors. For example, you may accidentally delete important files. Maybe you can’t get this error fixed despite all your best attempts. Re-installation or hiring experts to rescue the project are the only options if you don’t have a Joomla backup. The same applies if your Joomla website is infected with malware.
What are the possibilities of backing up Joomla?
Whether it’s your own fault or external influence, a defective plugin or an update error, the causes listed for a Joomla project that no longer functions are manifold. Therefore, play it safe by creating a Joomla backup regularly and especially before all important updates.
There are three main options available to you:
- Joomla backup with your hosting provider: The provider automatically creates backups of your Joomla project, which you can download and import at any time. So the backup itself means no effort for you, but also costs.
- Joomla backup via plugin: There are various free and paid plugins that can be used to create a Joomla backup. You install and configure the extension conveniently via the backend and then receive backups at desired intervals in the desired storage directory.
- Manual Joomla backup: The most elaborate, but safest variant is a manual Joomla backup. You back up all folders and files that are in your online storage (via FTP access) and export the database(s) locally or in the cloud.
The following table summarizes the pros and cons of the three variants.
| Manual Joomla backup | Joomla backup via plugin | Joomla backup by provider | |
| Security | high | medium | high |
| Own effort | high | medium | low |
| Costs | none | low | medium |
Looking for a hosting provider who lets you create your web project with Joomla? Opt for Joomla hosting from IONOS and benefit from advantages like 1-click installation, a free domain and a SSL/TLS certificate!
Step by step instructions for a Joomla backup
The three options for backing up your Joomla project come with their own advantages and disadvantages. However, all three options ensure that you are well prepared in case of an emergency. The backup copies should be made regularly and before any important changes to your site of Joomla itself, such as a Joomla update. Read the instructions below to find out what to do in each case.
Automatic updates with your hosting provider
Many providers automatically create backups of customers’ web projects. As a rule, you do not need to activate this service. Find out in advance whether such a service is part of the purchased plan, at what regularity the backups are created and how long backups are stored (usually for a few days).
You’ll only need to take action when you need one of the Joomla backups to restore an old state of your project.
The restore function or the import of backups is subject to a fee with some providers!
With IONOS, follow these steps to restore the files and folders from your online storage:
- Log in to the IONOS Cloud Panel on the login page.
- Select the “Hosting” category.
- Click on the gear icon in the “Webspace” category and then click on the “File Recovery” menu item.
- Now select one of the available restore points and confirm with “Select”.
- Add all the folders or files you want to restore by clicking the “Add” button. Finally, click on “Restore all”.
- Afterwards the Joomla backup will be uploaded, which takes some time. Once the restore is complete, you will receive a notification email.
How to create Joomla backups with a plugin
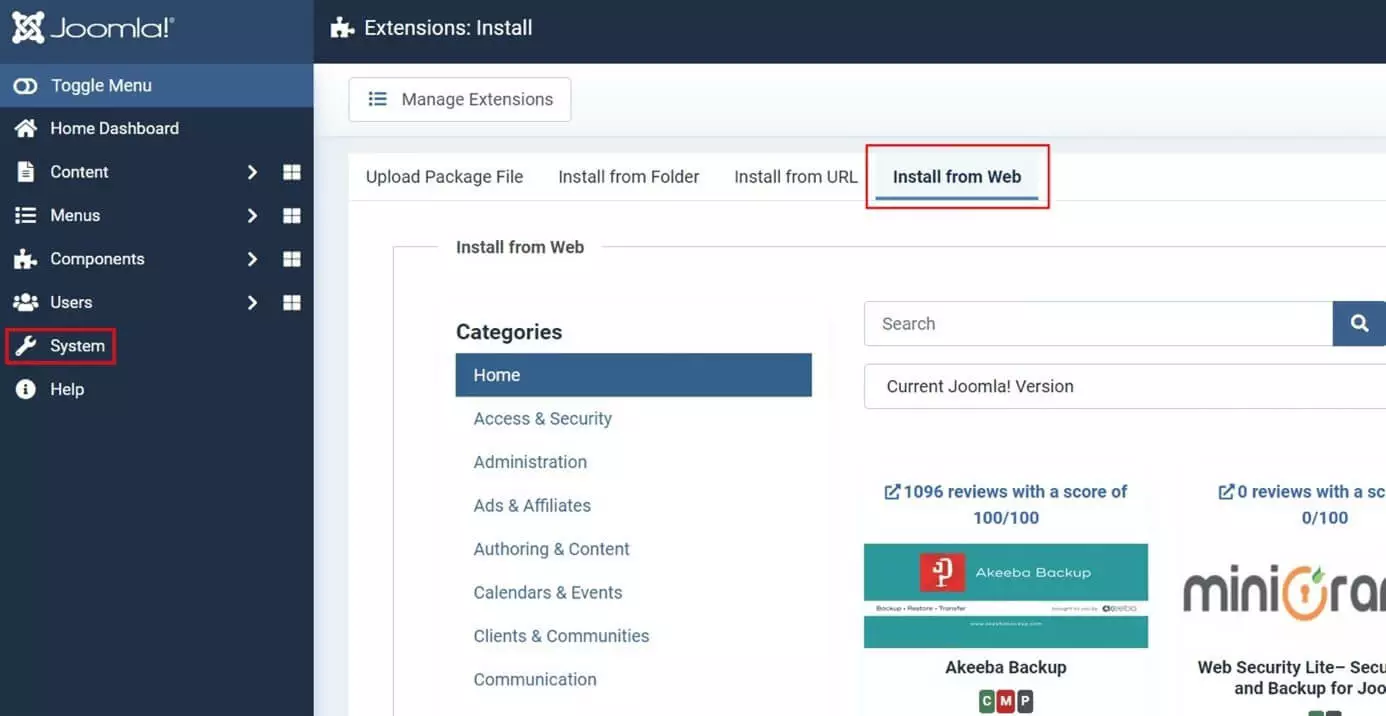
If you want to create your Joomla backup yourself and use a plugin for this purpose, you have several options available to you. So, before you can start setting it up, you first need to decide on a backup extension. The search for a suitable plugin can be done directly via the backend:
- Select the “System” item in the left side menu.
- Click on “Extensions” and then on “Install from Web”.
- Search for “Backup”.
One of the most popular backup plugins for Joomla is the open source Akeeba Backup, which we also use as part of this guide. Popular alternatives are:
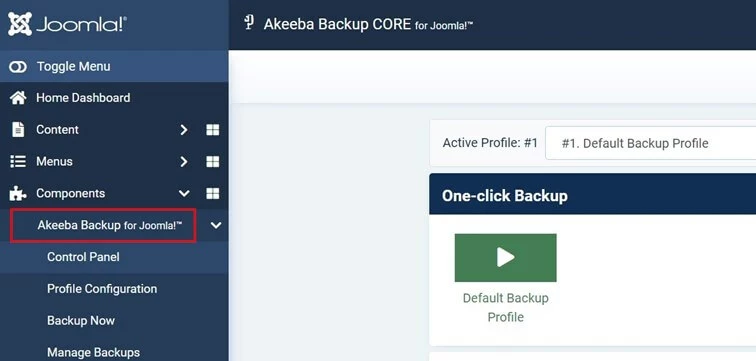
After you have installed Akeeba via the web, you will find a new item called “Akeeba Backup for Joomla!” in the “Components” menu:
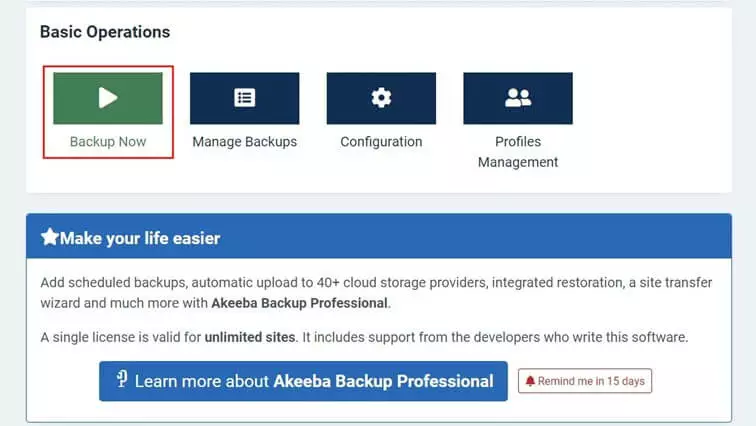
For premium features like an automatic upload to over 40 cloud storages and backups on schedule, you need to buy the paid edition Akeeba Backup Professional.
If you need one of the downloaded backups to restore an old state of your Joomla website, extract the backup copy directly to your server using Kickstart. You can find the latest version of the tool in the Download section of the Akeeba website.
Want to store your Joomla backup in the cloud? With the HiDrive Cloud Storage from IONOS, you can store your files securely and device-independently on ISO-certified servers.
Here’s how to back up Joomla manually
If you want to create a Joomla backup manually, you will have a relatively high effort. However, a manual backup is also the safest option if you consider all important points. First, you need a secure connection to your web space to backup all folders and files on the server. Best is via SFTP. Second, you also need to pull a backup of the Joomla database to keep all text content, configurations and user data safe.
Backing up Joomla folders and files online:
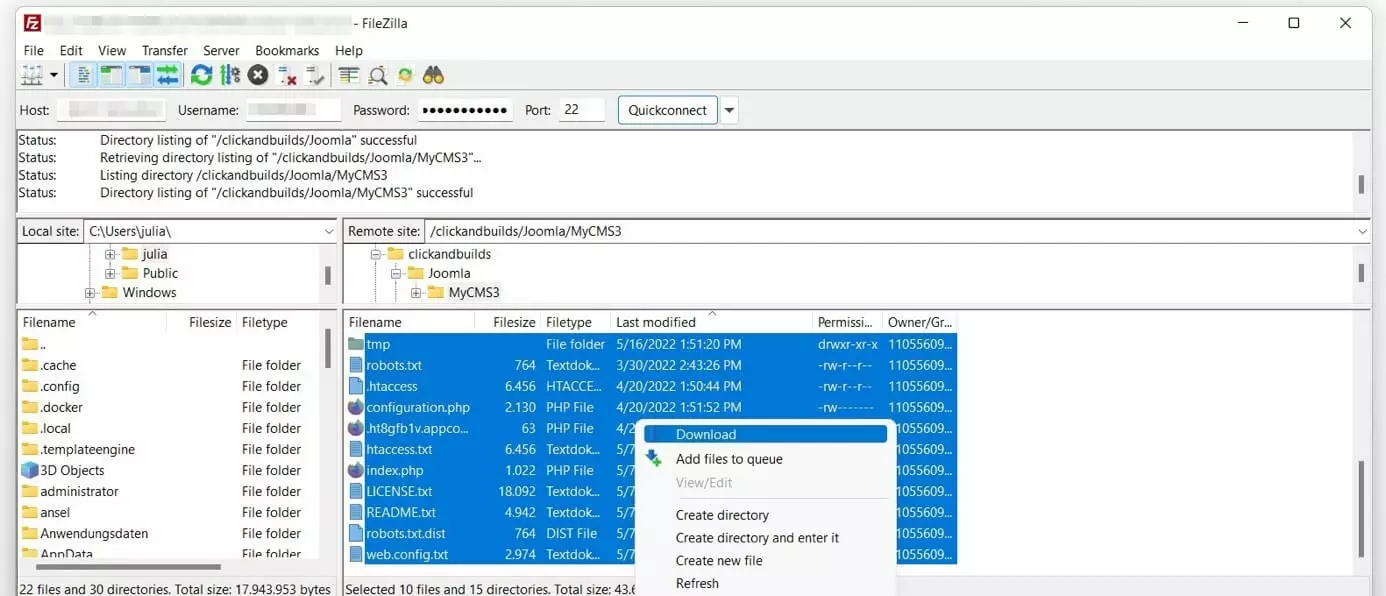
The easiest way to create a manual backup of your online storage is to establish an (S)FTP connection in the usual manner and then copy the files and folders to the desired storage directory using drag-and-drop. Alternatively, you can select the files in most FTP clients such as the FileZilla used here and download them via the menu item of the same name:
Create a Joomla database backup:
Once you have backed up all files, set your sights on the database. To do this, you need to log in to the phpMyAdmin interface. With many hosting providers, you can do this conveniently via the customer center. As an IONOS customer, you can access the database tool as follows:
- Log in to the IONOS Cloud Panel via the login page.
- Go to the “Hosting” section. 3.
- Click the “Manage” button under the “Databases” section.
- Search for the database of your Joomla installation in the listing and click “Open” on the corresponding entry.
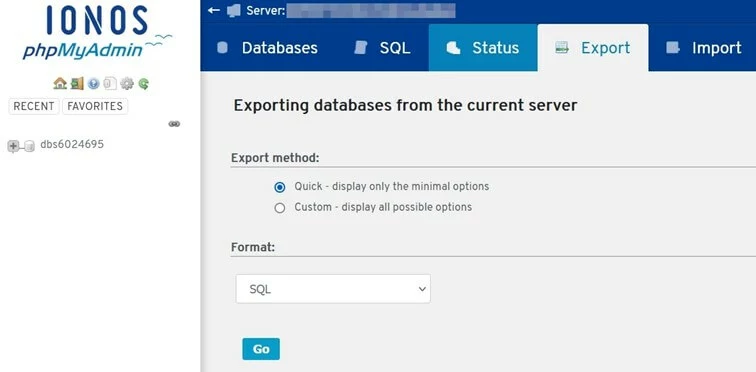
If you are logged into the phpAdmin console, follow these steps for the Joomla backup:
- Click on the “Export” tab.
- Keep the export method “Quick” or select “Custom” if you want to specify specific settings for the export.
- You can also keep the SQL format, otherwise select the desired alternative from the drop-down menu.
- Click “Go”.
If you want to restore the exported database later, go to the “Import” tab in phpMyAdmin and specify the location of the previously downloaded file.
Need next-level security on all your digital projects? MyDefender from IONOS will give you all-round protection for your devices including all files and system settings!


