WordPress migration: steps for a successful server migration
As is the case when moving between brick and mortar localities, a virtual move between server A and Server B is also a demanding enterprise that requires both careful planning and patience. Reasons for moving to a different server are various: a switch to another provider, setting up a backup server, or just implementing a trial round. If you want to transfer your WordPress blog, you can enlist the help of a migration tool. This step-by-step guide outlines some of the best tips and tricks to keep in mind when you carry out a WordPress server migration.
Manually migrating a WordPress account
Migrating to a new server and a new domain is a manageable task that a routine WordPress user should have no problem pulling off. Transferring all of your themes, plugins, settings, and content (including comments), is a matter of following a few basic steps. The requirements for transferring your blog are: an FTP account to an existing site, phpMyAdmin access to the database of that same website, and a webhosting package from an internet provider. After around one hour, the old data is saved and exported, new accounts and a new database are set up, and finally, the existing data is adapted and imported.
- Create & customize your site with AI tools made for everyone
- 3x faster: SSD, caching & more
- Daily security scans, DDoS protection & 99.98% uptime
Step 1: backing up database and WordPress data
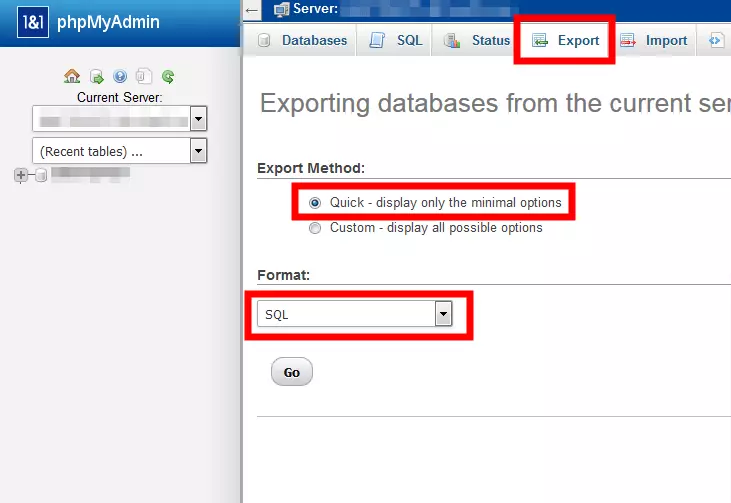
Backing up and securing your data is the first step before a move. But securing your data doesn’t end with securing your content. Other important settings, such as plugins, also need to be secured prior to migrating to a new WordPress server. The software phpmyAdmin is a convenient option for blogs that take up less than 2MB, and is often already integrated into many hosting services. Larger websites should consider using an external program, such as mySQLDumper. Backups can be locally saved. Within phpMyAdmin, you first select the correct database – if you are running several websites on the server. Click on 'Export' and you will be presented with the options 'Quick' or 'Custom'. The latter option enables you to influence the export. This is only recommended if you are already familiar with MySQL. The reason for the backup: you want to migrate WordPress manually. You should therefore select SQL as the format once again. The other formats are only useful if you are pursuing different destinations with your export. Confirm your settings and save the file to your hard drive.
If you want to learn more about the popular database management system, take a look at the MySQL tutorial for beginners.
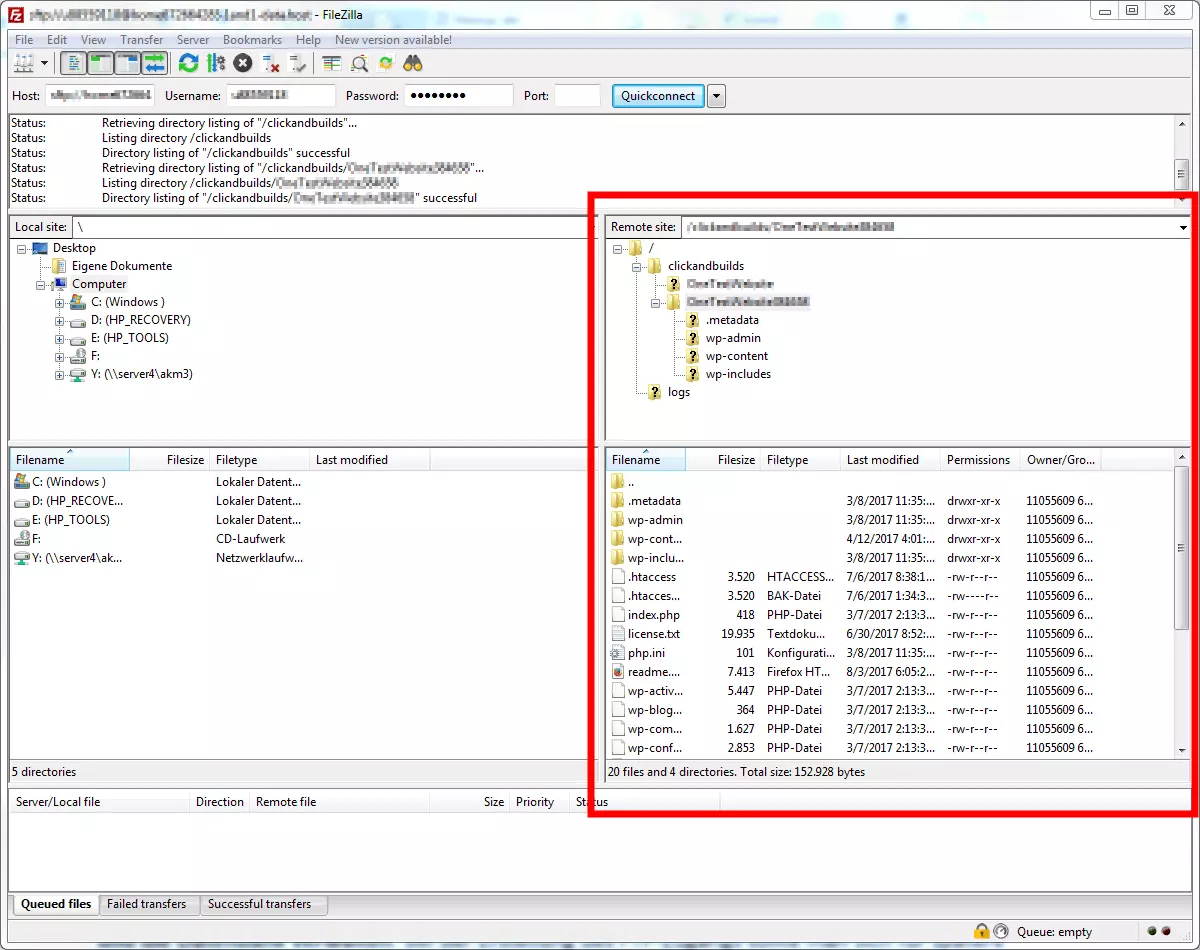
When using an FTP client such as FileZilla, all other WordPress files will be saved locally: choose the correct website from the folder structure and copy the data to your hard drive. Now you have all the files together and can move with WordPress.
Step 2: Creating a new database and access point
For the next step, a database needs to be set up with the new web hosting provider. As a IONOS customer, just open the Control Center in the MySQL database area and create a new database there. For your new server you need FTP access, which you can usually create via the login area of your hosting provider. Make a note of your new username and password when creating FTP access so you have it for future reference. Also keep note of the database name, hostname, database username as well as the password.
Step 3: Aligning and uploading WordPress data
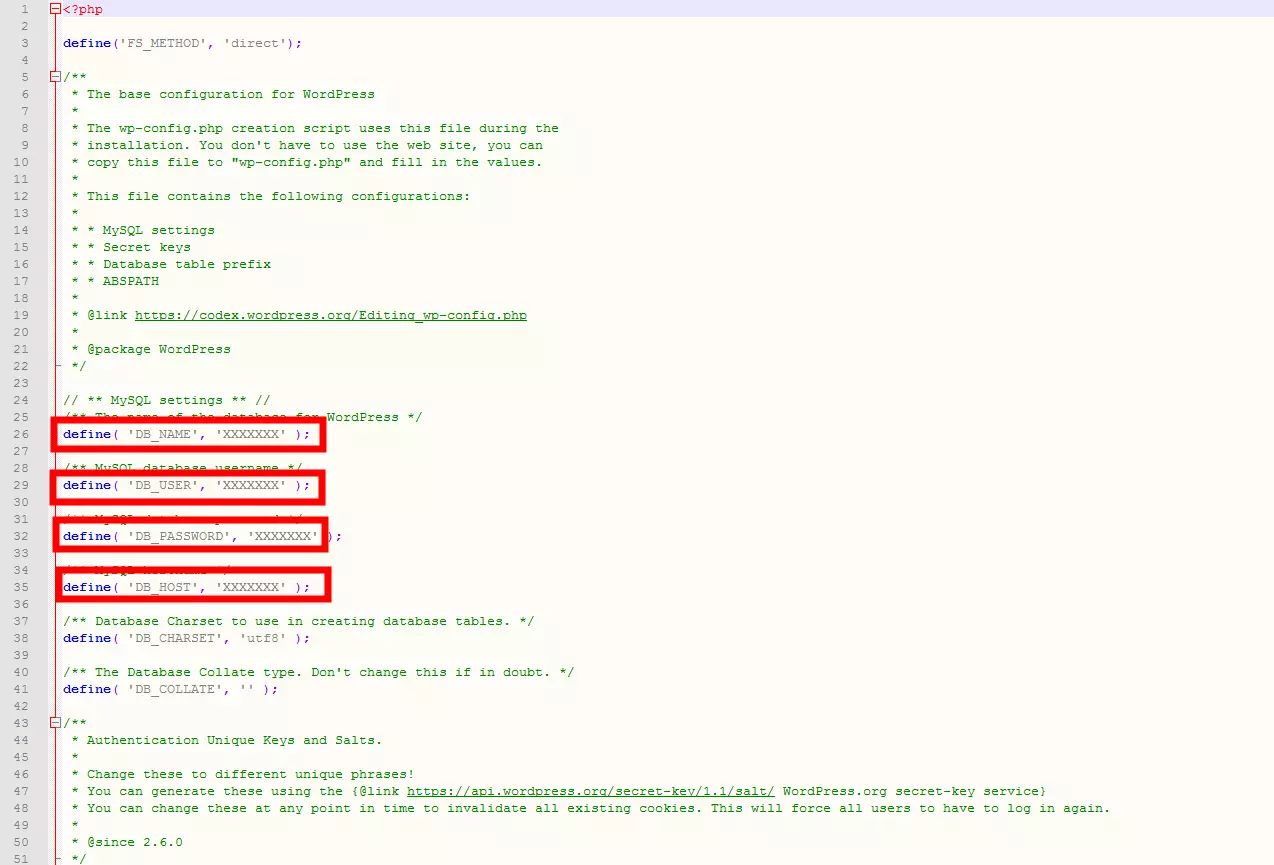
The next step is to align the existing data. To do this, open the file wp-config.php using a conventional text editor. This file is located in the root directory of your newly created backup. Align and save the entries DB_NAME, DB_USER, DB_PASSWORD and DB_HOST. You will also find this information in your setting’s host. Your blog is now ready to be migrated to a new WordPress hosting server. FileZilla or a similar program enables you to upload a copy of all WordPress files and folders into the root directory of the new server.
Step 4: Domain change
If you change the site or blog’s domain when you migrate, you can note this down directly in the SQL file before you upload it. If you search for the keywords 'siteurl' and 'home' with a text editor, the old domain can be replaced by the new address.
If you are still looking for a new domain, the IONOS domain checker can help:
Step 5: importing your database
In order to complete the WordPress migration, the database needs to be imported. In the administrative area of your new provider, you can access the programs phpMyAdmin or, for larger projects, MySQLDumper. There you can import the previously exported SQL file again. For phpMyAdmin: it’s important to click the right database in the left sidebar, otherwise the database won’t be selected and the import will fail. Now you can go to the import tab, select the database on your hard disk and start the upload. If you have not changed any special settings during export, you can also keep the default settings during import.
Step 6: completing and checking WordPress migration
At this point your website should be up and running. Some mistakes throughout this process might occur. Here is a list of the most common ones and how to fix them:
- .htaccess error: The .htaccess file allows webmasters to manually add links. Upon migrating to a new server, it is not uncommon for there to still be a few of these links lingering around. These links refer to your old domain and hence cause a problem report to appear when they are accessed. Errors are easily corrected in the .htaccess file.
- Mod_Rewrite and Internal Error 500: The server is not able to read .htaccess files if it the mod_rewrite module is activated. Internal Error 500 will appear when trying to access an article if this is the case. You can deactivate this setting under the “settings/permalink” function located in the dashboard. If, after adjusting the permalink settings, everything then proceeds to run smoothly and error-free, then reactivating mod_rewrite should not cause any further problems.
Migrating WordPress with plugins
Many guides found online give the reader the impression that migrating WordPress is a simple task that even beginners can manage. Pulling off a manual migration, however, can be a formidable challenge for less technically inclined WordPress users. Forgetting to complete even just one small step can result in an unsuccessful server migration and a lot of frustration. WordPress’ open source software easily lends itself to developers to create useful plugins that aid in WordPress migration. These programs cover all the necessary security precautions prior to the move; however it’s still advisable to create a backup beforehand.
The 5 best free WordPress migration tools:
WordPress Move
WordPress Move’s most attractive feature is its simple and intuitive usability. This migration tool makes it possible to transfer your entire website while changing the domain and transferring all of your data at the same time. It also serves as a back-up tool.
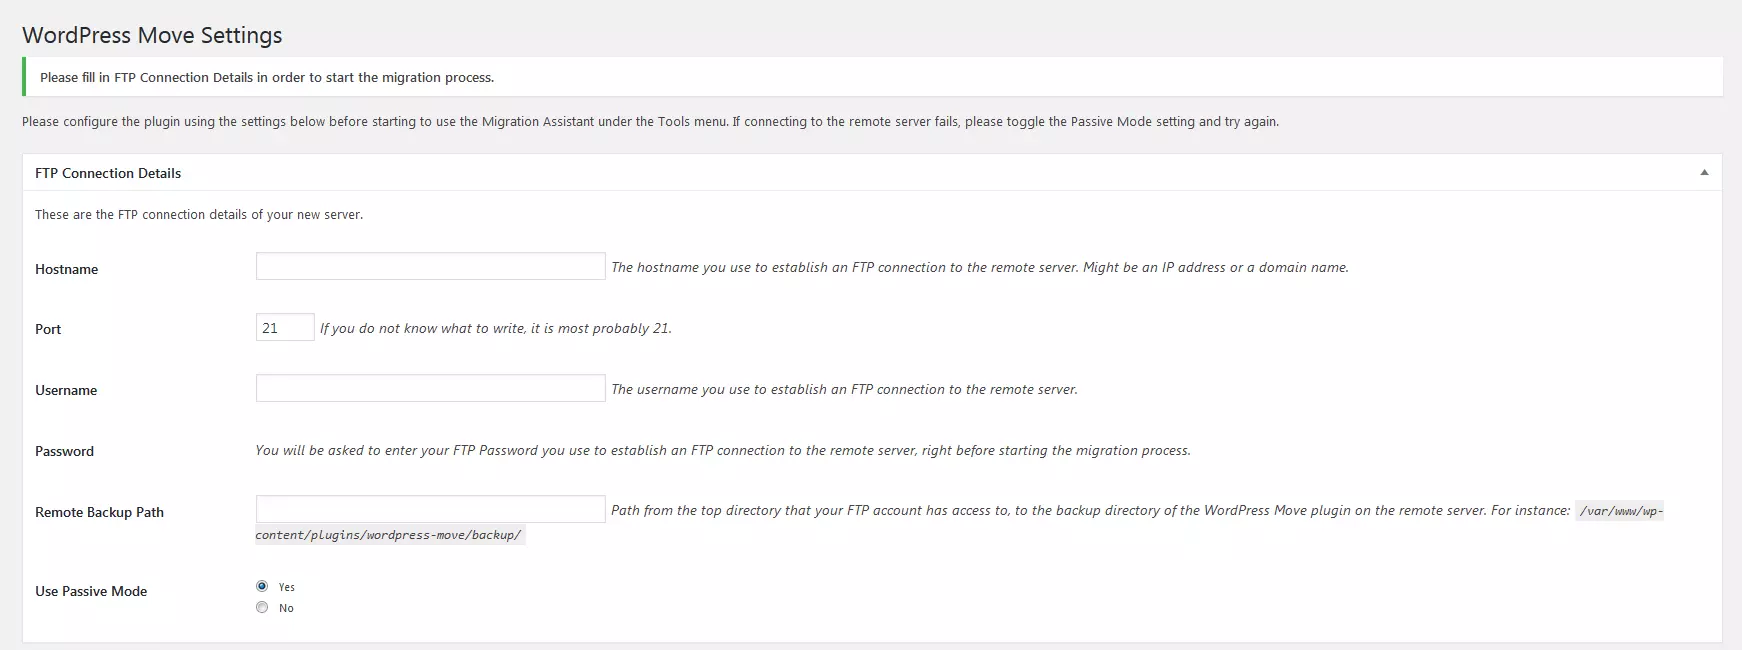
After the plugin has been installed and activated, you can make use of the Migration assistant in the dashboard under the Tools tab. If you choose the WordPress server relocation (Migrate), you must first install a new WordPress installation on your new host and install the plugin there as well. Enter the FTP details of the new server. Once you have created your backup, you can change to the migration extension in the new installation and restore the old contents and settings with Restore.
All-in-One WP Migration
As the name suggests, All-in-One WP Migration offers a complete solution for most of your WordPress migration needs. It exports all data so you can move all files together with the WordPress database: in one step. Another advantage the extension offers is that the upload is divided into small packets. This avoids any possible size limitations that the web server might have in place.
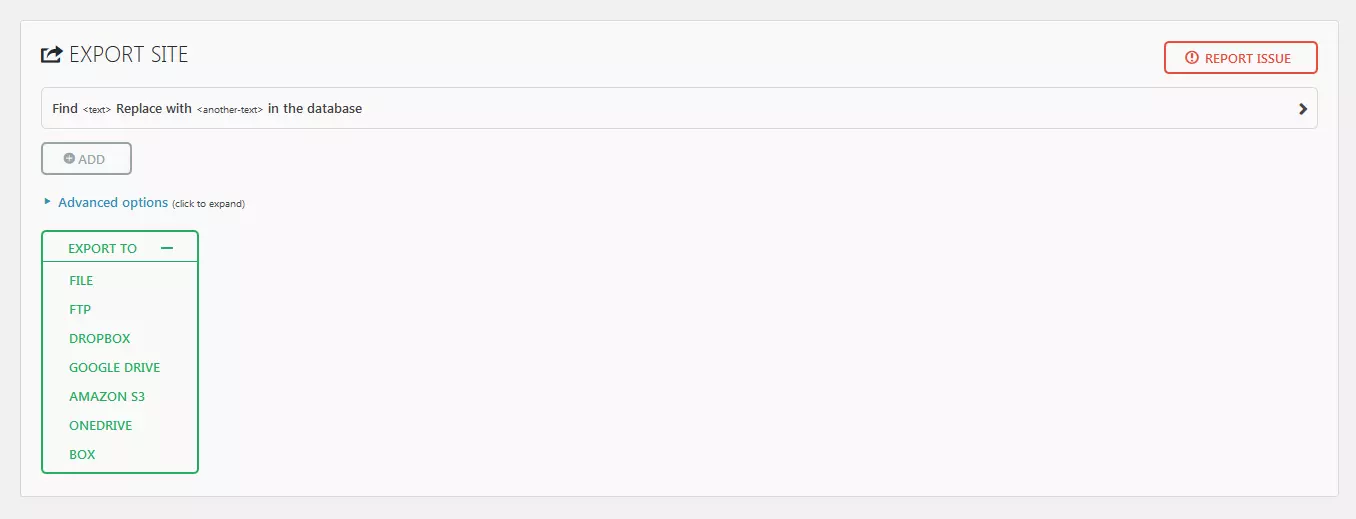
You can export everything in a single file. If you choose the premium version, you have the option to load everything directly to an FTP server or various cloud solutions. On your new server, you can also install WordPress and the plugin, and then use the drag-and-drop function to upload the old data.
WordPress Clone by WordPress Academy
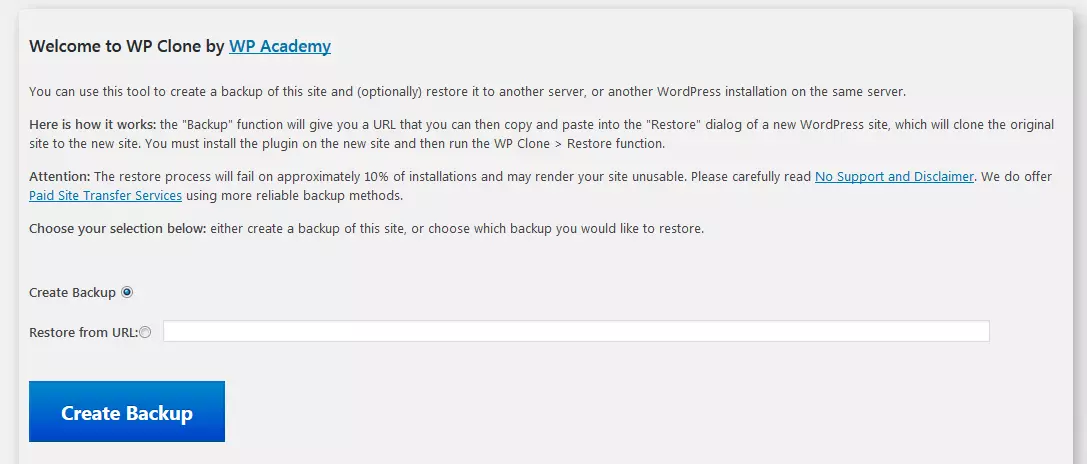
The plugin, Wordpress Clone is the quickest and least complicated solution for moving WordPress. This program also allows users to transfer pages to a local server environment, thereby allowing copies to be created for testing different approaches.
With WP Clone you can create a new menu item. The move is very easy. Click on 'Create Backup' to create a link. The backup can then be found under this address from now on. The URL can easily be added to the new server.
WordPress Duplicator
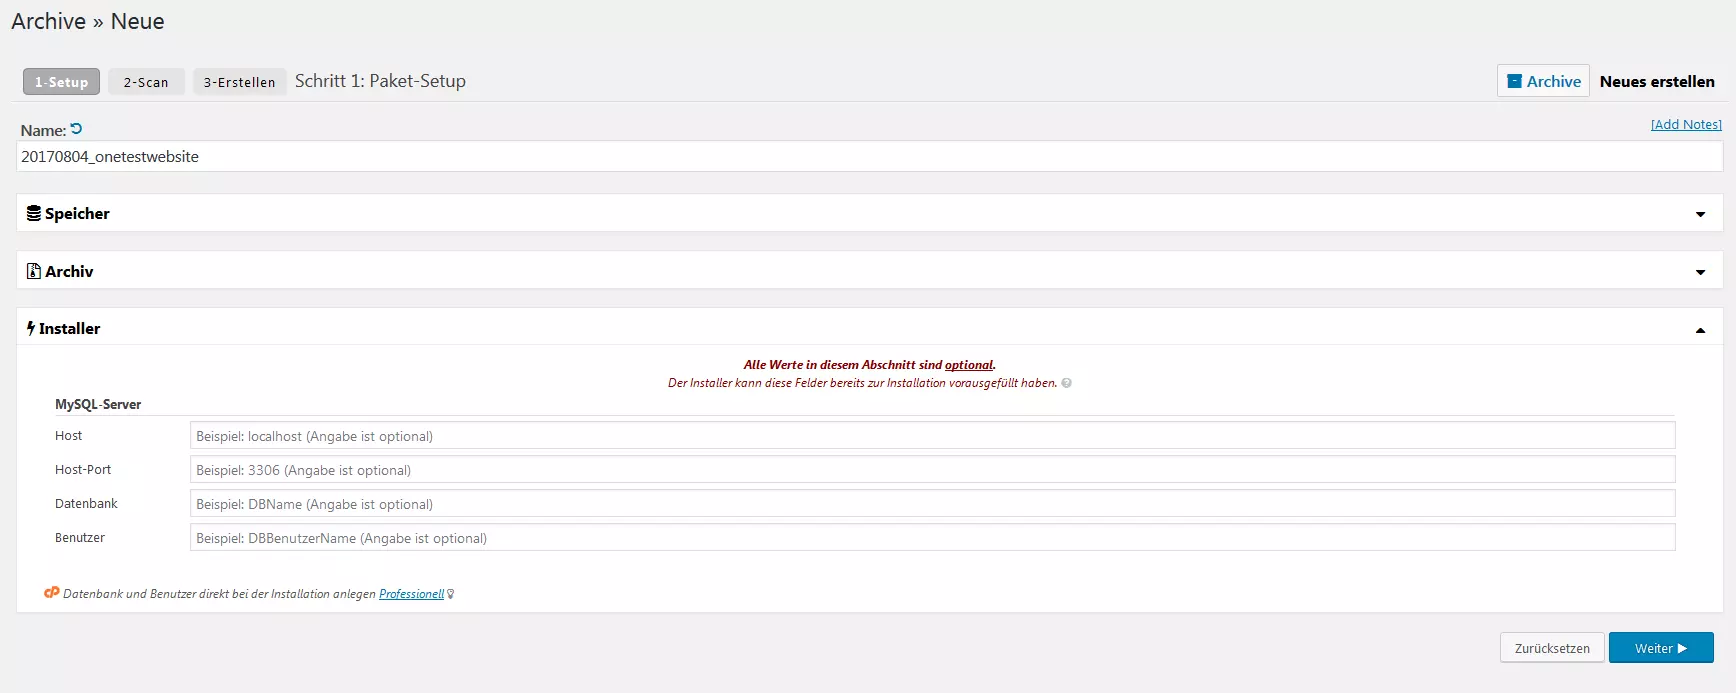
The WordPress Duplicator allows users to duplicate a blog before the website is transferred from server A to server B. This plugin is by no means meant to be a solution for WordPress beginners, but is rather intended to support experienced developers.
Under the menu item 'Duplicator', it’s possible to change some of the settings before the tool creates a backup. In addition, each created archive gets an installer, which makes the move a lot easier. Both files can be downloaded and then uploaded to the new server. Then the file installer.php is accessed on the new server (i.e. mywebsite.com/installer.php) and then the migration can start.
UpdraftPlus
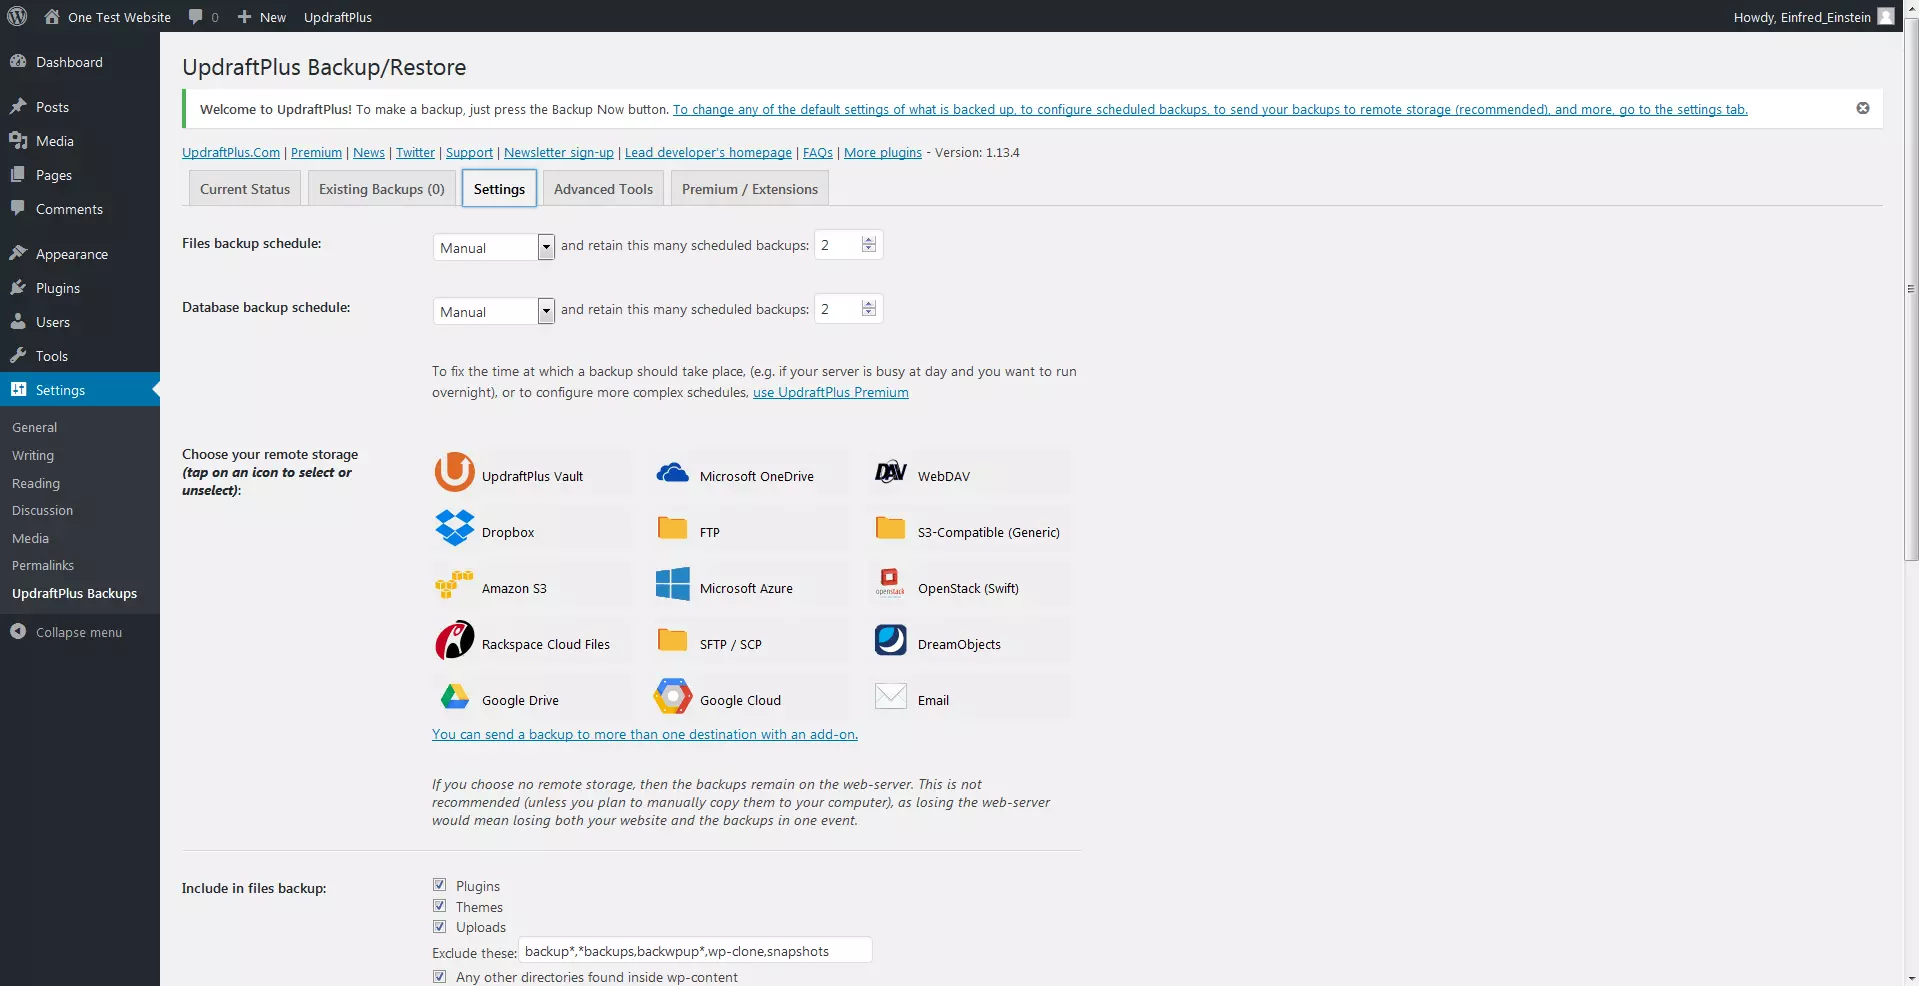
The plugin UpdraftPlus enables you to save your backup to different cloud servers: after you enable the extension, you will find the plugin under 'Settings' in the dashboard of your WordPress installation. In UpdraftPlus, specify where the backup should be saved: Dropbox, Amazon S3, Drive, or even e-mail (the latter is only recommended if you do not use a free e-mail provider as this greatly limits the size of the received files.) Once you have configured all the settings, the backup can be set up with a single click. To install it on a new server, you switch back to the view of the plugin in the newly created WordPress and select the appropriate files that need restoring.
It’s even easier if you switch to the payment version of the plugin, which means you will have a dedicated migration function available. Premium users also have the option of encrypting their backups, which isn’t a bad idea for backup copies on cloud servers.


