How to add Bcc in Outlook
Blind carbon copy (Bcc) is a function offered by Outlook that enables you to send a “hidden” copy of your message to select addresses. This is useful, for instance, if you want to send an email to multiple people.
Unlike addresses in the “To” or “Cc” fields, addresses in the “Bcc” field are hidden from other recipients of your message. This feature helps you keep your business relationships confidential and safeguards the contact details of people you are sending emails to.
Read our step-by-step tutorial to learn how to add the Bcc field in Outlook so you can send blind carbon copies of emails.
How to use the Bcc field in the Outlook desktop application
The Bcc field is available in all versions of the Outlook desktop application. By default, however, the Bcc field is hidden in the Outlook versions of Microsoft 365 and Outlook 2021, Outlook 2019 and Outlook 2016.
Take the following steps to activate the Bcc field for new messages, email replies or forwarding:
New email with Bcc
- Click on New Email to open a new email window.
- Switch to the Options tab.
- Click on the Bcc button in the Show Fields section.
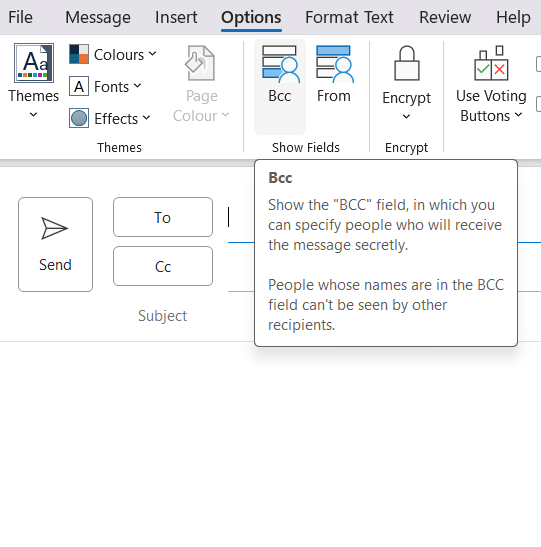
Once it’s activated, the Bcc field will appear as a new address line under “To” and “Cc”.
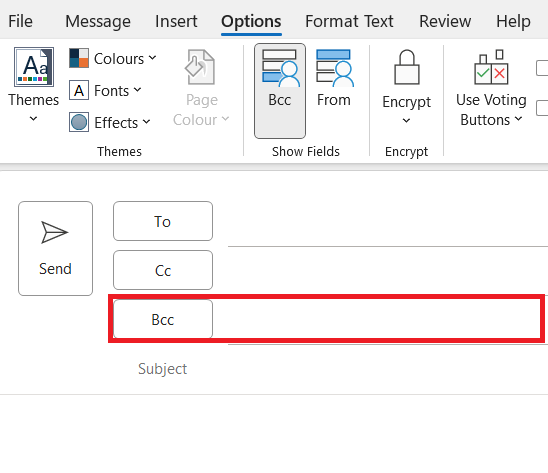
When you activate the Bcc field in the Outlook desktop application, it will automatically appear when you write new messages. The Bcc button is highlighted. To deactivate it, all you have to do is click the button again.
Replying or forwarding with Bcc
- Click on Reply or Forward to write a reply or forward a message.
- Click on the Pop Out button to open the message in a new window.
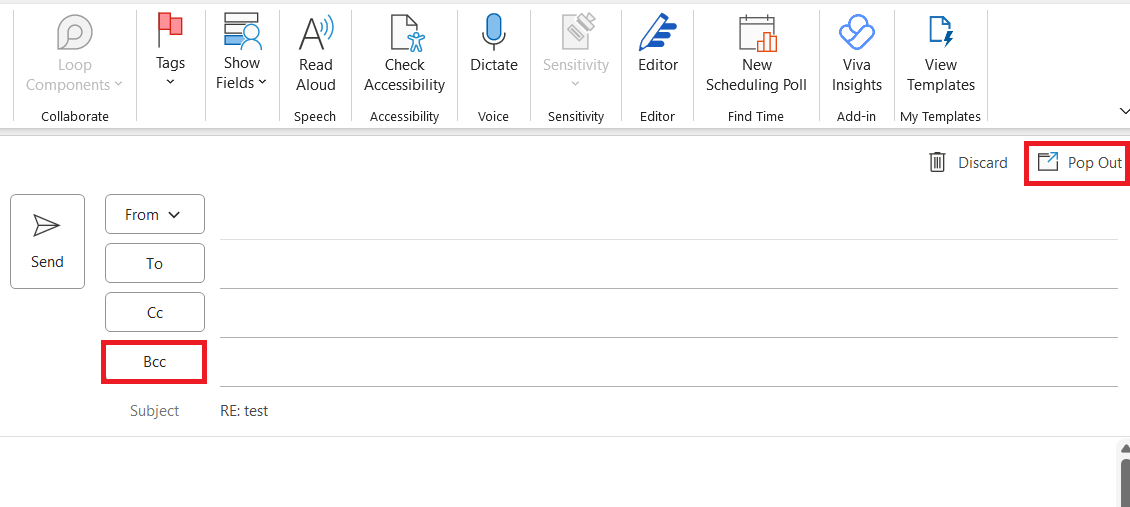
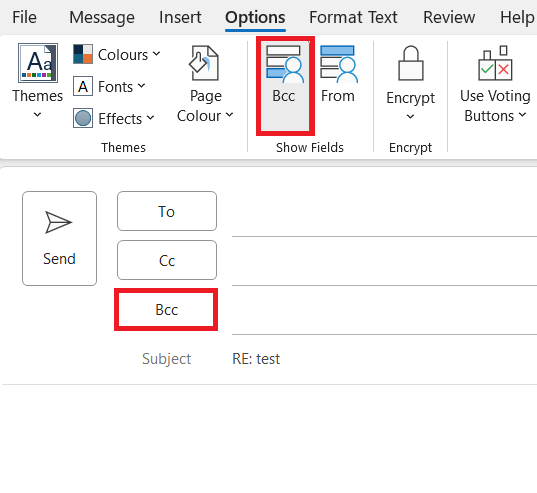
- Click on the Bcc button in the Show Fields section.
- 2 GB+ storage
- Sync across all your devices
- Spam filter and ad-free
How to use the Bcc field in the online version of Microsoft 365 and Outlook on the web
The blind carbon copy feature is also available online in both Microsoft 365 and Outlook on the web. In Outlook on the web, the Bcc field is hidden by default.
Follow the steps below to display the Bcc field in Outlook on the web and Microsoft 365.
- Sign in to Outlook on the web or Microsoft 365.
- Click on New Email, Reply or Forward.
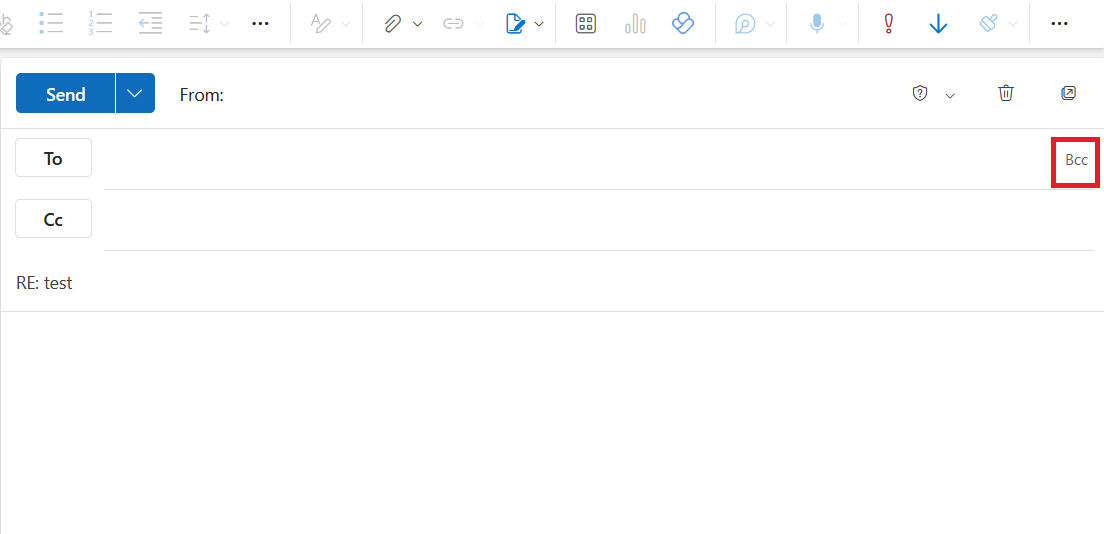
- Activate the Bcc field by clicking on the button with the same name, located in the upper right corner next to the To field.
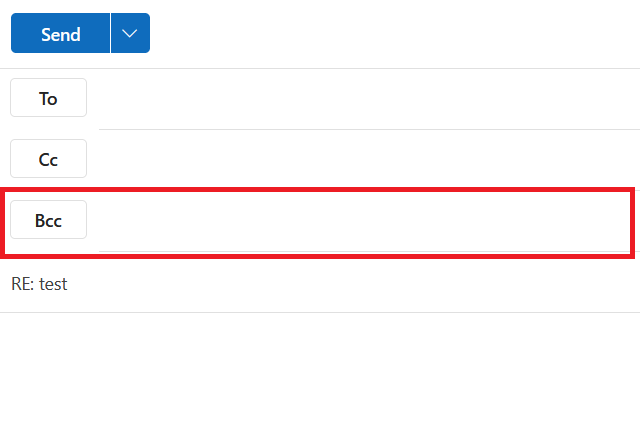
The Bcc field is displayed as a new address line below To and Cc.
How to view Bcc recipients in sent messages
Email addresses entered in the Bcc field aren’t shown to message recipients, regardless of whether they are in the To, Cc or Bcc field. Only the person who sent the message is able to view the Bcc addresses later on.
If you want to view Bcc addresses after you have sent an email, open the Sent Items folder. Here you’ll find the Bcc recipients in the email header of the email you sent.
- Fast drag and drop editing
- Simple personalization
- AI-powered text generation

