Import PST to Gmail: step by step
Want to use Gmail like Outlook? You can import your entire Outlook profile to Gmail. This ensures that all your stored Outlook email addresses, notes, and calendar entries are transferred. Best of all, you don’t need to import data records individually, saving you plenty of time. Microsoft Outlook stores all data in a specially created format which means that in order to save your Outlook data and transfer it to Gmail, you need to create a so-called PST file. Afterwards, you can import Outlook PST to Gmail to transfer all the information you need from one program to another. Find out how below.
- Simple registration
- Premium TLDs at great prices
- 24/7 personal consultant included
- Free privacy protection for eligible domains
What is a PST file?
A personal store file, or PST file for short, is an archive that stores emails, notes, contacts, and other contents from Outlook. PST files are like a backup for Outlook profiles to restore them in case of data loss. These archives are saved locally to a computer. Optionally, archives can be stored in a web mailbox from where they can be easily retrieved.
Reasons to import PST files to Gmail
There are different situations when you may want to import PST files to Gmail. A migration could become necessary if you or your company want to implement Google Workspace as a central platform to work from. This may involve the switch from your existing Outlook to Gmail. In this case, PST archives are the easiest and also the most secure way to migrate data from one email client to the other.
Gmail provides plenty of useful features compared to other email clients like Outlook, which is another good reason for importing a PST file. For example, Gmail boasts plenty of storage space for backing up important emails. The client can be used across multiple apps using a single Gmail ID, and a chat messenger is available to chat with co-workers and teams. In this way, teams can exchange information without having to use an additional app. Another bonus of Gmail is that it is free and it is easier to use, in parts, than other email clients.
An Outlook license, on the other hand, is usually associated with high costs. You may be able to save money when switching.
How to import PST to Gmail: step by step
There are two options to import Outlook PST to Gmail:
- Use the Google tool to import – similar to the Outlook Import/Export wizard.
- Manually import PST following the step-by-step tutorial below.
Both options produce the desired result. During a manual transfer, you’ll have more options to adjust the individual steps and define certain information when migrating PST to Gmail. The path via Google’s migration manager accompanies you from start to finish and is thus easier to implement.
Import PST file to Gmail using Google Workspace Migration for Outlook
If a manual import is too time-consuming for you or you’re not familiar with the technical terms of both email clients or don’t have Outlook installed anymore, you can add PST archive files to Gmail. All you need is the Google migration tool. So you don’t need to rely on third-party software for the migration.
Google Workspace Migration for Outlook lets you import all the files you need from a PST to Gmail in just a few steps. You can either import all the files in an archive or selected files or groups, for example, only emails.
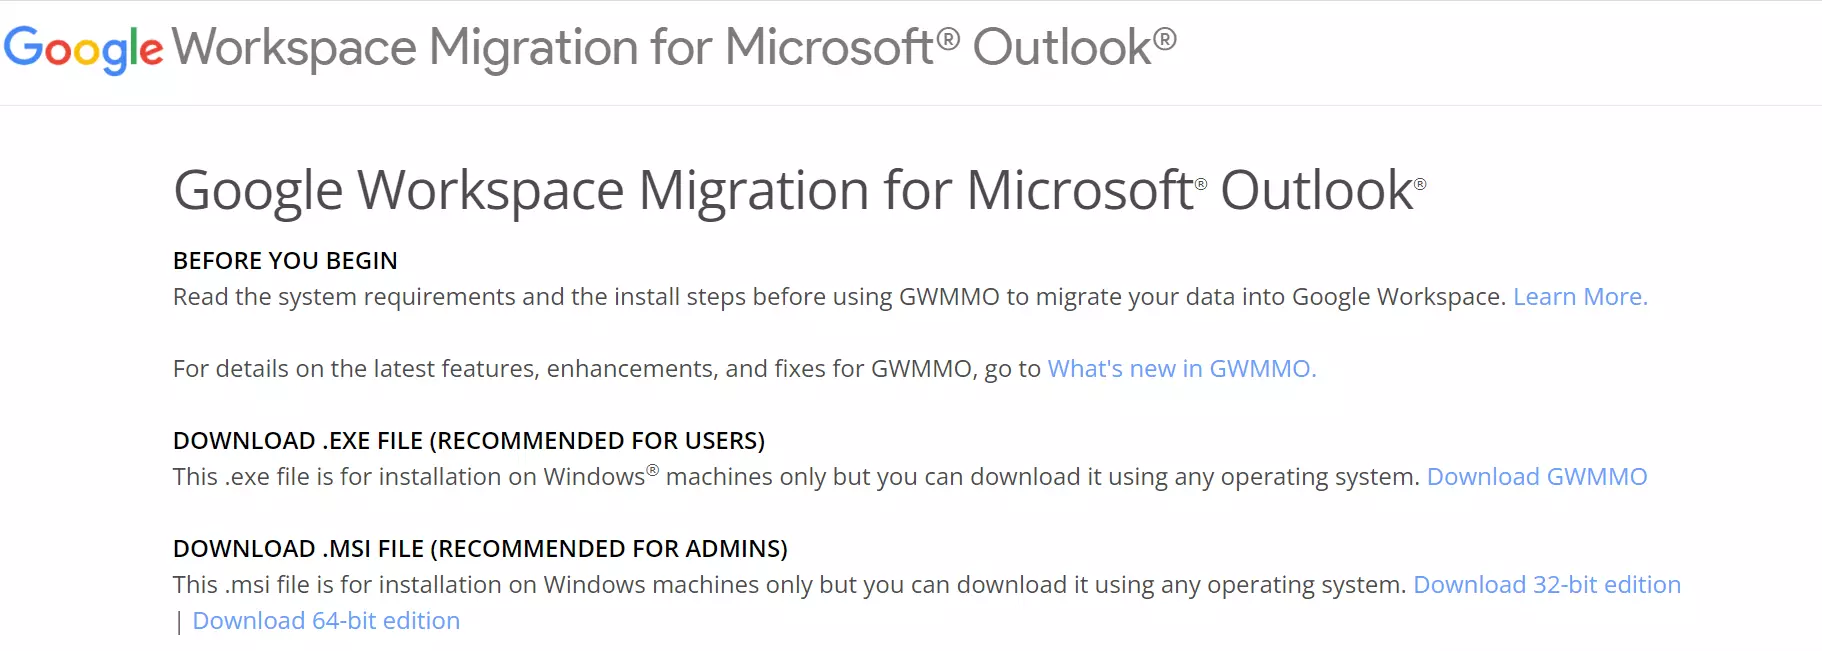
Step 1: Download the Google Workspace Migration tool. Before downloading, verify the version of Outlook you used to save the PST archive – 32-bit or 64-bit. The Google Workspace Migration must match the Outlook version. But don’t worry if you install the wrong version since the Import Wizard will alert you the first time you run it, so you can install the correct version again afterwards.
Step 2: Once you’ve downloaded Workspace Migration, open the application. Specify the email address of the Google account to which you want to import the PST archive.
Step 3: A new window will open in the browser with a login window for the “Google Workspace Migration for Microsoft Outlook”. The appropriate account should already be pre-listed. If you selected a wrong email address in the previous step, you can now change the address of the account. Confirm use of the Google account by clicking on the appropriate account.
Step 4: Confirm usage of Google in the next step. This gives Google Workspace Migration for Microsoft Outlook permission to read, write, send, and finally delete Gmail emails. Allow this by clicking on “Allow”. You can then select which archive to import
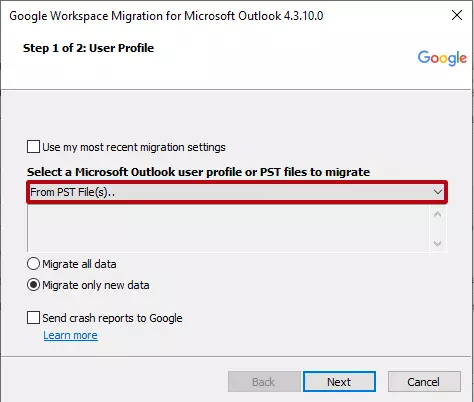
Step 5: You’ll be taken back to the import wizard. Select “From PST File(s)...” in the menu. A window opens in which you can search for and select the desired PST folder. The selected file will then be listed under the choice of the two options. Confirm with “Next”.
- Free Wildcard SSL for safer data transfers
- Free private registration for more privacy
- Free 2 GB email account
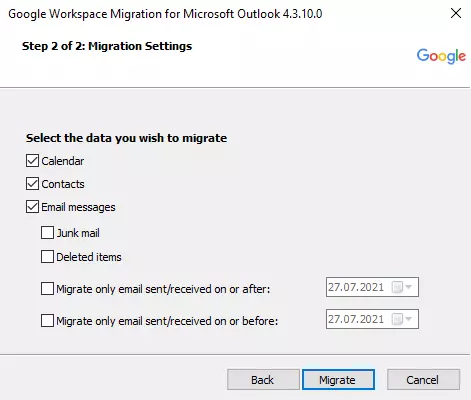
Step 6: Now, you can choose to import all files or, for example, only emails or contacts from the PST into Gmail. You can change this by placing check marks in the checkboxes or removing them. When you have made the appropriate selection, confirm your selection with “Migrate”. The transfer process will begin. You will then see the status of the migration in a processing window.
Note: Depending on the size of the archive, you may want to let this process run overnight so that your Gmail inbox is not constantly resynced and reloaded with additional data while you work.
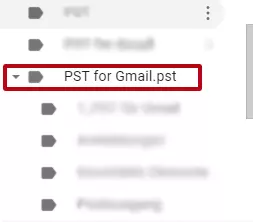
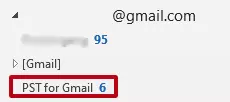
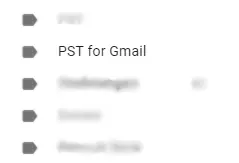
Step 7: After the migration is complete, switch to your Gmail account in a browser or in the Gmail app. If the previously selected PST folder is listed, you have successfully imported a PST file into Gmail.
PST files are suitable for archiving data so that Outlook and Gmail are not overloaded. Professional email archiving automatically saves selected folders and is a great option for businesses.
Manually import Outlook PST to Gmail
Manual import of PST files to Gmail lets you specify precisely the type of data you want to transfer to Gmail – be it emails, contacts, or notes. This way, you can determine which subfolders should be taken into account during the import. However, the process tends to take longer because of the individual steps involved.
First of all: for a manual import, you will need Outlook and an existing Gmail account. An import from a PST file into Gmail is only possible by connecting the two email clients.
While Google lets you create an email address with the @gmail extension, for the self-employed and businesses, a unique email domain looks more professional. IONOS makes it easy to create a professional email address with your desired domain.
During the process, a link is established between the two email clients that lets them access one another. By saving an Outlook PST file, you can first add it to Outlook as a complete archive and then move it to the area that accesses Gmail within Outlook. In doing so, you can think of the process as creating a subfolder called Gmail in the directory called Outlook, and then dragging and dropping data into it as you see fit. This is how the desired PST is inserted into Gmail. Find out how this works step-by-step below.
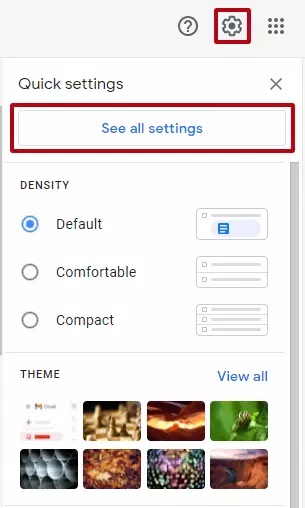
Step 1: Launch your Gmail client and click on the small cogwheel in the toolbar on the right. This opens the quick settings, from where you can make minor changes. Select “See all settings”.
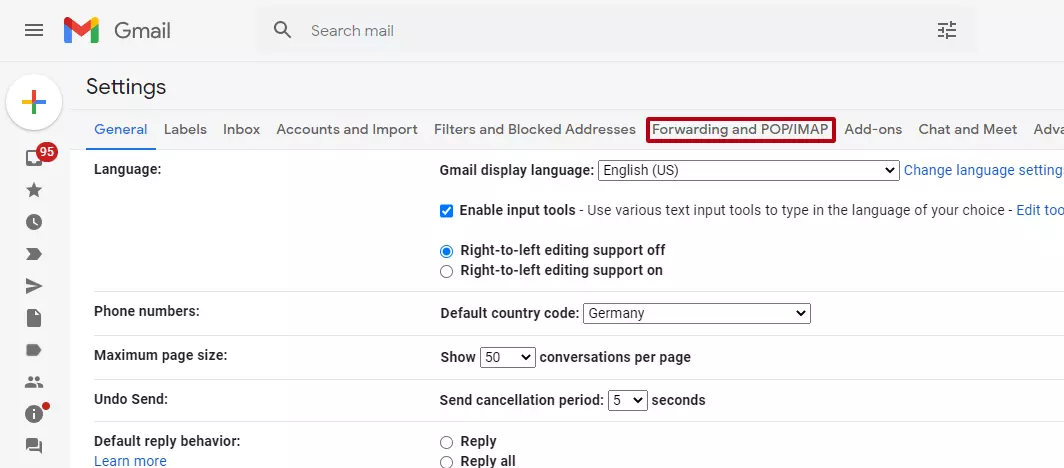
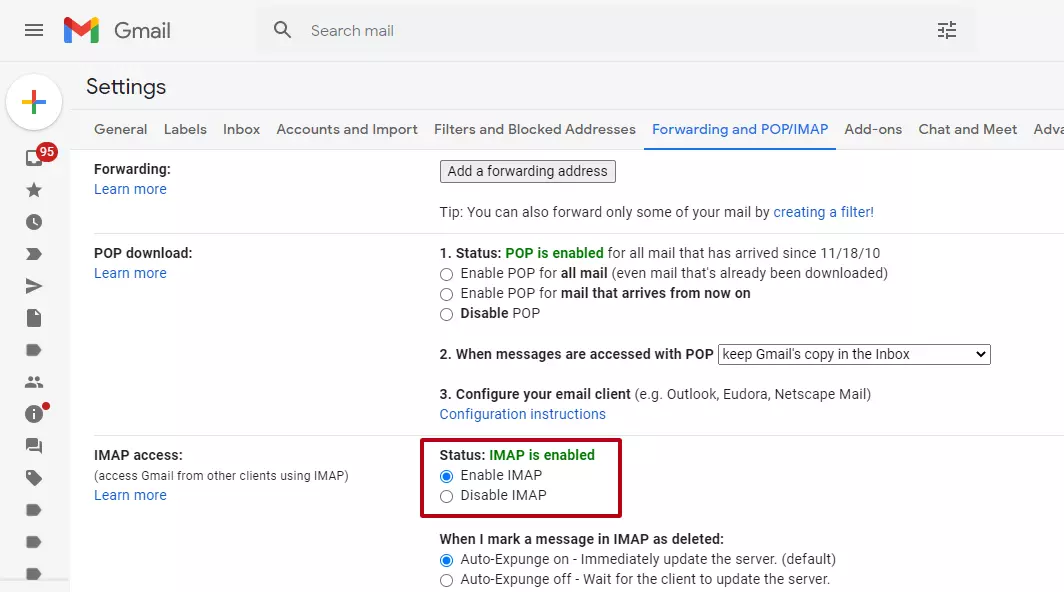
Step 2: In advanced settings you can customize Gmail and adjust various settings. First, you need to enable Outlook access to your Gmail profile. To do this, select the “Forwarding and POP/IMAP” option.
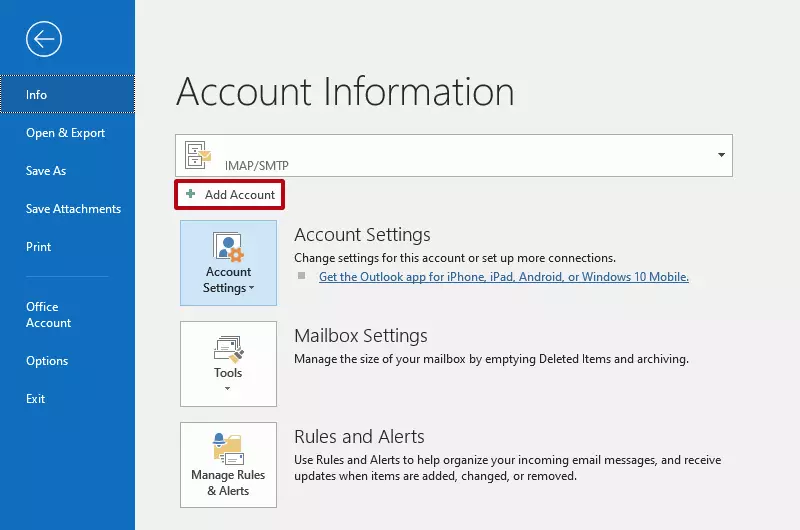
Step 4: After you have prepared the Gmail account for forwarding to Outlook, establish the connection from Outlook to Google. Switch to Outlook and select the first item “File” in the status bar and click on “Add Account”.
Step 5: Enter the email address belonging to the account and click “Connect”. Type the Gmail password and click “Connect” again. In the last dialog box, confirm the process. This completes the setup. Outlook and Gmail are now connected.
This means that emails arriving in Gmail will be auto-displayed in Outlook. At the same time, you can now move data from Outlook to Gmail. When you open the Gmail app on your smartphone, for example, you will see that the moved emails or folders show up in the Gmail app in the same place where you moved them in Outlook. We will take advantage of this effect for PST-Gmail migration.
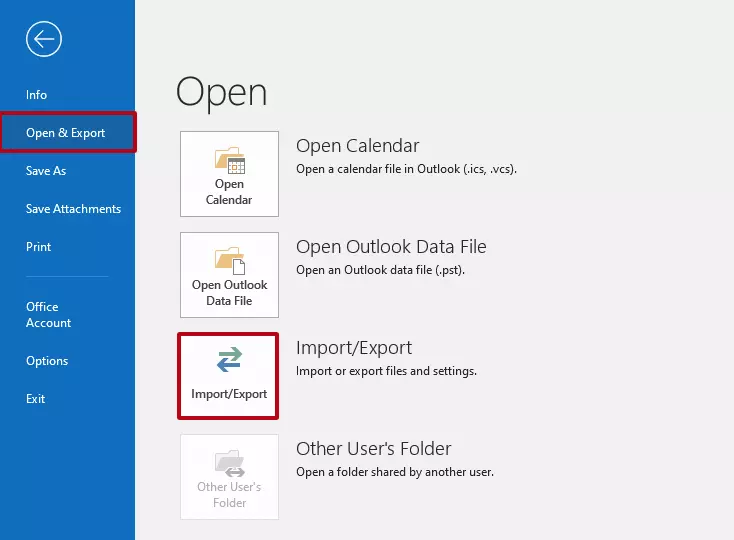
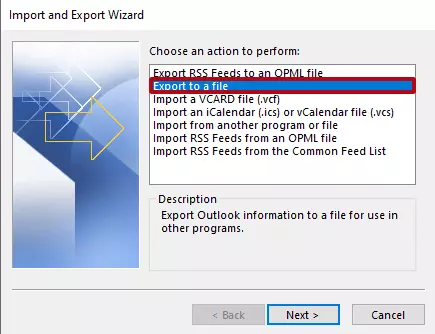
Step 6: For mirroring of the data to take place, you must first define which data should be archived and saved by Outlook. To do this, create a PST archive. Go to “File” > “Open & Export” > “Import/Export” to start the wizard.
Step 8: Outlook now queries which emails, folders, and other information will become part of the PST archive and where they should be stored. When you have made all the selections and chosen a suitable location, complete the export.
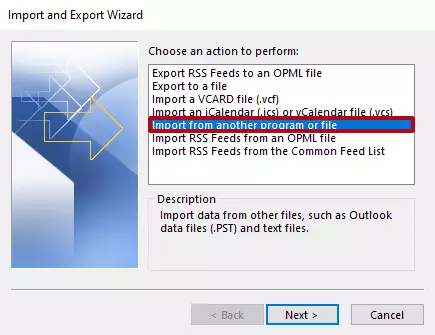
Step 9: To transfer the data to Google, import the folder we just saved as an archive into Outlook. To do this, return to the wizard as described, so that you are in the Import/Export wizard. Now select the top item “Import from another program or files”. Check out other ways to import a PST file to Outlook in our dedicated article on the topic.
- Store, share, and edit data easily
- Backed up and highly secure
- Sync with all devices
Step 10: In the next dialog, you will be asked again what kind of file you want to import. Once again, select “Outlook data file (.pst)” and the folder you saved.
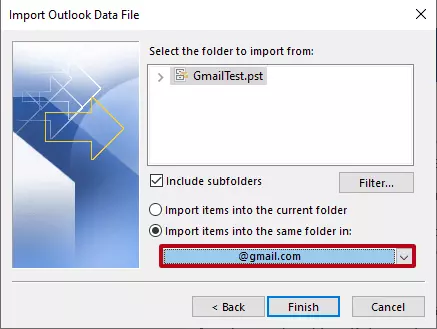
Step 11: Here’s the decisive step: you can select the email account where the PST file should be imported to via a drop-down arrow. Select the Gmail account and confirm the import with “Finish”.
Not a fan of Google or Microsoft? Looking for a different email client? Here are some great Gmail alternatives, their advantages and disadvantages.


