Creating an e-mail signature – a step-by-step guide
An e-mail signature is a type of business card within the world of the internet and it leaves behind a professional impression, especially with business contacts. In it, your partners and customers find important information – such as your telephone number and extension or the internet address of your homepage. Before you can create an e-mail signature, you should know what a professional e-mail signature should contain – there are special guidelines, especially at the business level, that you should observe to make sure your signature is legally valid. How you set up your e-mail signature differs slightly, though, depending on the e-mail provider or program.
How to create an e-mail signature in Outlook
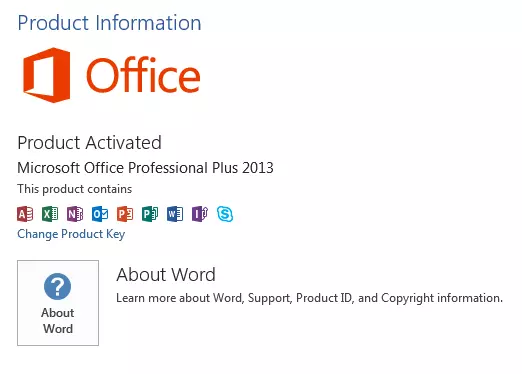
Do you use Outlook from Microsoft as your e-mail provider? To find out how to create an e-mail signature with this program, you first need to figure out which version of Outlook you’re currently using. To do this, click on “File” in the upper-left corner of Outlook and then on the “Office account” option. There, you’ll find your personal user information as well as other product information. This will tell you which Office package is currently installed on your computer.
Create an e-mail signature in Outlook 2007 to 2010
- Click on “New Message” under the “Home” menu, so a separate window for a blank e-mail is opened
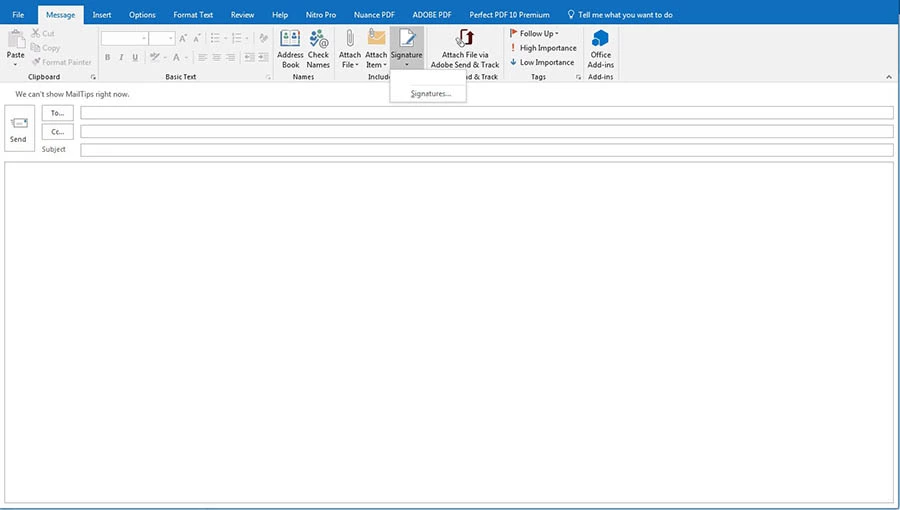
- Make sure that the “Message” tab is selected, and then click on “Signature” in the ribbon menu
- A small, clickable window named “Signatures” will appear, after which a menu for signatures and stationary opens in an extra pop-up window
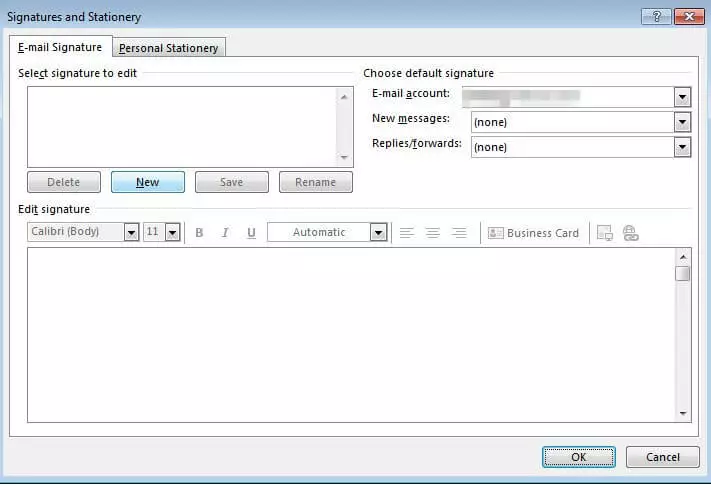
- In the “E-mail signature” tab, click on “New” to open a dialog window in which you can enter a name for the new signature
- Now you can edit your signature as desired in the large text box on the lower half of the pop-up (besides various text formatting tools, you also have the option to integrate individual business cards, links, or even graphics in either JPG or GIF format into your signature using the buttons on the right)
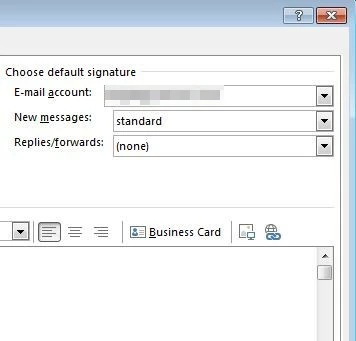
- Once you’ve finished designing your signature according to your wishes, click on “Save.” In the upper right part of the dialog window you can now specify whether the new signature should be automatically added to every new message as well as to replies or forwards. To do this, select the name that you’ve assigned to the new signature from the drop-down menu.
The individual steps are clearly illustrated in this YouTube tutorial:
Create an e-mail signature in Outlook 2013 to 2016
If you’re using a newer version of Outlook, the process changes quite a bit from the previous versions for creating an e-mail signature.
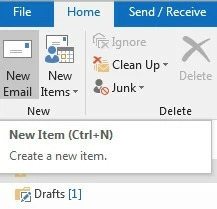
- Open the window for a new message – either by clicking on “New E-mail” in the upper left corner of the “Home” tab, or via the shortcut Ctrl+N
How to create an e-mail signature in the Outlook web app
Do you usually use Outlook through your browser? The strategy is a bit different in the web app.
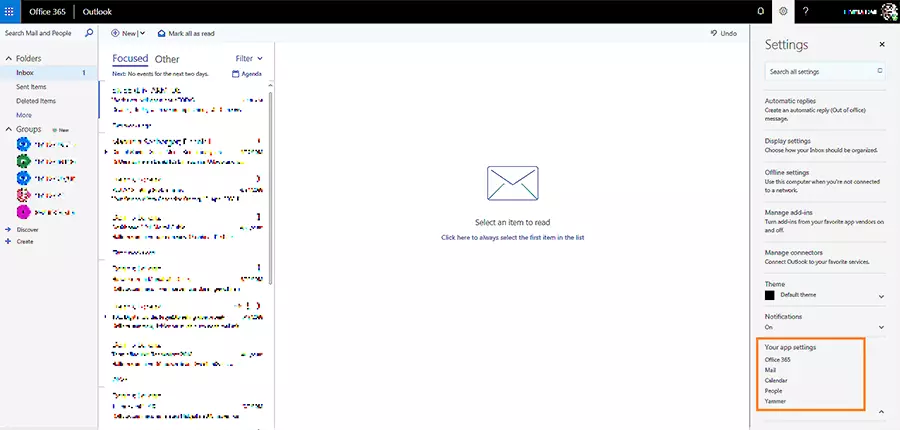
- After logging in to the web app with your personal login data, access the settings menu through the gear symbol next to your username in the top right. Click on “Mail” in the drop-down menu under “Your app settings”.
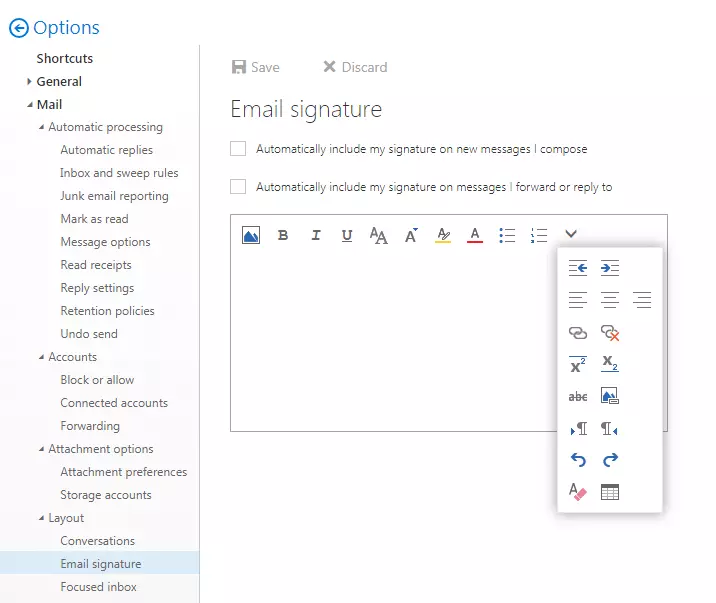
- A window appears with the e-mail options. In the left sidebar, select the “layout” button. In the drop-down menu, click on “E-mail signature”.
- Now you can create your desired e-mail signature in Outlook, uniquely format it, and automatically integrate it in your sent messages by clicking on the checkbox.
Create an e-mail signature in Outlook for Mac
If you use Outlook in combination with an Apple operating system, the interface of the e-mail client looks a bit different. But a signature in Outlook for macOS is still created with just a few clicks.
- Click on “Outlook” in the top-left menu bar and select “Settings” from the drop-down menu
- Under “E-mail”, find and select the “Signatures” button
- This opens a new window in which you can create and edit your signatures
- Click on the plus symbol to add a new signature – by double-clicking on “Unnamed” you can create a label for the signature
- In the text field on the right, only enter the information that you want to be attached to your e-mails in the future
- To format the text or add links, select the desired section of text and click on the respective option in the “Format” menu
- If you want to set one of your signatures as the standard signature, you can do this under “Select standard signature”– it’s also possible to select a different signature for replies and forwards
- To add a signature manually, click on “Signature” in the “Message” tab of your message text – a list of your created signatures will appear
These directions work for Version 2011 as well as 2016, which hardly differ from one another in terms of controls. Here you can see the processes for the individual versions in their own videos:
How do you create an e-mail signature in Gmail?
To be able to use the Android operating system, smartphone owners need a valid Google account. Thanks to Gmail, many also use their account directly as their preferred e-mail program. How to create an e-mail signature in Gmail can be explained in just a few steps.
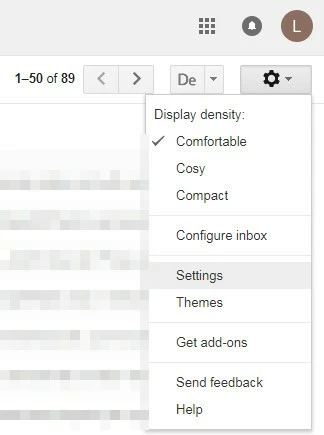
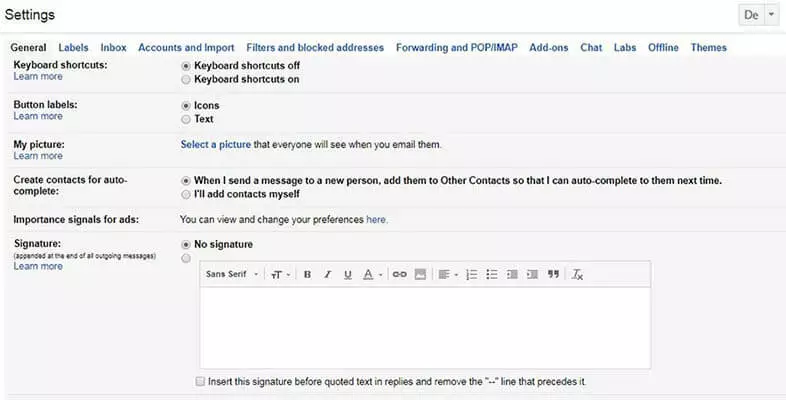
- After logging in with your Gmail e-mail address and password, click on the settings symbol, found in the top-right of the browser window
- In the drop-down bar click once again on “Settings” (make sure that you’re in the “General” tab) and scroll down to get to the editing window for your signature
- “No signature” is pre-selected, but as soon as you enter text into the editor it is automatically changed (you can also easily add links and photos to your signature by navigating to the chain-link or image symbol in the middle of the task bar)
- Now you just need to decide whether Gmail should also attach your signature to replies – check the corresponding box if you would like it to do so
- Scroll to the bottom and confirm your new settings by clicking on “Save changes”
How do you create an e-mail signature with GMX?
Many users trust German e-mail providers for reasons of data protection – GMX is one of them. To create an e-mail signature in GMX, you only have to follow four steps.
- After logging in, click on “Settings” on the lower-left side of the browser window
- Make sure that “Write e-mail” is selected in the settings menu and find the entry field for your signature on the right side of the screen
- Formulate your signature – you can use a maximum of 500 characters, and if you have multiple GMX accounts you can assign a unique signature for each e-mail address
- Click on “Save” on the bottom right
How do you create an e-mail signature with Yahoo?
The internet company out of California has one of the most-used search engines and, like Google, also offers an e-mail service. If you have such an account, then you also have the option to create an e-mail signature in Yahoo.
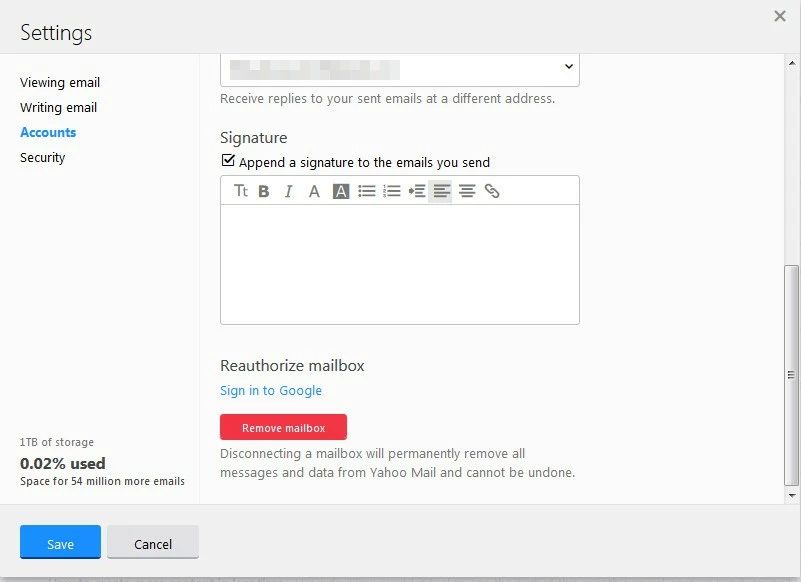
- Click on the gear symbol in the upper-right corner and select “Settings” from the drop-down menu that appears
- A new window will open in the foreground – select the “Accounts” menu item and scroll down to reach “Signature”
- If you place a checkmark here, the text editor will be opened in which you can formulate your signature
- Save your input by clicking on “Save”
Regardless of which e-mail service you use – the effort to create an e-mail signature is minimal. But the benefits that you get from these few minutes of work are much greater: You not only offer your contact added value through the included information that you send, but you also leave a serious and professional impression. This is why a signature is an invaluable component of a perfect business e-mail.


