How to link ProtonMail with a custom domain
ProtonMail’s default email addresses end with @proton.me. However, you can also use the mail service from Switzerland with a custom address by connecting ProtonMail to your own domain. You can do this in a few steps once you have purchased a web address.
How to register your own domain for ProtonMail
You need to purchase a paid plan such as “Mail Plus”, “Mail Essentials” or “Proton Unlimited” to set up a custom ProtonMail address. “Proton Free” users do not have the option to change to a custom domain.
You also need to own a custom domain. You can purchase a domain from a domain registrar such as IONOS. Take some time to think about a name and which top-level domain (domain extension) would be a good fit for you and your ProtonMail inbox. The Domain Checker allows you to see whether the combination is still available at an affordable price.
How much does a domain cost? And what are the alternatives to the .com domain? Our articles detail this and much more to help you get your domain search started!
How to register a ProtonMail domain using IONOS
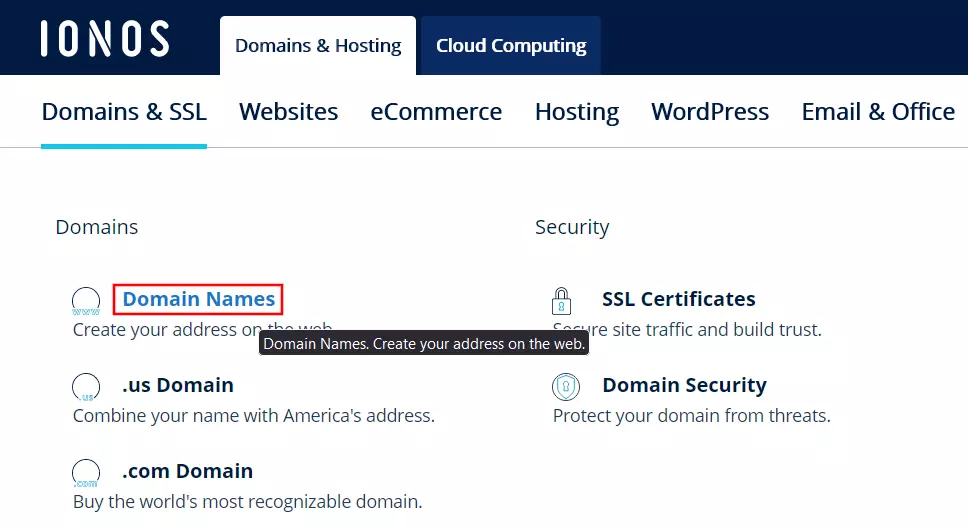
You can choose from several different endings for your custom domain for ProtonMail and register your unique address in a just few steps. Go to the product category “Domains & SSL” in the top menu on the IONOS website. Select the option “Domain Names”.

Enter the domain you have in mind for your ProtonMail account into the Domain Checker’s search field and click “Check”.
The IONOS Domain Checker checks if the address is available. If the domain isn’t available, you can search again for an alternative address. If the domain is still available, you will be able to buy the domain. Click on “Add to cart” to start the registration process.

You can add more addresses to the domain or combine the domain with another IONOS product such as web hosting. If you don’t need these additional products, you can just skip these steps. You must create an IONOS customer account or directly pay for the domain using PayPal to complete the registration of your own domain for ProtonMail.
Register your custom domain at IONOS and combine ProtonMail with your custom domain to build your brand today. Benefit from an easy setup and avail of our excellent customer service.
How to link ProtonMail and your own domain
If you have your own domain, you can connect ProtonMail with the domain at any time. You can set it up using your ProtonMail account. Go to the ProtonMail login page and log in with your login data. Then follow the steps outlined below to set up the custom domain for your ProtonMail inbox.
Step 1: Open ProtonMail settings
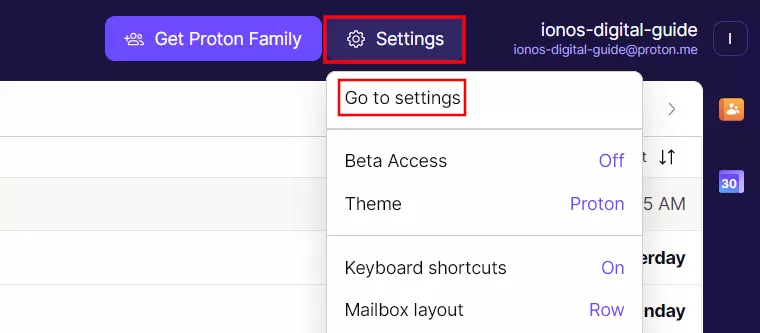
Once you have logged into your ProtonMail inbox, click on “Settings” to open the menu to customize ProtonMail. Select “Go to settings” to access the advanced options for your account.

Step 2: Specify your own domain for ProtonMail
Click on “Domain name” in the left sidebar to open the domain menu. Select “Add domain” and type in the domain name you have purchased for ProtonMail. Click on “Next” to confirm the address. You will then be asked for your ProtonMail password.
Step 3: Confirm ownership
For security reasons, ProtonMail must check whether you are the owner of the custom domain. An individual value is automatically generated for a TXT record which you must insert into the web address’s DNS settings.
Start your browser and log in to your account with the domain registrar. IONOS customers can use the Cloud Panel’s login page. Select the “Domains & SSL” to access the DNS settings and click on the domain you registered for ProtonMail. Open the “DNS” tab in the next menu.
Click on “Add record” and select “TXT”. Enter the value @ as the hostname and copy the confirmation code generated by ProtonMail into the “Value” line. Click on “Save” and complete the next steps to confirm your ownership of the custom domain in ProtonMail.
Step 4: Create MX records for ProtonMail
Once the address has been verified, the following two MX Records must also be entered in the DNS settings to receive emails in ProtonMail under your own domain:
| Type | Hostname | Value/Points to | Priority |
|---|---|---|---|
| MX | @ | mail.protonmail.ch | 10 |
| MX | @ | mailsec.protonmail.ch | 20 |
Step 5: Add address or inbox
The last step involves adding your ProtonMail inbox to the custom domain. Select the last tab “Addresses” in the setup wizard and then click on “Add address” to do this.

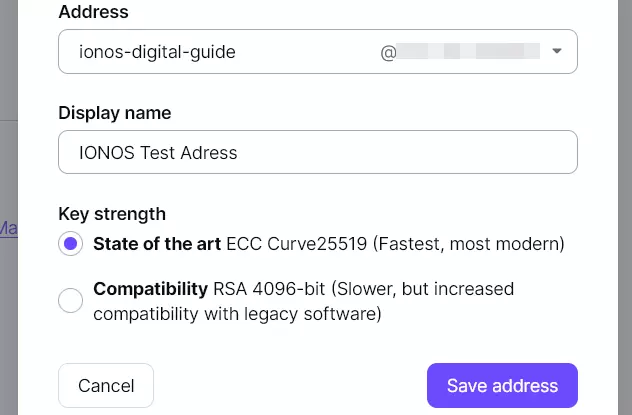
In the following menu, scroll down to “My Email Addresses” and click “Add Address” again. Select the custom domain under “Address”. Put the name in front of the domain and choose a display name for the inbox. Keep the “State of the art” option for key strength and click “Save address”.

The new address will now be listed. Click on “Set as default” to set it as the new main inbox for your ProtonMail account to complete linking your ProtonMail and your custom domain.
Do you also want to use your custom domain for the Google mail service Gmail? Check out our guide on how to use Gmail with own domain!

